
To get better at drawing, it’s important to first make sure you have the right supplies. Then learn some essential drawing techniques and put them into practice with varied drawing exercises.
Improving at any skill is a cycle of learning, practising and analysing. In this tutorial, fast track your skills by learning how to master the essential techniques and practice with the right exercises. I’ll also give some tips on how to analyse your own drawings, so you can see areas of improvement for yourself. This guide starts with the absolute basics—the tips get progressively more challenging as the guide progresses. So if you’re an intermediate level artist, feel free to skip the first few steps.
Disclaimer: Fine Art Tutorials is a reader supported site. When you make purchases through links on this site, we may earn a small commission at no extra cost to you.
Get the right art supplies
To improve your drawing skills, first you should understand how your drawing supplies work. Once you’ve mastered your supplies, you can start to get creative with the kinds of techniques you use. You don’t need lots of different supplies to draw. All you really need is a pencil and paper. However, if you’re looking to add some materials to your tool kit, there may be some supplies that could improve your drawing practice.
Types of pencils
There are different types of pencils: charcoal, graphite, wax or oil coloured pencils, and watercolour pencils.
Graphite
Graphite pencils are most common, they come in different hardnesses.
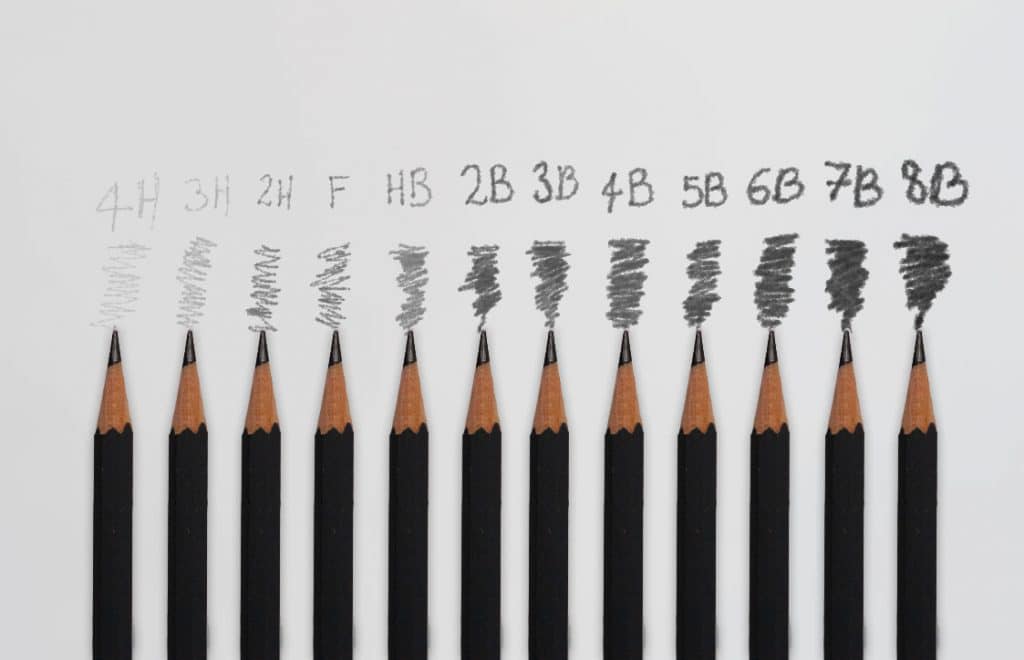
8B pencils are extra soft and will create the darkest marks. Pencils in an F or HB will make fine, light marks.
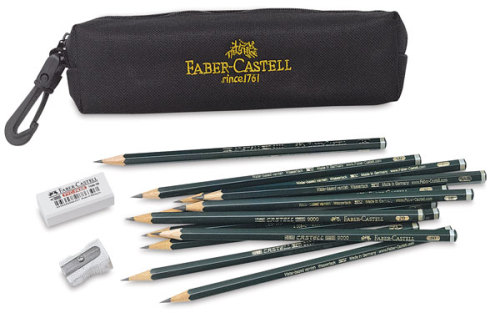
If graphite is your choice of drawing medium, get a range of soft pencils, these pencils by Faber-Castell are a great option. Softer pencils will allow you to create a greater range of values in your drawings.
Charcoal
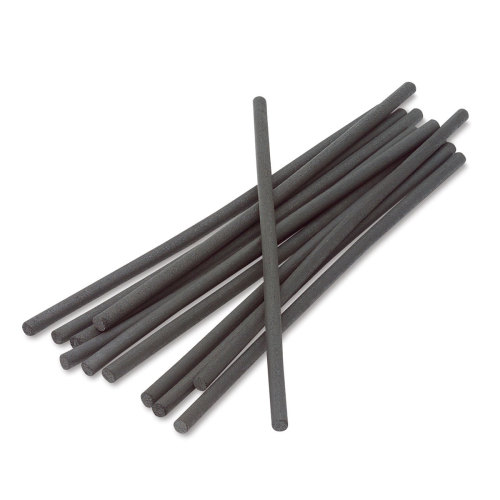
Charcoal is different from graphite, in that they are made from the carbon remains of heated wood or willow.
With charcoal pencils, artists will create more indelible, loose and dark marks compared to graphite which is easier to erase and offers more precision.
Watercolour pencils
Watercolour pencils are soluble and can be used alongside the watercolour medium. They are an excellent choice for artists who want a versatile pencil that they can transform into a painting medium with water. Layer colours from light to dark as you would with watercolour. Work in fine details with the tip of the pencil, or wet the pencil application for a more painterly look.
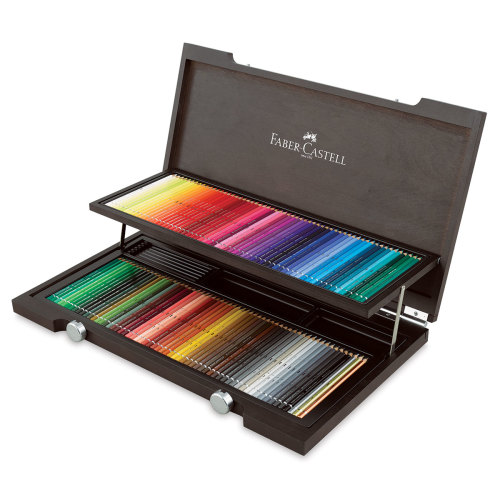
Coloured pencils

Coloured pencils made from oil or wax have wonderful layering abilities. Finished artworks look vivid and almost like paintings, due to the richness that can be achieved from creating multiple layers, details and blended tonal transitions.
They are the perfect medium for working in a realistic style, due to the precision and softness that can be achieved.
Paper for drawing
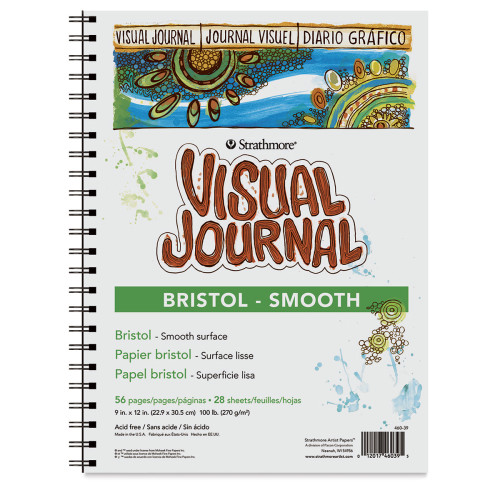
If you want to create highly detailed drawings, get smooth thick paper like Bristol Board. It’s sturdy and won’t tear when erasing pencil marks. If you buy a more textured paper like cold pressed watercolour paper, fine details could get lost or appear skewed. To find the best sketchbook for drawing and the best drawing paper, check out our guides.
Other drawing supplies
Aside from a regular eraser to erase dark pencil marks, there are two other types of erasers that can come in handy. The first is a Tombow Mono Zero, it allows you to erase super fine lines and details.
Kneadable erasers are useful to have. They’re mouldable and soft. Roll between your fingers to mould the eraser into a fine point to erase details. Alternatively, roll the whole eraser across the paper to lift large areas of graphite. To completely erase pencil marks, you may have to go over the same mark several times.
A good quality sharpener is a game changer. It will preserve the lead and sharpen pencils to a longer point, meaning that they will last longer. Pencils will be less likely to break when sharpened with a quality sharpener that creates a longer point.
In order to achieve smooth blends in drawings, use a paper stump to soften hard lines on the paper. Clean the paper stumps by rubbing on sandpaper. Additionally, artists can use powdered graphite to create seamless transitions and soft blends for large areas of a drawing. Brush the graphite on the paper and use the brush to blend the powder out to create soft edges. Powdered graphite can be useful for filling in backgrounds, or large areas of mid tone values.
Improve your drawing skills: The absolute basics
Think about how you hold the pencil
This might sound too basic, but how you hold the pencil will affect the outcome of the drawing. For self-taught artists, it’s a skill that can be overlooked in favour of jumping to learn more complex skills.
For small, detailed sketches, artists draw by holding the pencil on the casing close to the lead and moving the fingers and wrist for precision.
Conversely, for larger sketches, artists will hold the pencil further up the casing and draw in sweeping motions, moving the shoulder or the elbow. Experiment by holding the pencil in different positions and moving different parts of the arm to draw. You might be surprised how much of an effect it has on the outcome.
Doodle patterns & practice drawing shapes
An intricate drawing is simply an arrangement of simple lines and shapes. Practice drawing and shading simple shapes, lines and patterns before moving on to more complex subject matter. Once you’ve mastered drawing and shading shapes accurately, try some easy drawings.
Values
In an artwork, values refer to the relative lightness or darkness of the pencil. How light or dark the pencil mark is depends on the pressure you apply to the pencil. The darkness you are able to achieve from a pencil mark is also dependent on the softness of the pencil. Softer pencils, for example 8B, will leave darker marks. Leave the white of the paper to show through for the brightest highlights in a drawing. There are other techniques artists can use to portray light and dark values that are a little more complex, such as the hatching, or stippling technique.
Line weight
One really important thing to practice if you haven’t had much drawing experience is varying pressure applied to a pencil. Get a softer pencil that’s relatively unsharpened in a 6B or 8B and apply pressure. The line weight created will be thick and dark. In contrast, pick up a sharpened hard lead pencil in an F or HB and apply light pressure whilst drawing a line. The line will be thin and light. Use these skills to your advantage to vary line weight in a drawing.
Line weight has some important applications in drawing, as it can be used to portray perspective. Elements further away in a contour line drawing (simple outline drawing) will be lighter and have a thinner line weight, compared to thicker darker elements in the foreground.
Draw a straight line
Of course, most artists will use a ruler for the most precise straight lines. But to get more accurate results freehand, hold the pencil further to the middle of the casing and at an angle. Then sketch lightly moving your elbow to drag the graphite across the paper. If you press hard and hold the pencil near the lead, more often than not the line will come out looking wobbly.
Draw shapes and patterns
Practise drawing simple shapes and repeating the shapes to see if you can draw them accurately over and over again. Try drawing them large and small. Most often, people gravitate towards drawing things on a tiny scale as it feels easier, but push yourself to draw bigger occasionally.
Learn how to draw different textures—use techniques like scumbling and scribbling and vary pressure on the pencil to create a range of textures like the organic surfaces you see in rocks, hair, skin and more.
Create a doodle spread—don’t overthink it, just enjoy the process of drawing a mixture of shapes and patterns. Using the pencil in this way to exercise your drawing muscles.
Learn about the different drawing techniques
There are a multitude of techniques you can use with drawing. From basic mark making techniques, to more complex drawing techniques.
By creating a loose sketch or underdrawing, you can layer contrast and shading on top. This is a brilliant way to start a drawing and a technique lots of professionals use. Learn more about how to create an underdrawing.
When it comes to shading techniques, there are quite a few to choose from. Shading creates values in an artwork, meaning you can depict realistic looking light and shadow. If you use a soft pencil, like a 6B, you will be able to achieve a greater value range, as 6B pencils release more graphite onto the paper when more pressure is applied, giving the appearance of darker shadows.
Choose to create a tonal sketch—whereby shadows and light passages are created by applying varying amounts of pressure to a soft graphite pencil.
Or create the appearance of light and dark values by stippling. Stippling is the technique of creating hundreds, even thousands of tiny dots to create contrast in a drawing. The closer the dots are together, the darker the shadow will appear. The dots will be absent in the lightest areas of the drawing. This is just one example of one shading technique, for a more comprehensive list, check out our tutorial of 17 drawing techniques.
Draw in a sketchbook
A sketchbook is an invaluable tool for pencil artists. This wirebound Strathmore Sketchbook has thick, ultra smooth pages, allowing you to create fine details and smooth blends with ease.
An artist’s sketchbook is a completely personal thing. It’s a space to practise compositions, themes and ideas without any worry of making mistakes. You can let loose and experiment in your sketchbook. If you really like a drawing you make, you can always transfer it to a larger piece of paper to spend more time on later.

Another attractive aspect of having a sketchbook is its portability. Pack it away in a bag and take it out with you to draw whenever or wherever inspiration strikes. Having it with you to jot ideas down will train you to get into keeping up a regular drawing practice and squeezing it in around other commitments.
Try drawing on toned paper
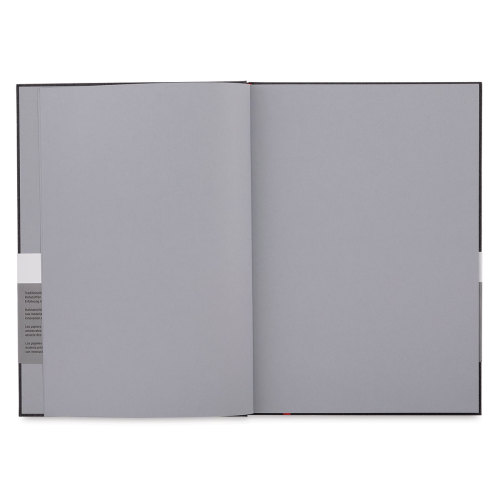
Drawing on toned paper like the Hahnemühle Grey Book can make the drawing process more efficient. The mid tone is already established, so you only need to focus on shading the darkest shadows and lightest highlights.
Get a white pencil for the highlight tones. The mid tone can help artists perceive value transitions better. The white highlights pop out of the page, even though toned paper drawings allow artists to better render the subject with subtlety. See our pencil drawing for beginners guide to see the process of drawing on toned paper.
Try some drawing exercises to improve accuracy
Instead of just attempting to draw accurately with the same methods over and over again, it can help to mix up your approach. Try these drawing exercises to improve your accuracy, speed and analysis skills.
Try continuous line drawing
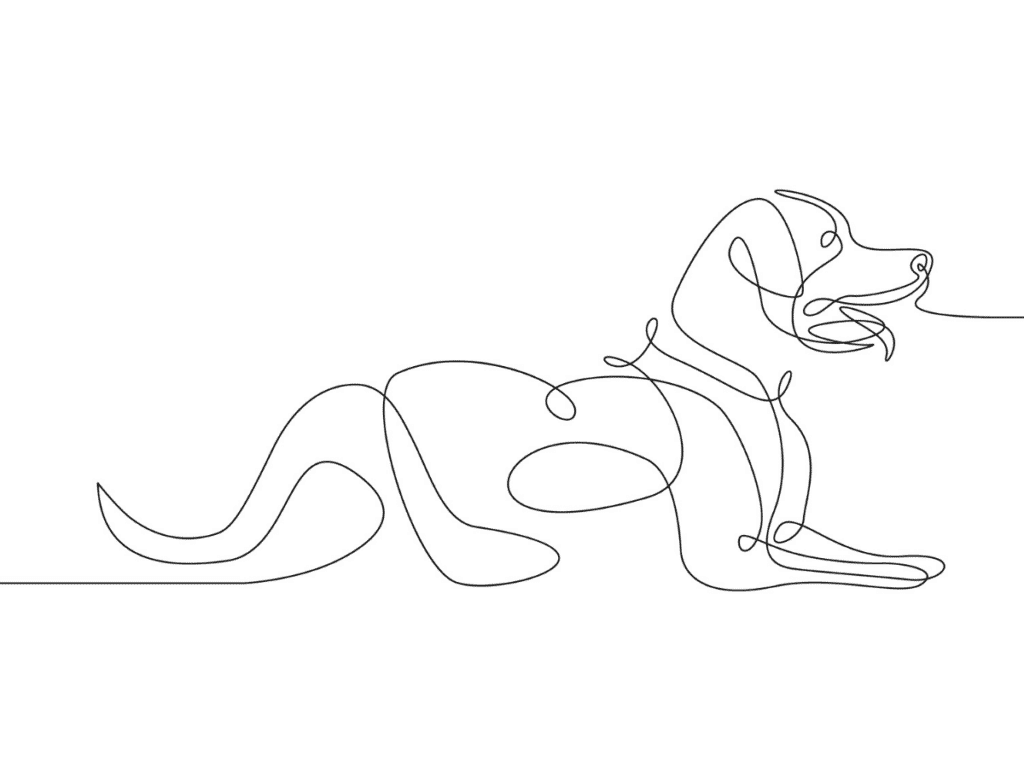
A continuous line drawing is made by completing the artwork in one go without removing the pencil lead from the paper. This exercise will help you to observe your reference fully before starting to draw. It will also help you to accurately depict the form and volume of your reference.
Try gesture drawing

The purpose of gesture drawing is to quickly sketch the action and pose of a subject, without focussing on details. It helps with speeding up drawing and accuracy of drawing complex poses. If you practice this exercise a lot, you’ll see that your figure drawings will start to look more lively and expressive. This is similar to contour drawing, which is the exercise of drawing the outline of a figure, to practice accuracy and proportion.
Practice drawing structure and form
To draw realistically, you will need to develop methods to accurately convey the subject freehand. Subjects and objects in a reference can be simplified into basic shapes, such as cubes, cylinders and spheres. Once you have mastered drawing basic shapes, you can construct more complex forms from the simple shapes.
Learn to draw proportion
Accurately portraying the proportions of a subject, is about finding visual landmarks and measuring sections of the reference. It is one of the most challenging aspects of learning to draw. There are a few methods and tools that can be used to find visual landmarks in a drawing to create marker points that will become the starting points of the piece.
For portrait artists, one method that can be used to accurately construct a head is the Loomis Method. This method originally devised by Andrew Loomis, involves starting with a circle to represent the cranium, then subdividing this to find the proportions for the features jaw and brow.
Sight, measure and map
Use a pencil as a measuring tool. Maintain your posture and hold the pencil at arm’s length with a locked elbow and one eye on the subject. Measure either the height or width of the subject by placing your thumb at one end and lining the end of the pencil up with the other end of the reference. Use this measurement as a reference. For example, the width of a face may be around ⅔ compared to the height. Measure the placement of other features using this technique. Use the measurements to map the placement of elements onto the paper.
Plumb line
The first tool you can use, that Florent Farges demonstrates using in this video is a plumb line. A plumb line is simply a weight attached to a thread. Use it to measure the model or aspects of the reference to determine the alignment of elements. Map out marker points on your drawing, such as the placement of the important features, or use it to measure angles.
Use the grid method
To create an accurate drawing, you could use the grid method. To draw with a grid, draw a grid on your reference image, then scale up the grid and draw it with the same proportions on the surface you will use for your final drawing. Make sure to draw lightly, you could use a H or F pencil that can be erased easily. You could draw the grid on a digital reference image in Photoshop. Make sure the grid is to scale, it’s much easier if the reference image and drawing surface are roughly the same aspect ratio. Use the grid markers as reference points to draw the elements and features in the correct place.
If you solely use this method to execute your drawings, you could compromise your ability to draw precisely naturally without an aid. Instead use this method and pay attention to the placement of each individual part.
Accurately draw depth and perspective
How to depict depth in a drawing
When drawing landscapes or any subject that has depth of field, artists will use shading techniques to make elements appear as if they are receding into the distance. Apart from size, there are a few other ways to create atmospheric perspective. Elements in the distance will generally have softer edges compared to elements in the foreground. The values will be more similar to that of the sky, compared to subjects and objects in the foreground which will have a more contrasted value range.
One point perspective
This video demonstrates how to draw a train in a tube station using one point perspective. Draw a horizon line, then mark with the pencil where the vanishing point will go. In a one point perspective drawing, the vanishing point is where all the lines of interest will meet. Draw lines extending from the vanishing point, you can use a ruler to ensure accuracy. The train gradually gets small along the lines and towards the vanishing point. Try drawing with the two point perspective technique too, practising this will be especially useful if you enjoy drawing street scenes, buildings or cityscapes.
Plan the composition before you start
Before you start drawing, plan the composition of your piece. This is essential, especially if you plan on spending some time and effort on your drawing.
Create a few thumbnail sketches to arrange the visual elements and consider the effect you want to achieve. For example, think about the elements that you want to bring to the forefront, to create a focal point.
Analyse your results
After you finish your drawing, I recommend stepping away from it for a while. Coming back to look at the next day gives you a fresh perspective.
A great tip is to hold your painting up to a mirror, as it flips the painting, allowing you to see it in reverse. By doing this, you can look at the painting as if it’s a new piece, which forces you to look at the composition as a whole rather than focussing on small details you may have been paying attention to for hours on end. This allows you to see any flaws in your painting straight away, whether certain elements should be more balanced, or some parts of the drawing need more work.
A striking composition will include harmony, variety and contrast. There should be a focal point that is emphasised by its position or detail.
Check the pencil marks you made. Did you focus on perfecting your technique? Did you render the values correctly? Maybe some areas are too contrasted compared to others.
Focus on what you struggle with
We all have weaknesses when it comes to drawing. A lot of portrait sketchers struggle with drawing the second eye once they have the first in place. That’s more to do with accurately drawing symmetrical elements.
The only way to get better at drawing is by focussing on what you struggle with and practising until it starts to feel easier. For example, if you struggle with drawing two symmetrical eyes, start with the one you don’t normally draw first. Or draw one eye, then carefully map out the other, drawing dots for the inner corner, the eyelid and the outer corner, then joining them up. By planning the positioning beforehand, it can make you reassess placement before committing to draw the whole thing.
Create a daily drawing practice
We improve by practising our drawing skills regularly. Find time to create a more regular drawing practice, it doesn’t have to be daily. Any extra practice you can fit in will accelerate your skills further.
It might be sectioning off 20 minutes a couple of evenings per week instead of watching TV. Or the perfect time for you could even be on the train on the commute to work. Find what works for you and try and make it a routine.
By repeating various exercises and studies, you will watch your skills evolve. You can test to see how far you’ve come over the course of months, by returning to draw from the same reference you used a few months or a year prior.
If you’ve found anything on this site especially useful, you can make a donation to me through PayPal. I take a lot of time to research and write each topic, making sure each tutorial is as detailed as possible and I make all my content freely available. Any small donation (even the price of a cup of coffee!) can help me to cover the running costs of the site. Any help from my readers is much appreciated :).
Follow the link in the button below to support this site.