
Creating the appearance of three dimensions on a flat surface accurately takes some skill and knowhow. Linear perspective in art can be defined as the process of creating depth and dimension in a drawing or painting. With a horizon line, vanishing points and objects that seem to disappear into the distance. Objects are set on a perspective plane so they appear as if we were viewing them in three dimensional space.
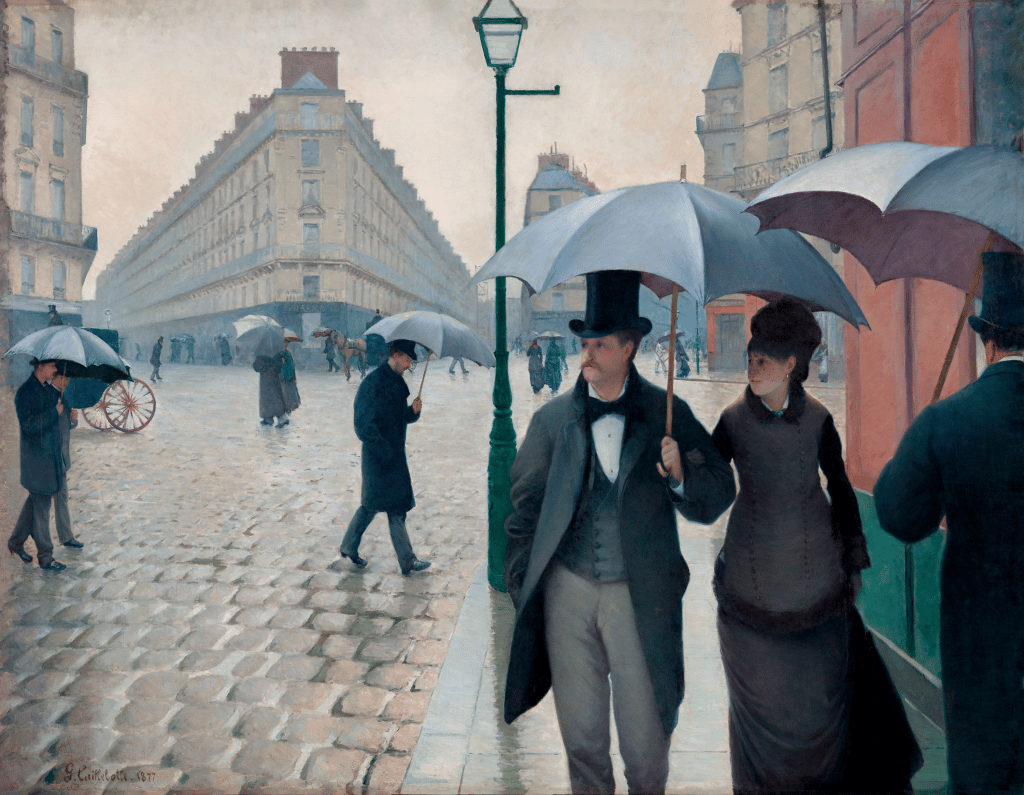
For example, a street scene with buildings disappearing towards the horizon, railway tracks gradually vanishing in the distance or the interior of a room, with objects placed accurately as the human eye would see them.
In this guide, learn about what linear perspective is and a formula for including perspective planes in your drawings. This way you can create realistic and accurate cityscapes, roomscapes, landscapes and more.
Disclaimer: Fine Art Tutorials is a reader supported site. When you make purchases through links on this site, we may earn a small commission at no extra cost to you.
Linear perspective definition
Linear perspective is a technique used in art to create the illusion of depth and realism on a flat surface. This is done by creating vanishing points on a horizon line and drawing the scene with converging lines that mimic the way objects appear to get smaller as they recede into the distance.

This technique can be used to capture realistic scenes and objects, as well as more abstract or stylised compositions.
One point perspective, two point perspective and three point perspective are all types of linear perspective.
Linear perspective relies on the visual elements of line and shape to create the appearance of depth.
Linear perspective terminology
The horizon line

This is an imaginary horizontal line that appears to divide objects into those sitting above it and below it. In three dimensional space, the horizon line is eye level, which separates the sky from the land, or sea. When creating a drawing or painting, this line is used as a reference to demonstrate the eye level of the viewer.
Vanishing point

The vanishing point is the spot on the horizon line where all of the orthogonals in a scene converge. It is usually marked with a dot or cross to help artists visualise it in their drawings. The vanishing point is an imaginary point in the drawing and used as a guide.
Orthogonals

The orthogonals are the lines that connect the front to the back of the shapes of the subjects and objects to the vanishing point. These are lines drawn in a scene that seem to be receding into the distance. They converge at vanishing points on a horizon line. These lines are used as guides to begin with. Draw over parts of the guides and use them in the final shape.
One point perspective

In a one point perspective drawing, there is a single vanishing point on the horizon line. This is typically used for scenes or objects that are in front of the viewer and appear to get smaller as they recede into the distance.
A cube, for example, would be drawn with its edges converging at a point on the horizon line. If you were drawing a building with one point perspective, one of the sides of the building would be in view, rather than a corner.

After drawing the horizon line and vanishing point, the next step is to draw the front of the shape. Then draw the orthogonals that connect to the vanishing point. This will tell you where to position the back and sides of the shape in relation to the front. This method applies to one point perspective drawing. Read on to find out more about two point and three point perspective.
Two point perspective

Two point perspective uses two vanishing points on the horizon, to represent where objects will recede into the distance.
The two vanishing points will be far enough away from each other that the perspective does not appear warped. For example, if you were to draw a horizon line down the middle of your surface, then place the two vanishing points each one or two inches away from the left and right hand edges of the paper, this will give you enough room to work on your drawing.

Two point perspective is useful for drawing buildings, from the perspective of looking from the corner of the building, where the sides of the building will each disappear towards the vanishing points along with the other buildings and objects surrounding it.
Two point perspective also works for drawing the inside of a room, from the vantage point of looking at the room’s corner.
Three point perspective

Three point perspective uses three vanishing points in the horizon to represent the vanishing point of objects that recede into the distance, away from the viewer.

This is typically used for scenes or objects where one side of them will be viewed at an extreme angle. Such as from the vantage point of a high building looking down upon the tops of buildings. Or from the ground looking directly up at a skyscraper. If you can imagine a third vanishing point above or below the building, because the building appears tall, then this is a use case for three point perspective.
This type of perspective can also be used to draw a room from the vantage point of looking up at the ceiling or down at the floor.
How to determine which type of linear perspective to use
In order to determine which type of linear perspective to use, you should first consider the scene or object that you are trying to draw. Is it in front of you in its entirety, such as a cityscape? Or is it only partially visible, such as looking down at a building from above?
If you can see the front of the object, use one point perspective, if the vantage point is looking directly at the corner of the object, use two point perspective and if the vantage point is looking at a corner and the top or bottom of the object, use three point perspective.
Linear perspective history in art

Creating works of art with the appearance of realism, perspective, depth and dimension started in the Renaissance period and one point perspective was the primary technique used. Prior to this time art had mainly been focused on flat looking religious and mythological imagery, but now artists were moving toward portraiture and a more naturalistic style of presentation.
Leonardo da Vinci was a painter who aimed to make his artworks appear realistic and rich with symbolism. He began using linear perspective techniques to add depth and dimension to his portrait paintings. You can see in this example of da Vinci’s ‘The Last Supper’, the vanishing point is placed directly behind Jesus, with the windows showing the view from behind. The illusion of space behind Christ emphasises his figure. Additionally, the light coming from the windows creates a higher value contrast in the centre of the painting where he has been placed, further emphasising his position, making him the focal point of the piece.
Space in art
Space is a fundamental element of art. It can give a two-dimensional artwork the appearance of depth, create illusion and emphasise shape. Three dimensionality relies on space in order to portray depth, which allows artists to bring their work to life.
There are different types of space in art, including positive space, negative space, deep space and atmospheric space. Positive space is the area occupied by an object or figure, while negative space refers to the background surrounding that area. Atmospheric space is used to create a sense of perspective and mood in a painting, such as a foggy or cloudy day that makes objects in the distance appear lighter in colour compared to foreground objects. Atmospheric perspective is rendered with colour and value, rather than with line and space.

To create artwork with three dimensional qualities, an artist must carefully consider the use of space, perspective and light in order to achieve a sense of realism.

Using the system of linear perspective will instantly give three dimensional form to the scene by using only the visual elements of line, form and space, without the need for shading or colour. But adding value, colour and texture to a scene will add depth and dimension. This can be done by experimenting with different techniques such as shading, adding shadows and incorporating overlapping objects into your images. Additionally, you can also try adding texture or brushstrokes that add volume to your work, helping it to look more lifelike and three-dimensional to create the impression of detail. With careful planning and attention to detail, you can create beautiful works of art that appear solid and realistic.
Compositional tips using linear perspective
To create compelling compositions using linear perspective, there are a few important things to keep in mind. First, it is important to consider the perspective that you want to use. As this will affect the objects and subjects in your image. Make sure to keep the focal point of the image in mind when planning the composition. Also keep in mind how you will lead the viewer’s eye in.
Perspective drawing tools
Tools to help with drawing linear perspective include drawing guides, rulers, and other measuring tools. Additionally, you can also use software programs or apps that help to create perspective grids. Adobe Illustrator has a perspective grid function, so you can create mockups of your scene before you start. With practice and experimentation, anyone can learn to master linear perspective techniques. Use these techniques to create stunning works of art that truly come alive on the canvas.