Learning about how to create a focal point in an artwork is a useful way to improve your skills as an artist and produce successful compositions.
Artworks with strong focal points are aesthetically pleasing and lead the viewer’s eye into the piece. By planning the composition of your painting or drawing first, you can instantly improve the potential appearance of the piece by considering how elements will be arranged.
In this guide, learn what a focal point is and how to create a strong focal point in your artwork to create more successful pieces.
Disclaimer: Fine Art Tutorials is a reader supported site. When you make purchases through links on this site, we may earn a small commission at no extra cost to you.
What is a focal point?
A focal point of an artwork is the area that first draws the viewer’s eye. It’s the most salient element of the painting or drawing. Artists will plan which element they want to stand out the most when designing the composition of the piece.
Artists can create the focal point by arranging visual elements: line, shape, colour, value, texture, form and space. Arrange these elements in such a way to stand out to the viewer.
For example, areas with a high contrast between highlights and shadows will draw the eye. Bright colours, interesting shapes and hard edges will also demand attention from the viewer. Added to this, human faces and animals will draw the eye in.
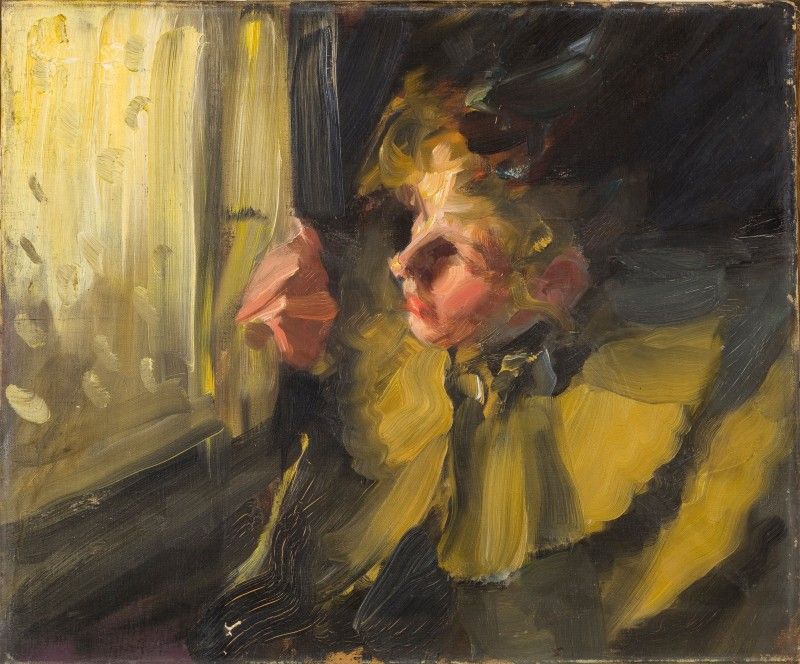
In this painting by Anders Zorn, the woman’s face is the focal point, as people are naturally drawn to faces. However, the colour contrast of the pink skin tones against the yellow also creates contrast. Plus, the positioning of the face at the top third intersection of the canvas is where the eye automatically lands. Zorn has cleverly positioned his subject and created colour contrast to emphasise his focal point to the viewer.
Why create a focal point in a composition?
The focal point is perhaps one of the most important components of the composition. It serves to pique the viewer’s interest and hold their attention. The focal point can be considered a centre of interest, from which you can base the rest of artwork around. It also helps to convey meaning in the piece. Of course, you don’t have to have a single focal point, you can have multiple focal points. But when you design the focal point of the artwork beforehand, it gives you a certain amount of control over how the artwork will be received by the viewer.
Ways to create a focal point: Contrast
The aim when creating a focal point in an artwork, is to think about creating contrast between elements. Use visual elements such as texture, colour, value, space or form. The element should stand out in some way, whether that’s in the way in which it has been positioned, with the use of texture, value or colour contrast.
Value contrast in a focal point
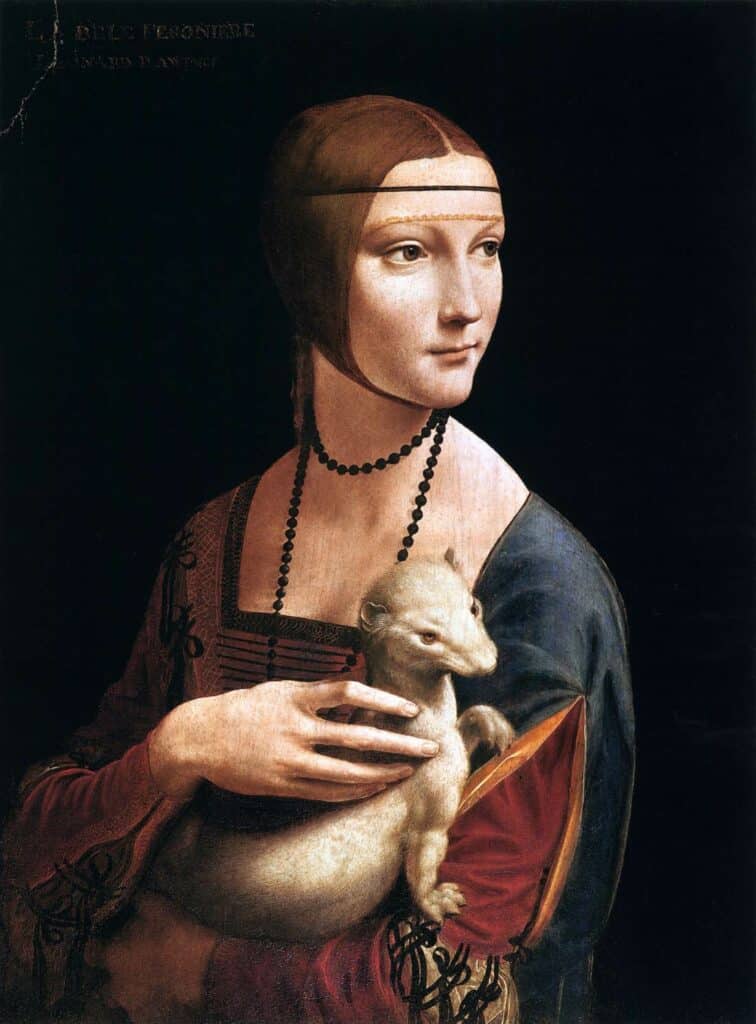
One of the most obvious ways to create a focal point in a painting is by creating value contrast. This is a method that has been used throughout history, made popular in the Renaissance period by da Vinci.
The figure, subject or object that you want to stand out should have a higher value contrast. It should have more of a dramatic difference between the highlights and shadows compared to other elements in the painting.
One way to create an especially dynamic piece, is to use the chiaroscuro technique. This is the technique of using high value contrast to highlight particular elements, often in portrait paintings or charcoal drawings.
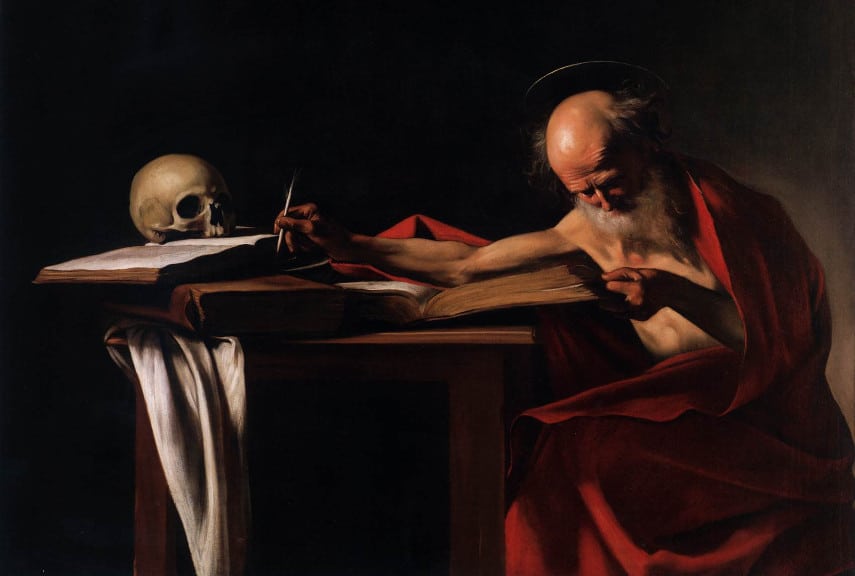
This often involves a figure with bright highlights, or a lightsource shining on them. The figures are set against other figures or objects with low contrast, mostly painted in mid tone or dark values.
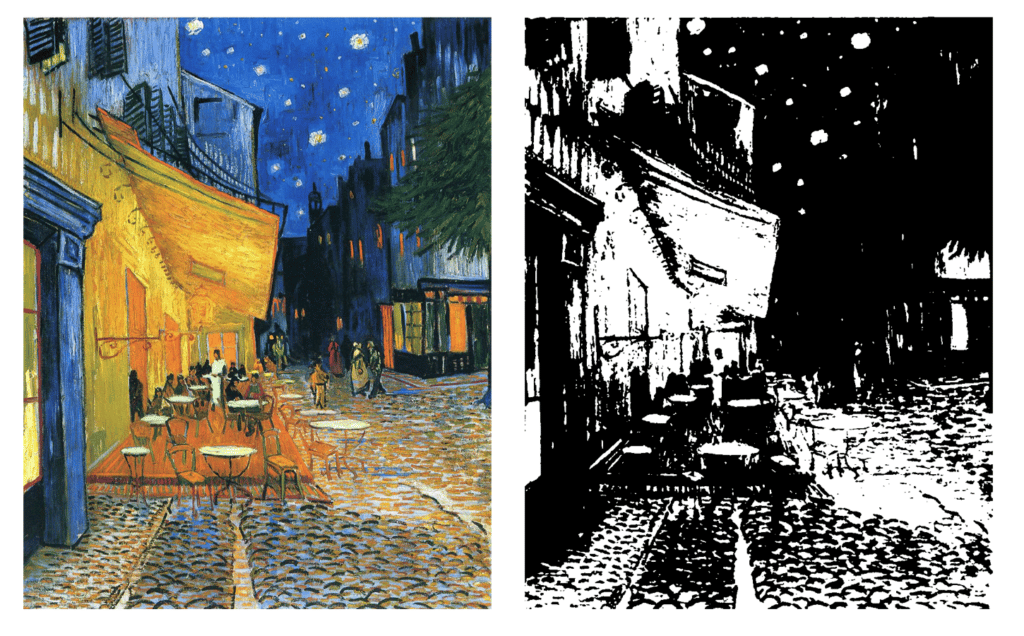
A great way to plan the focal point using value contrast in an artwork is with a notan study. Notan is a black and white study, to show you the balance of light and shadows in an artwork. Read our guide of how to create a notan study for a more in depth look.
Focal points and texture
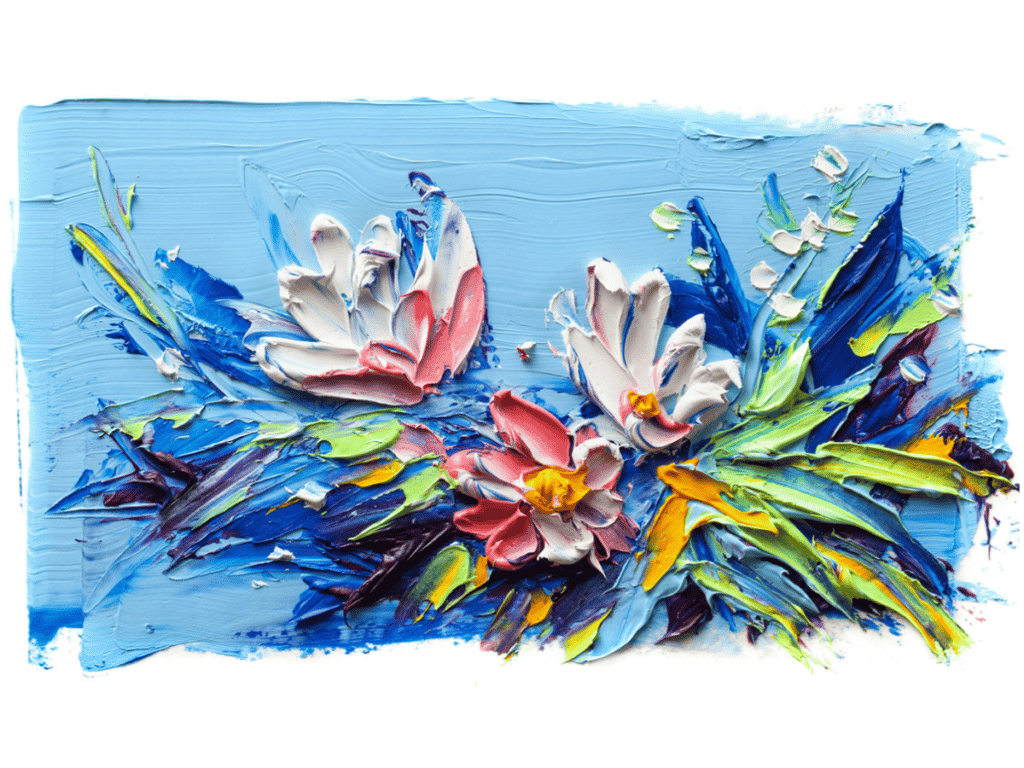
Using texture to create contrast in your image is a fun technique! Make elements stand out by adding physical three dimensionality to your artwork. Paint with a palette knife and with thick texture to make your focal point pop from the canvas. Creating texture with paint is quite easy, but you will need to work with a painting medium that allows for you to add extra thickening mediums. For example, if you’re working with oil paints, you could add cold wax, or an impasto medium. If you’re working with acrylic paint, add a molding paste or gel. With watercolour, you could add salt to your painting to absorb water and create the appearance of texture.
Space and focal points
Space refers to the space within and around a subject or object. It also refers to how artists create the illusion of space, perspective, dimension and depth in an artwork.
Positive and negative space
An artwork is made up of positive space and negative space. One way to create a focal point is by having the right balance between the two. Positive space is any part of the artwork taken up by a subject or object and negative space is parts of the artwork that are not classed as focal points in the piece.

For example, in this painting of a tree against the sky, the tree is the focal point and therefore is the positive space in the painting. Whereas the sky and grass are not the focal points and are therefore the negative space.
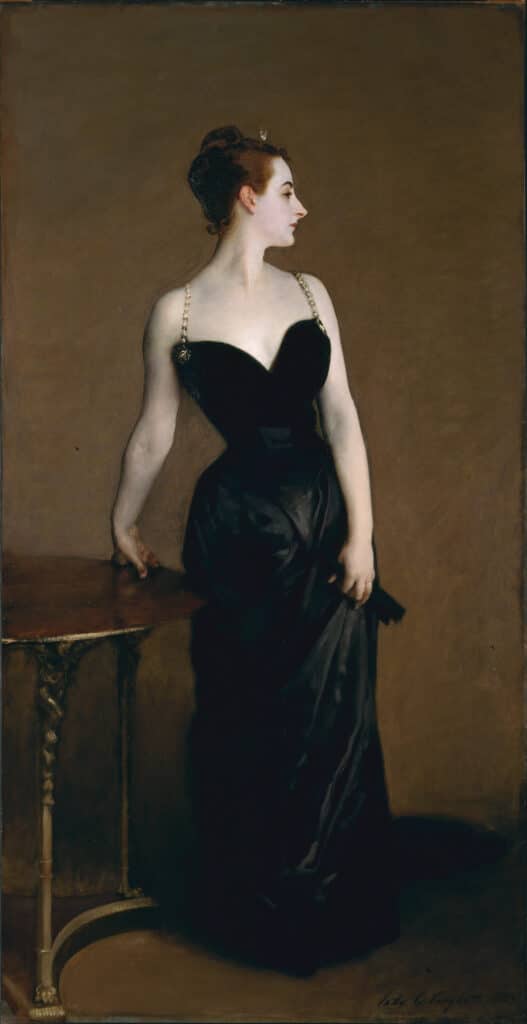
In this portrait by Singer Sargent, the figure is the positive space and the dark background can be classed as negative space.
Positive and negative space is different in each painting. For example, in a painting of a portrait against a cloudy background, the clouds can be considered negative space. Whereas in a cloudscape painting, the clouds will be the focal point and therefore classed as positive space. It’s up to you as the artist and the viewer to decide what is positive and negative space.
One purpose of negative space is to provide visual rest for the viewer. Another purpose is to create emphasis of the positive space. What makes the portrait and tree paintings by Singer Sargent successful, is the adequate use of negative space around the focal point. Practice using negative space in your artworks effectively by planning your composition and trying the negative space drawing exercise.
Perspective and dimension
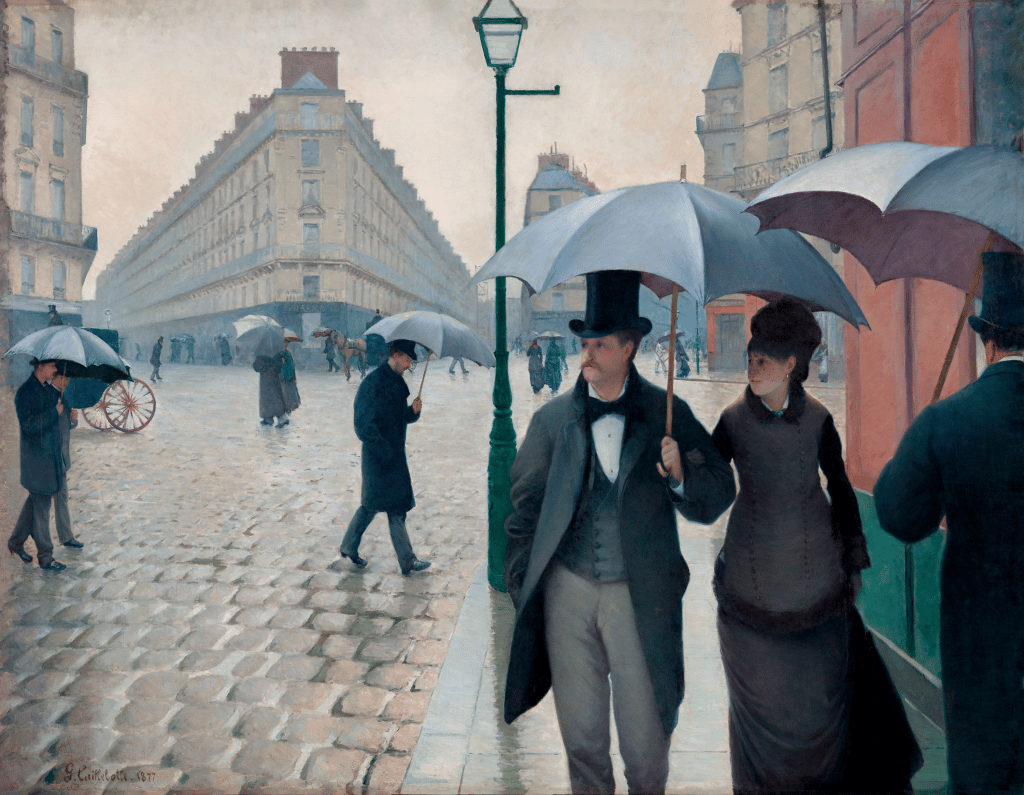
Space in art is also about creating dimension and depth. For example, an artist could choose to create a cityscape with a sense of deep space, with a foreground, midground and background. The focal point of the artwork may be positioned at the front. For example, in this Paris street scene, with buildings in the background. Gustave Caillebotte creates depth with atmospheric perspective. The buildings in the background appear less contrasted, more muted in tone and more similar to the colour of the sky compared to the buildings in the foreground. The figures in the front appear to have a higher contrast in values and colours, with more details and definition. This will make them stand out against the background, making them the focal point of the piece.
Focal points and colour
There are two ways that an artist can create salience with colour. There has to be a high colour contrast between either the saturation of the colours, or the hue.
Colours that sit opposite one another on the colour wheel (complementary colours), for example purple and yellow, or blue and orange have a high colour contrast with regards to hue.
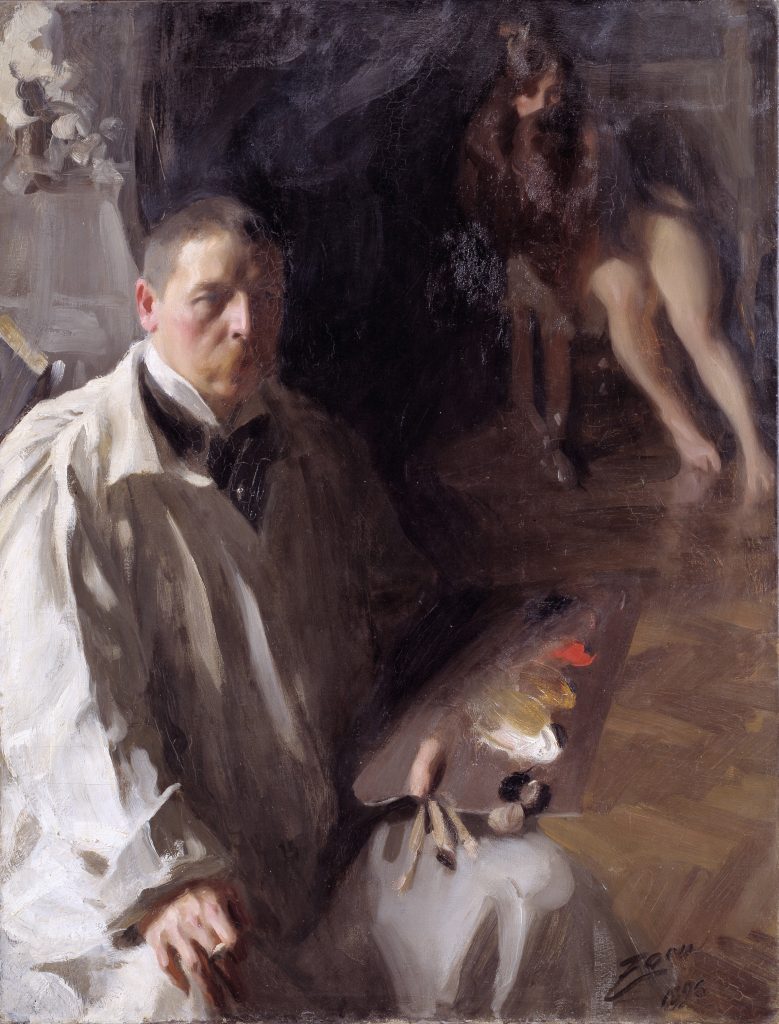
When you position colours that are highly saturated next to colours that are more muted in tone, this creates contrast and therefore a focal point. For instance, the saturated colours on Anders Zorn’s palette stand out against the muted tones of the figures.
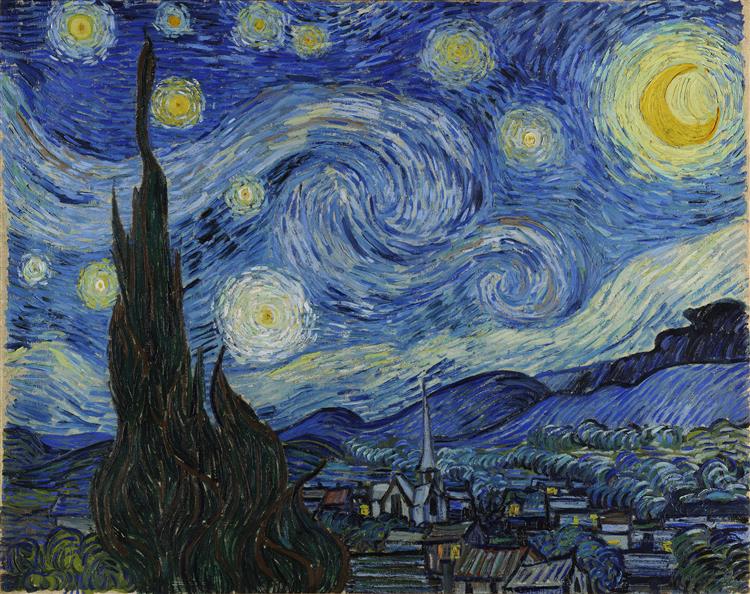
However, the focal point is somewhat determined by the ratio of contrast between the two elements. For example, if 80% of the canvas is painted in a muted tone, with one small section painted with highly saturated colours, the viewer’s eye will be drawn to the area of the canvas that appears different, as it stands out against the rest. Similarly, if the majority of the canvas was painted in cool, blue tones, with a small section of yellow, the yellow will immediately stand out. Just like in ‘The Starry Night’ by Van Gogh. You don’t have to use complementary colours to make a focal point, check out our guide of different colour schemes for more ideas.
Compositional techniques to create a focal point
Aside from arranging visual elements to create contrast in a painting, there are other ways to make a subject or object salient in an image. These compositional techniques are worth a try to create a interesting and unique piece.
Symmetry
Symmetry is naturally aesthetically pleasing, however in art pieces it can appear simple and repetitive, sometimes lacking interest. It appears everywhere in nature, for example in the reflection of a lake, the symmetry of flowers and in facial features. If you’re using symmetry in your artwork, one method of creating a focal point is to break the symmetry. For example, if you were painting the reflection of the sky in a flat, still lake, you could break the symmetry by placing a boat in the lake. The boat would draw the eye, against the backdrop of repetition and pattern.

For example, in this painting by Edgar Payne, the left hand side of the canvas imperfectly mirrors the right hand side. However, the three figures break the vertical symmetry of the rock, sky and grasses. This creates a focal point in the painting.
Positioning of a focal point
When positioning the focal point in your artwork, you can use compositional techniques and geometry to make the subject stand out. These geometric compositional techniques include the rule of thirds and the golden proportion.
The rule of thirds is a compositional guideline, which suggests that dividing an image into thirds, both horizontally and vertically, creates a more balanced and harmonious composition. This is because it follows the natural way that our eyes move around an image. Placing the focal point at any of the intersections of these lines will naturally draw the eye.
This ratio and the golden proportion ratio can be applied to everything from landscape paintings, to portraits, to still lifes.
Framing the focal point
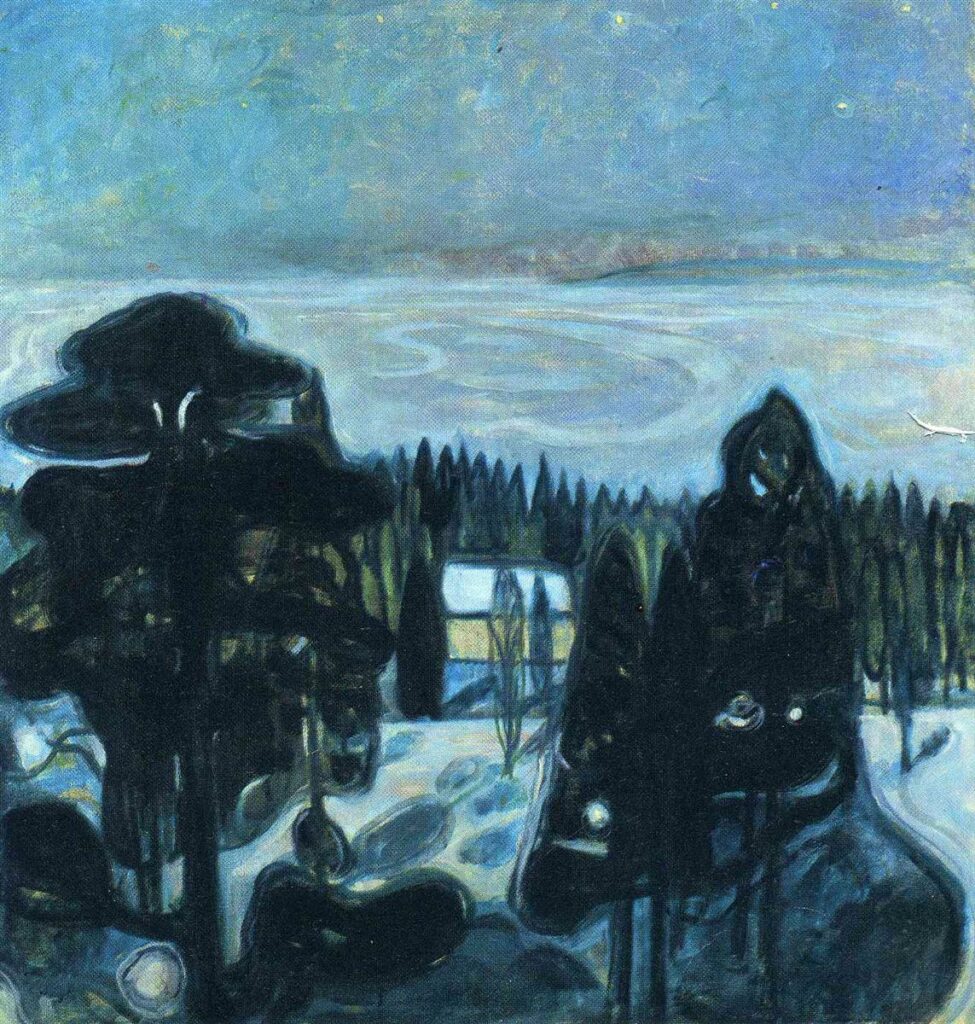
An easier way to highlight your subject in a painting or drawing is to frame them. A framing element is any visual element that is used to contain the composition and create a sense of depth. The trees in this winter scene frame the house in Edvard Munch’s ‘White Night’.
Another example is if you were painting a landscape scene with mountains in the background, you could use rocks or foliage to frame your focal point. Similarly, if you were creating an interior portrait painting, you could use a window frame or doorway to frame the focal point, drawing your viewer’s eye into the room.
Using multiple focal points
Not every painting has to have a single focal point, some paintings have more than one focal point. Think of Pablo Picasso’s Cubism works, or Umberto Boccioni’s expressive futurist paintings.
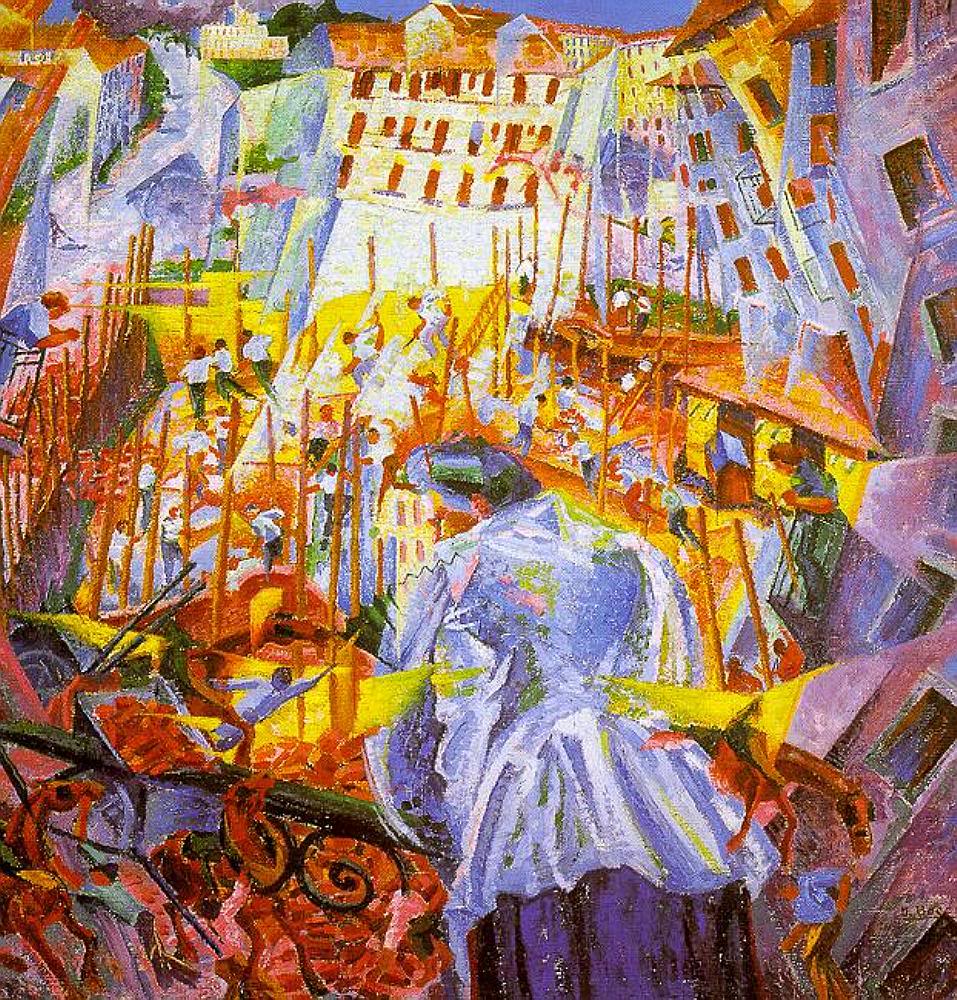
These examples are both of highly colourful, dynamic artworks with bold shapes and designs, each shape seems to be fighting for the viewer’s attention. The purpose in these artworks is to create a feeling of chaos and unrest. By painting multiple jagged shapes in close proximity in highly saturated colours, it creates a viewing rhythm of the eyes darting from one subject to another in quick succession.
One way to create a successful composition without using a single focal point, is to create spatial dividers in an artwork. Spatial dividers are sections of a painting that stand out in their colours, values or subject matter.
It’s a compositional technique that is used to create rhythm and movement in an artwork. The elements in the distinct sections of the artwork are often divided in broad shapes, of triangles, S shapes or curves.
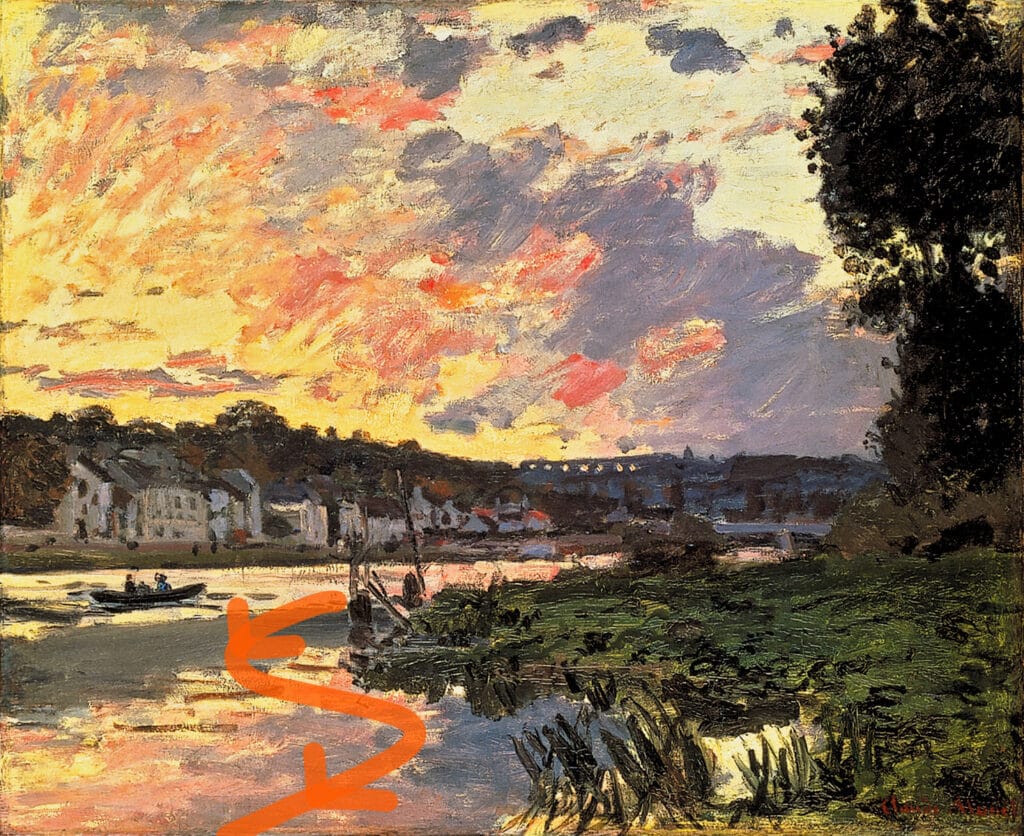
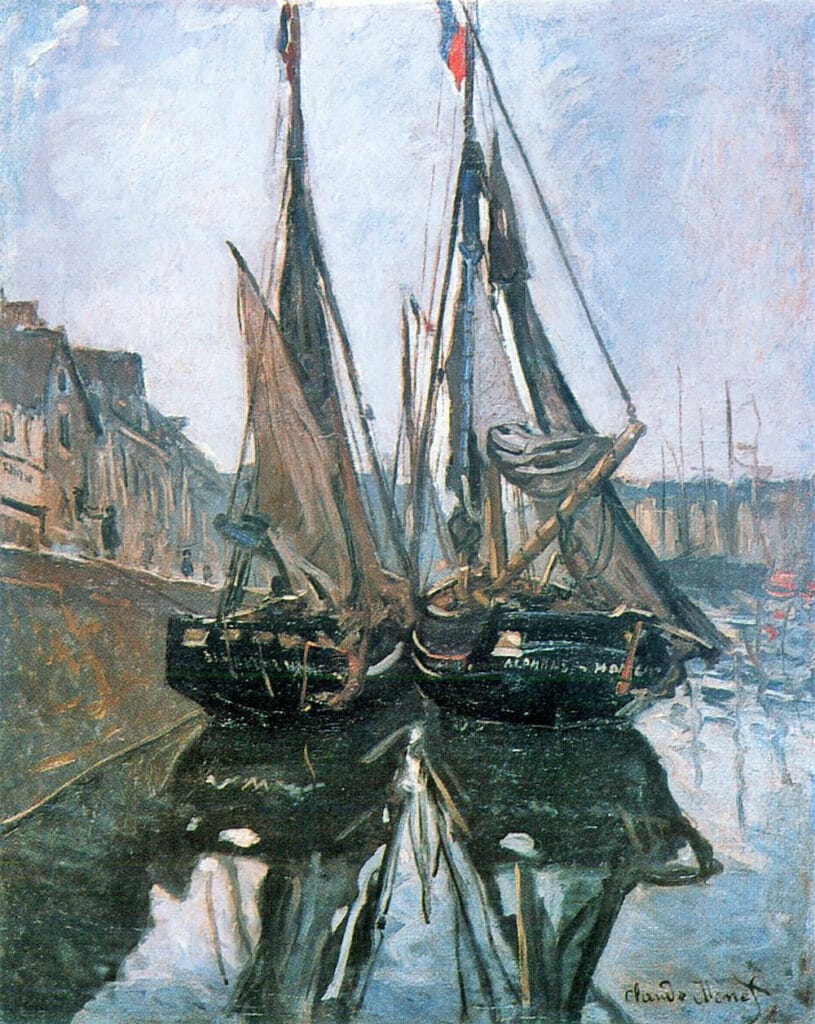
For example, in this painting by Monet, the lake which is linked to the sky in its colour and tone, curves towards the horizon in an S shape. I’ve marked the S shape over the spatial divider. The dark river bank follows the S curve towards the horizon, creating distinct segments for the viewer to focus on. These spatial dividers lead the eye in and make it easier for the viewer to focus on each section, one by one.
Tips for creating a strong focal point
1. Plan your composition carefully. Start by planning the composition of your artwork before you begin painting or drawing. Create a composition sketch, then draw the elements before you start, so that you can focus on creating a strong focal point from the beginning.
2. Consider how different elements interact with each other to create contrast. For example, lines may lead towards and away from the focal point, shapes might circle around the focal point, and colours could contrast with each other to create a strong focal point.
3. Use visual techniques that are impactful and attention-grabbing. For example, you might use more saturated or contrasting colours in your focal point, or you could draw emphasis towards it using bold outlines. Experiment with different techniques until you find one that works for your art style.
4. Pay attention to the viewer’s eye path. Try and be mindful of how the viewer will view and interact with your artwork, and adjust your focal point accordingly, if necessary. One way of giving yourself a new perspective of the artwork is to hold a mirror to the piece, so that it flips the perspective, allowing you to look at it with fresh eyes.
5. Take feedback from others into account. Get input from other artists or art teachers who can give you feedback on whether your composition has the effect that you intended.
Finally
When creating a focal point in your artwork, always experiment with different compositional techniques and approaches to see what works best for you. Whether you prefer geometric proportions or organic shapes, there is no right answer when it comes to composition. Have fun experimenting and creating beautiful works of art!