
One of the best ways to improve your sketching skills quickly is by practising a variety of drawing exercises.
In this guide, we will discuss some of the best drawing exercises that you can do to improve your skills. We will also provide some tips on how to get started. So whether you are a beginner or an experienced artist, there is something for everyone here.
Disclaimer: Fine Art Tutorials is a reader supported site. When you make purchases through links on this site, we may earn a small commission at no extra cost to you.
Drawing Exercises
One of the most important things to remember when doing any of these drawing exercises is to focus on the process, not the end result. The aim is to get better at drawing, and that can only be done by practising regularly and putting in the hard work. With that in mind, let’s take a look at some of the best drawing exercises to improve your skills. Here are 10 drawing exercises to get you stretching those sketching muscles.
Contour drawing
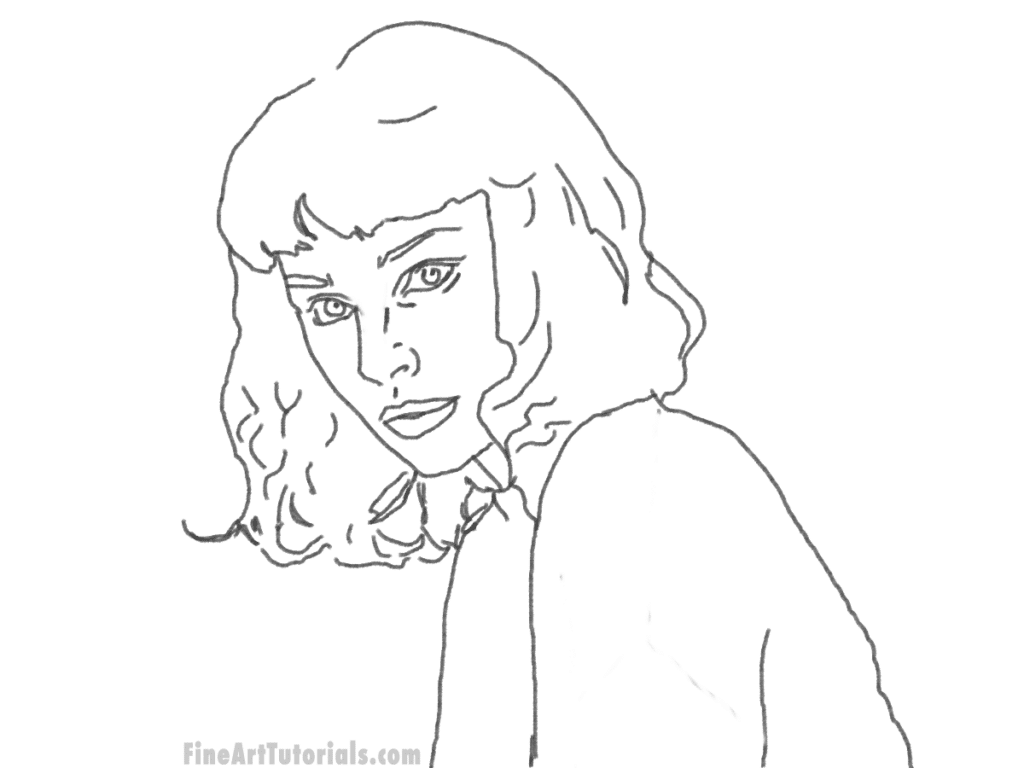
Contour drawing is where the artist draws only the outline of the subject or scene, without shading any values. The focus is on the visible edges of the subject’s shape. A contour drawing exercise can improve skills in drawing accurate proportions, form and structure in artworks, freehand without aids.
Grab a pencil, or pen and observe and outline the main elements in your reference. Try and be accurate with your portrayal of the subject, if you make a mistake, erase it or start a fresh.
Creating contour drawings can provide a foundation for larger pieces, more detailed works and paintings. Many artists rely on transferring a drawing onto the canvas of their final artwork, or using a grid to achieve accurate proportions. However, by practising drawing the outlines of different subjects, you can naturally improve the most fundamental and arguably difficult drawing skill, which is rendering realistic proportions.
Blind contour drawing
A blind contour drawing is a contour drawing that is completed without looking at the paper. This exercise forces the artist to study their reference and improves hand eye coordination. To do a blind contour drawing, look at your reference and outline the visible shapes. Make sure not to look at the paper, or take your eyes away from the reference.
This exercise can feel hard and the finished results may be completely unexpected if you’ve never tried this drawing method before. However, it’s a fun exercise that can make you pay attention to skills that you may be struggling with, or that may be holding you back in other areas of your art practice.
Cross contour drawing

A cross contour drawing is a contour, or outline drawing that conveys the volume of the surface with curved or straight lines spanning across the form. Lines are drawn within the outline and can be drawn closer together or further apart to represent light and shadow.
Depending on the form of the subject, the lines will appear differently, for example, use straight lines to represent a flat surface like a table, and meandering lines to show the curvature of a plane.
This is an enjoyable drawing exercise that highlights the volume and mass of a subject and how this affects the way light and shadows appear.
Continuous line drawing
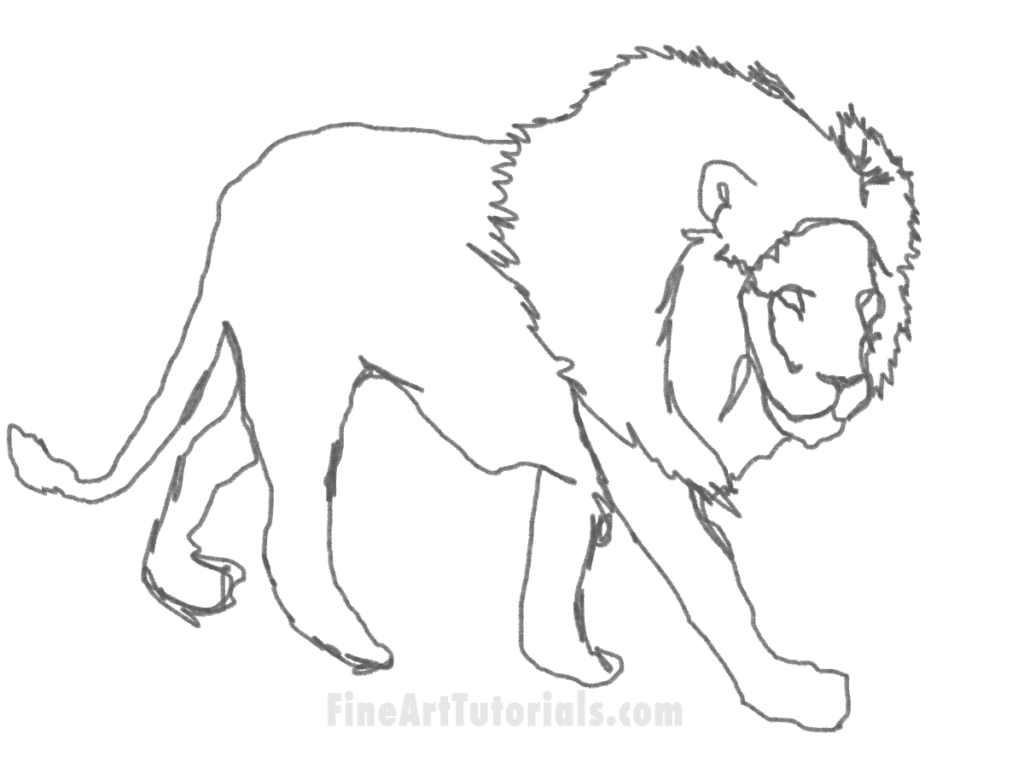
A continuous line drawing is a drawing completed in one sitting without taking the pen or pencil off of the paper. The lead of the pencil should remain in contact with the paper until the outline is completed. Try to draw the full form of the subject, without breaking the line.
Start by drawing a simple object like a cup or vase. As you draw, focus on the outline of the object and try not to take your pencil off the paper. Try to look at your reference for the majority of the time spent drawing, only look down at your paper to check that the proportions you are drawing are as accurate as possible.
This is an excellent drawing exercise to not only improve hand eye coordination, but also to show how details and forms join and relate to one another. It will also force you to foreplan how elements will fit together, rather than spontaneously starting a drawing.
This drawing exercise can take some practice to get good at, but the results are always fun to look at! To complete a successful continuous line drawing, try to keep your pencil in constant motion, rather than holding the pencil still for any length of time, to maintain the flow of the drawing.
Gesture drawing

Gesture drawing is a drawing method that focuses on capturing the movement, or gesture, of the subject. This type of drawing is often used by portrait artists to warm up before starting a more detailed drawing, or painting.
To do a gesture drawing, start by looking at your reference and try to identify the main shapes and forms. Once you have an understanding of the subject, start drawing with quick, fluid strokes. The aim is to capture the essence of the subject, rather than drawing every detail. First, draw in lines for the angle of the shoulders, the waist and the line of action, which acts as a spine for the drawing and shows how the figure is balanced.
This drawing exercise is great for improving your drawing skills as it will make you think about the forms and shapes of the subject, without getting bogged down in details. Gesture drawings are an exercise in creating more dynamic, lively looking drawings; these skills will transfer to future portrait pieces. Gesture drawing is also a fantastic way to loosen up before starting a more detailed drawing.
Negative space

A negative space drawing involves drawing the silhouette contours of a subject and filling in the values of the background around it. Start with outlining the basic shape, that contains no details and fill around the edges with the background tones.
Negative space drawing is a great exercise as it encourages the artist to think about the balance between different forms and spaces in a drawing. Focus on the areas between objects, the layout and how you can achieve balance with the composition of the drawing.
Create a value study
A value study is a drawing that uses a set variety of tones, to create the illusion of light and shadow. This drawing exercise is perfect for beginners as it will help you to understand how light affects the form of different objects.
This exercise is all about experimenting with values. First create a value scale, or buy one. Then decide on your range of values for your artwork. For example, you could create a drawing with just black and white, a drawing with high contrast, a high-key value study or a low-key value study. Draw the same reference with various different values and decide which suits your style best.
Speed drawing
Speed drawing is a timed drawing exercise where the artist has a set amount of time, usually one minute, to draw a subject.
This drawing exercise is great for warming up before starting a longer drawing, as it gets you into the habit of drawing quickly. It is also useful for improving your drawing skills as it forces you to work on your observation skills, without agonising over details. See how much you can get done in your time frame!
Varied line drawing
This drawing exercise is all about experimenting with different types of line. Draw a subject, using a continuous line, and then go over the drawing again with a different type of line.
Use different sketching techniques like cross hatching or stippling to fill in different areas and details. For example, you could use a wavy line, or a dotted line. This exercise is great for exploring how different lines can change the look and feel of a drawing.
By varying the line type, you can create different effects and add interest to your drawing. Try it with different subjects and see what results you get!
Smudge drawing
A smudge drawing is completed to create a soft appearance. Instead of drawing lines and hard edges, blend the pencil with a tortillion or brush so that elements appear to softly transition into one another.
One drawing medium that works excellently for this exercise is powdered charcoal. Brush powdered charcoal onto the paper to create gradients, blends and smooth transitions. Another great tool for drawing with perfect smudges and soft edges is tortillions, that pair well with charcoal.
Drawing with soft edges will sharpen your skills in creating blends and it will also help you to avoid relying on perfectly rendered outlines to create structure and form in a drawing.
Try drawing from different types of references
Of course, a photo reference can help with accuracy and drawing the perfect details. There are lots of benefits to drawing from photo references, however finding other references, such as plein air scenes can attune your observational prowess and in turn improve your drawing skills.
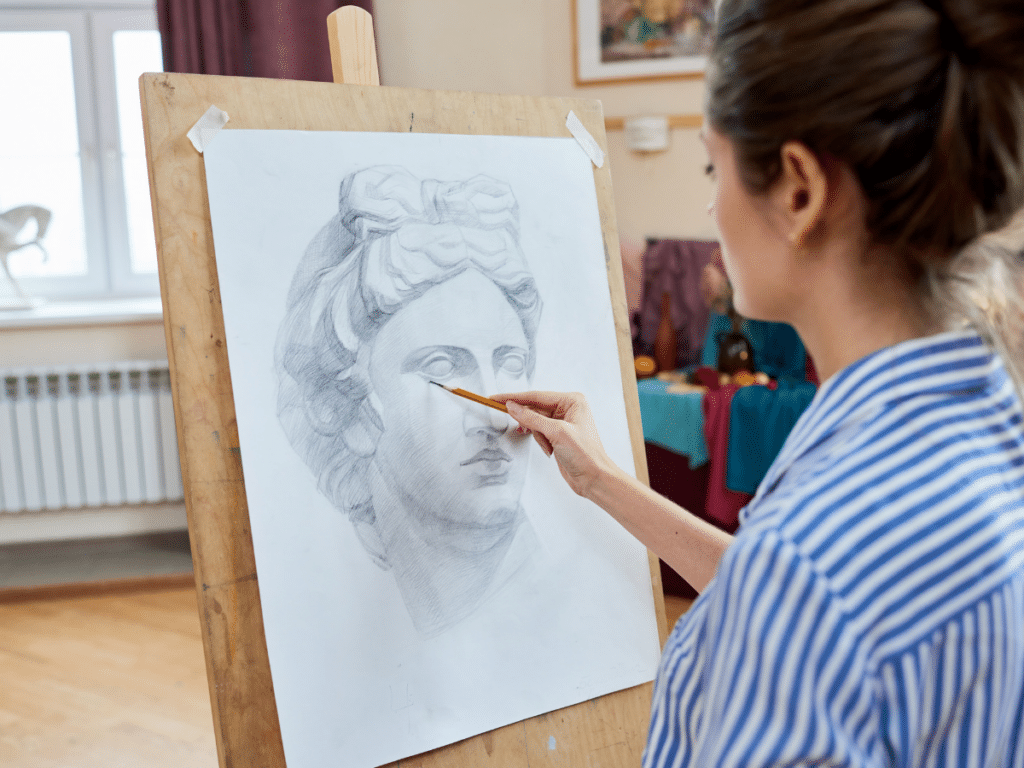
Draw from life
Drawing from life could mean creating your own still life setup, with flowers, fruit, crockery or whatever objects you find inspiring around your house. This is a great segue into drawing from a scene in front of you, as opposed to drawing from a photo reference, as you can control elements such as lighting, and your subjects won’t move!

Another option, if you enjoy landscape drawing is to take your sketchbook and draw en plein air. This is an excellent exercise in drawing fast before the light of the scene, or the weather changes. You will be able to capture the atmosphere of a landscape in a way that most photos won’t do justice.
If you prefer portrait drawing, consider going to a life drawing class. This will fine tune your gesture drawing, speed drawing, and anatomy drawing abilities. We have a guide on the best anatomy books for artists, if understanding how to accurately depict anatomy in a figure drawing is a sticking point, then find a book from the list to work from.
Sketch from memory
A tricky but rewarding exercise is to draw from memory. It can be a struggle to remember the light of a scene, or particular details, so your drawing may come out looking more abstract or expressive. However, it’s worth it, because the kinds of artworks that you produce will be based on your interpretation of a subject or event, which can add interest to an artwork. Start by drawing simple objects like fruit, then move on to more complex subjects like people or scenery.
If you make a mistake, don’t worry! Just keep going and try to get it as close as you can. The more you practise, the better you will become at drawing from memory.
Sketch from imagination
You don’t always need a photo reference or a scene in front of you to draw. If you enjoy fantasy or surreal style art, sketching from imagination is a great way to get creative and explore drawing without any boundaries.
Start by drawing simple shapes and forms, then add in details to create a more complex drawing. You could even try drawing patterns or stylised illustrations. Remember to have fun with it! The aim is to let your imagination run wild and see what you can come up with.
Observational drawing exercises
Observation, spatial recognition and hand eye coordination are the main skills that underpin a great observational drawing.
Sighting and measuring
Sighting is the practice of using your pencil as a tool to measure the proportions in your reference in relation to the proportions in your drawing.
An example of how to use the sighting technique in drawing is to measure the width to height ratio of an object. Hold up your pencil at arm’s length with eye open so that it covers the width, mark the width of the object you measured on your pencil with your thumb. Then, without moving your thumb from the pencil, measure the height of the object. Now you will have a estimate for the width to height ratio. For example, if you covered your pencil halfway for the width for the height you covered 1/4 of the pencil, your object has a 2:1 ratio. You can use the sighting technique to find the location of specific details, angles and more!
This is a great way to get the proportions of your drawing just right, and it’s also a useful skill to have when drawing from life.
Perspective drawing exercises
Practice drawing simple three dimensional shapes using one point perspective. Draw the horizon line, the vanishing point and parallel lines that lead from the paper’s edge to the vanishing point. Then, using these lines and points as a reference, draw several cube shapes.
The next exercise you can try, is drawing the same shapes, but with two point perspective. Draw two vanishing points on the horizon line.
Then, once you feel more confident drawing one point and two point perspective, try to shade the values on the cubes you have drawn. This is a great exercise in practising shading the lightsource on simple shapes.
When you feel ready, try to approach a one point or two point perspective drawing but draw more complex shapes, such as spheres.
Now you may feel prepared to approach drawing a scene, like a cityscape or a room! Give it a go and you can always come back to these exercises if you want to practice some more.
Drawing exercises for beginners
If you’re just starting out, drawing basic shapes is a great way to get familiar with the process of drawing.
The most basic skill you can learn when first starting out is contour drawing, then slowly try more complex drawing exercises, like cross contour drawing or gesture drawing. When trying a drawing exercise you are unfamiliar with, start with simple geometric shapes like squares, spheres, cylinders, circles and triangles, then move on to more elaborate shapes and forms, like apples, oranges or other simple fruits. All forms are made up of basic shapes.
Once you feel comfortable drawing basic shapes, you can start adding details like texture, shading and perspective. Remember to take your time, and don’t worry if your drawing doesn’t look perfect. The more you practise, the better you will become!
Subtractive charcoal drawing method: Try a new approach to drawing
The subtractive drawing method is when you start with a midtone surface and slowly remove charcoal to reveal highlights in the drawing. Shade with charcoal to deepen dark midtones and shadows.
Establish a mid tone and some of the tonal masses by by brushing powdered charcoal onto the paper. This will lift easily with a kneaded eraser. Then gradually deepen tones with a charcoal stick or with charcoal pencil. For highlight details, get a Tombow Mono Zero eraser to remove fine lines.
Drawing by lifting highlights is different to a standard approach of drawing outlines and filling in shadow tones, section by section, leaving the white of the paper for highlights.
The effect of drawing in this manner is expressive and almost painterly. Trying a new approach to drawing can help you to hone a signature style, to make your work stand out.
Experiment with different drawing mediums
There are so many drawing mediums to choose from, each with their own unique properties. Because each drawing medium has its own individual properties, they each require different approaches and techniques to create particular effects. Using different mediums is a great exercise in varying your approach and drawing techniques.
Graphite pencils are the most versatile drawing tool and can be used for a variety of effects, from soft and subtle to sharp and precise.
Charcoal sticks or pencils are great for creating rich, dark tones and shadows. They can be used for both subtractive and additive drawing techniques.
Oil pencils are perfect for creating smooth, blended effects and can be used on a variety of surfaces.
Pastels are ideal for creating bright, vibrant colors and can be used dry or wet.
Markers are perfect for drawing bold, graphic lines and can be used on a variety of surfaces.
There are endless possibilities when it comes to drawing mediums, so experiment with different ones to see what effects you can create
The best drawing exercises for portrait artists
When drawing portraits, it is important to capture the likeness of the subject. Practice gesture drawing so that you can better achieve accurate proportions quickly. Another great skill that a lot of portrait artists learn in art school is sighting, as this allows you to draw from life with incredible accuracy. The values in a portrait are often delicate and muted; it’s rare to see extremes in shadows and highlight tone. Create some value studies and practice shading, make sure to observe the subtleties in the transitions in values in your reference.
Create a daily drawing practice of drawing exercises
One of the best ways to improve your drawing skills is to create a daily drawing practice. Set aside some time each day, even if it’s just for 15-20 minutes, to sit down and draw. Draw whatever you like, from life or from imagination. The important thing is that you are consistently practicing drawing so that you can see an improvement in your skills over time.
If you want some drawing prompts for your sketchbook, check out our list of 70+ drawing ideas. For digital artists, Jae Johns has a great tutorial on digital drawing exercises.
Take your time and enjoy the process
When drawing, it is important to take your time and not rush through the process. This is especially true if you are a beginner.
Rushing will only lead to frustration and your drawing will likely not turn out the way you want it to. So take a deep breath, relax, and take your time.
As with any hobby, improving can feel hard. If you’re working on a piece that you are spending a lot of time on, or that is pushing you to your technical limits, the drawing process can feel like a struggle. It’s important to occasionally do some drawing exercises to remind yourself of why you started making art in the first place! Get creative, doodle, let go and make art for the sake of making art.
Finally
When it comes to drawing exercises, there are a few that stand out as being particularly helpful in improving your skills. These exercises focus on different aspects of drawing, from capturing movement to studying volume. By practicing these exercises on a regular basis, you’ll see a marked improvement in your drawing skills.
I hope you found these drawing exercises helpful! If you have any other tips or exercises that have helped you improve your drawing skills, please share them in the comments below. Happy drawing!
If you’ve found anything on this site especially useful, you can make a donation to me through PayPal. I take a lot of time to research and write each topic, making sure each tutorial is as detailed as possible and I make all my content freely available. Any small donation (even the price of a cup of coffee!) can help me to cover the running costs of the site. Any help from my readers is much appreciated :).
Follow the link in the button below to support this site.
This tutorial is amazing–comprehensive and helpful. THANK YOU.