
I’ll outline two different methods you can use to create an accurate drawing on paper, canvas or whatever surface you choose for your artwork.
The first method is best if you want to scale up your reference image and create a larger drawing on your canvas. Choose the second method if your reference is the same size as the artwork on your canvas will be.
Both methods involve transferring a picture (either a photo you’ve taken, or a picture you’ve drawn) from paper to the surface you will paint on.
Disclaimer: Fine Art Tutorials is a reader supported site. When you make purchases through links on this site, we may earn a small commission at no extra cost to you.
Method 1: The grid method to create an accurate drawing
This method involves creating a grid over a reference image, then drawing a grid with the same proportions but scaled up to fit onto your canvas.
It allows you to create an accurate drawing by reproducing an image at a larger size than your reference photo or drawing.
It’s important that the ratios are the same, so for example if the reference image is 4×6 inches, you could scale it up to a surface of 8×12 inches.
This method is for artists that want to work on a larger canvas when compared to their reference picture. However, if you were drawing on a canvas that was the same size as your reference, this would work too.
It works well for artists that draw and paint with realism and accuracy—to ensure that no detail is lost when transferring the reference to the canvas.
What supplies you need for the grid method?
- Polychromos or charcoal: Polychromos are oil pencils. It’s what I use to create under drawings as I find the marks they make to be softer than charcoal and less likely to show through in the finished piece. This is especially important if you are using thin glazes on top of an underpainting and imprimatura—a technique that relies on a certain degree of transparency.
- If you’re creating a digital grid on a photo, you’ll need your computer and Photoshop or a free photo editing software.
- If you’re not working from a digital photo, you’ll need a print out of your reference or a drawing you’ve done.
- A ruler to measure out the grid on the surface.
- Your surface primed and ready to draw onto.
For this tutorial, I’ll show you how to create a grid using Photoshop, but the principles are the same whether you’re working on a free alternative software or from an image you’ve printed out (you’ll just need a pen and a ruler to draw a grid on a printout).
If you’re looking for a free alternative software to Photoshop, in GIMP you can create a grid too. Follow these steps, they’ll work regardless of whether you’re using GIMP or Photoshop.
Why use Photoshop to create a grid?
Photoshop is an awesome tool which can be useful for traditional artists. I use it to edit photos of my artwork and get them ready for print, plan painting compositions and speed up various other processes.
Creating the grid in Photoshop is so easy, it takes about two minutes to make.
How to choose the best reference image
The image needs to be high resolution, if you’re working from a photo. This is so that you can zoom into various different areas while you’re working to see detail. The higher the resolution, the more you’ll be able to zoom in without it losing quality.
If you’re using a drawing you’ve made, take a high res photo to upload it to your computer. Make sure the camera is pointing straight at the artwork so that the image isn’t skewed in any way.
How to transfer an image using the grid method
Step 1: Set preset details and preferences in Photoshop
The first step is to open up Photoshop. You can set preferences when you open a new document. Set the units to inches, as inches are most commonly used to measure canvas sizes. Remember to size the art board so that it is the same dimensional ratio as your canvas.
For this example, I’m using a canvas that is 12×9 inches. So I’m going to make my art board 4×3 inches, then scale the image up by three times.

Step 2: Make the grid in your photo editing program
To make a grid in Photoshop, go to Preferences>Guides, Grids, Slices.
Go down to the Grids section and select the grid line interval number. I set mine to .33 inches; when I came to scale the image up to 9×12 inches, I multiplied the grid line interval placement by three, so I had a gridline every inch.
Here’s what my dialogue box looked like:

You can make your grid any colour you like. I made mine magenta so it stood out in front of the tones of the image reference I was using.
Make sure that when you go back to your art board, the grid is visible. If it’s not, go to the menu and select View>Show>Grid.
Here’s what my grid and image looked like:

If you’re working from a photo print or smaller drawing you’ve done on paper, all you have to do is divide your reference photo, then divide your canvas by the same number of grid squares.
So if you divide your photo with a 5×5 grid, divide your canvas by the same amount. Remember that the dimensions of the photo reference need to be roughly proportionate to the dimensions of your canvas. Otherwise when you come to complete your drawing, elements will appear skewed.
Creating a grid in free editing software GIMP is pretty simple. You need to use the grid plugin. Follow the steps here.
Step 3: Scale your grid and draw it onto your canvas
You have your grid ready on your reference. Now you have to scale it up. For example, I knew my canvas was three times bigger than my reference, so I multiplied the dimensions of each grid square interval by three. From .33 inches on my reference to a square every one inch on my canvas. You don’t have to be this precise, if you’re working from a print out, you could just divide your canvas by the same amount of squares as you divided your reference by.
Once you’ve done this, start drawing the grid on your painting surface.
Place your ruler on the bottom side of your canvas with the inch measurements pointing inwards, like this:

Make a mark at every interval (on my canvas I marked every inch). This is where you will place the guides:

So now you have marks on every inch or interval of your canvas, you can draw your grid straight on. Simply draw a straight line where each point you’ve marked is. This will evenly divide your canvas.
I recommend drawing lightly as you don’t want your grid to be too visible past the drawing stage.

Here’s my grid:

Now you can start drawing, using each square of the grid as a reference point for your drawing. After using this technique, you’ll see your drawing accuracy improve rapidly!
Here’s my finished drawing compared to my photo reference:


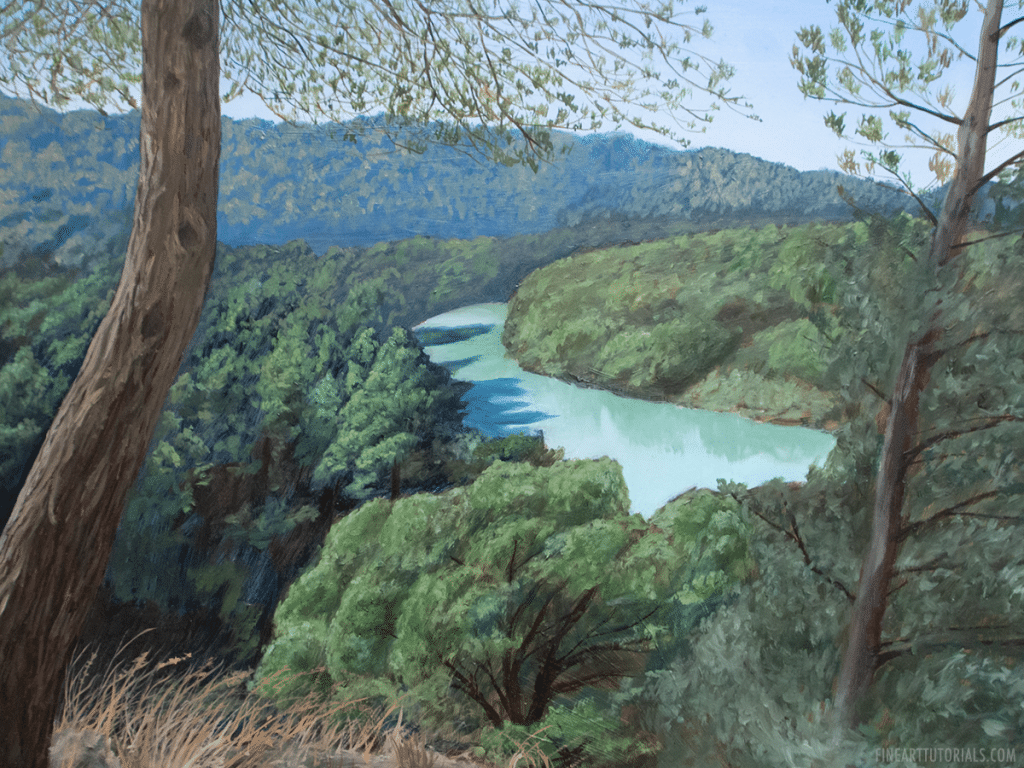
Here’s the finished oil painting:
Method 2: Paper Transfer
This involves drawing on paper and then transferring it onto the canvas.
The drawing you do on paper will be the same size as the one you do on canvas if you choose this method.
It works well for artists that want the drawing of their painting to be preplanned, with clean lines on the canvas.
The benefits of this method
Making a drawing on paper gives you more room to make mistakes. Rubbing out pencil or charcoal marks from a canvas can make a smudgy mess, therefore it makes sense to plan the drawing on paper first where you can rub out marks easily or discard it.
It can also feel easier to create detailed drawings from the angle of the paper being flat on a table, rather than directly on a canvas propped up against an easel. If you’re drawing straight on a surface that has a texture i.e. a canvas that has a weave that hasn’t been sanded down, then you could have a hard time drawing details straight onto it. Your pencil lines could get lost in the surface grain.
What you’ll need
- Charcoal
- Stylus or similar blunt object (like the end of a paintbrush)
- Tracing paper
- Masking tape
- Transfer paper
- Your surface, primed and ready.
How to transfer a drawing from paper onto a canvas
- Sketch the outlines of your drawing on tracing paper with a charcoal pencil. You could start by drawing freehand, or tracing a previous drawing you’ve completed. If you’re drawing freehand, it helps to work with a solid, light background, so get some masking tape and stick the corners of the tracing paper over some plain white card or paper.
- Stick the tracing paper with the drawing on to the canvas with masking tape. Tear two small pieces of tape and put one in each of the top corners. You’ll need the bottom of the tracing paper to remain unattached so that you can slide the transfer paper underneath. Make sure it’s in the right place and that the side you drew on is facing you.
- Place the transfer paper beneath the tracing paper and trace over the lines you drew with a stylus.
That’s it. You should see crisp and neat lines on your canvas from where you drew over the tracing paper. Your canvas will be ready to paint onto.
Tips to create an accurate drawing
If you want to improve at creating accurate drawings without the aid of a grid, it’s useful to commit to a daily drawing practice.
In your underdrawing, it’s possible to establish tones, shadows and highlights before you start painting. Using willow charcoal, spend a bit more time on the drawing filling in areas of shadow and leaving blank areas that will be light. To keep the drawing intact before painting, you could seal it.
Transfer a drawing to canvas: Pin it!
If you’ve found anything on this site especially useful, you can make a donation to me through PayPal. I take a lot of time to research and write each topic, making sure each tutorial is as detailed as possible and I make all my content freely available. Any small donation (even the price of a cup of coffee!) can help me to cover the running costs of the site. Any help from my readers is much appreciated :).
Follow the link in the button below to support this site.