Cross hatching is a drawing technique used to create a value range and add texture to a drawing. The technique involves drawing parallel lines that cross over each other to create a hatched effect.
It’s a type of line drawing technique that can be used with a wide range of drawing media, including ink, pencil, etching materials and more.
Cross hatching can be used to create different effects depending on the direction of the lines and the spacing between them. For example, close-spaced lines will create a darker tone, while wider-spaced lines will create a lighter tone. Lines that are drawn in different directions can also create interesting effects. For example, diagonal lines will create a sense of movement, while vertical and horizontal lines will create a more static effect.
Disclaimer: Fine Art Tutorials is a reader supported site. When you make purchases through links on this site, we may earn a small commission at no extra cost to you.
Cross hatching definition

Cross hatching is a type of shading technique, whereby artists will draw parallel lines at two angles that cross one another to create the impression of light and shadow. This is what creates a ‘hatched’ effect’.
The purpose of the cross hatching technique is to create a value range in a drawing. By using this technique, the artist can create the lightest and darkest values, to create a complete drawing.
Drawing with this technique is a great way to create the illusion of three-dimensionality on a two dimensional surface. The closer the hatched lines are together, the darker the area will appear, and the more space there is between the hatched lines, the lighter the area will appear.
Benefits of the cross hatching technique

Cross hatching is an incredibly versatile technique that can be used to create a range of different effects. By varying the spacing, direction and density of the lines, you can create the impression of form, volume, light and shadow.
The main benefit of the cross hatching technique, is that artists don’t need to use tonal shading to represent light and shadow. Tonal shading requires a medium like charcoal or graphite, where depending on the pressure applied, the mark will appear darker or lighter. So artists can use drawing tools like fountain pens, ink liners or etching tools to create the impression of the subject.
How to start cross hatching

To get started, all you need is a drawing tool and some paper. Start by drawing simple shapes like circles, squares and triangles. Once you’ve got the hang of it, you can start experimenting with different mark making methods using the hatching technique.
You are not limited to making perfectly straight parallel lines, you can draw curved lines to fit with the contours of the shape you are trying to represent. Combine the cross hatching technique with other drawing techniques, such as stippling, hatching or tonal shading. The only limit to creating the impression of light and shadow in your drawing, is your imagination.
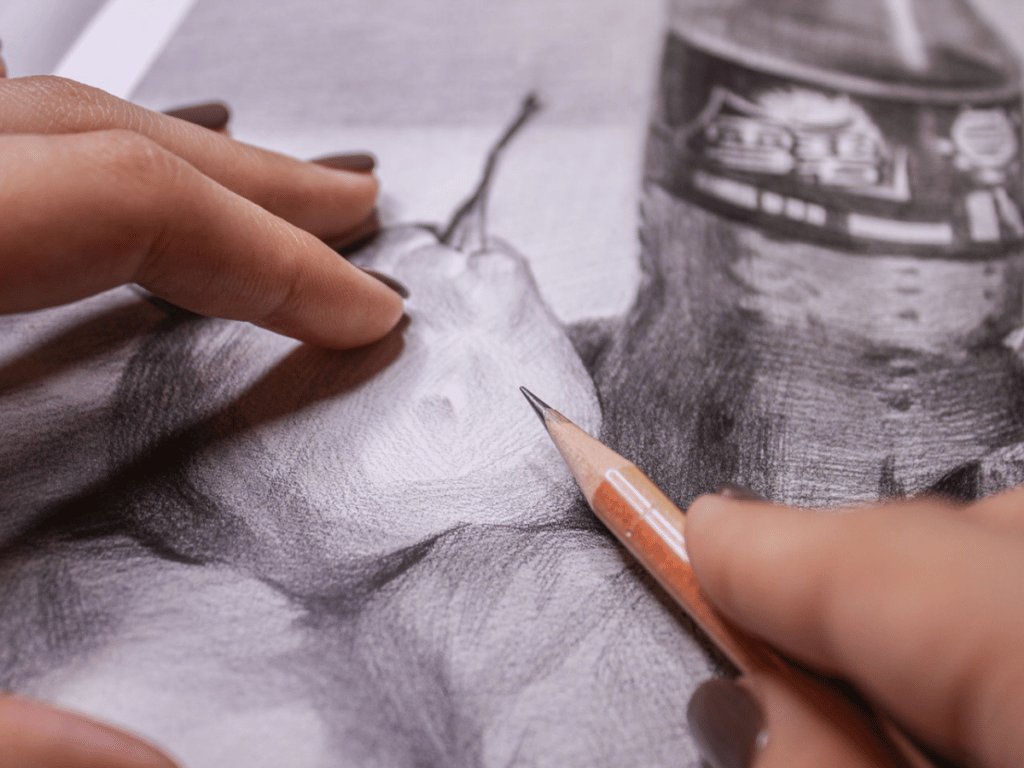
Once you’ve mastered shading simple shapes with the cross hatching technique, practice hatching simple subjects, such as fruit. Try setting up your own still life arrangement to draw from life. This is a great way to improve your observational drawing skills and accurately represent light and shadow from life.
Cross hatching technique: Tips

- Represent light, shadow and form in a drawing by varying the thickness and closeness of lines.
- Decide on the direction of your hatching. Horizontal lines will give a flat effect, while vertical lines will create an impression of height. Diagonal lines will bring dynamism to the drawing.
- Lines don’t have to be straight, some lines will curve to fit the contours of your subject.
- Vary the appearance of the marks, especially if you are drawing landscapes including rocks, leaves and trees, as by creating more jagged marks, scribbles and curved marks, your subject will appear more organic and realistic.
- Combine the hatching and cross hatching technique. This will create a more interesting and textured drawing.
- If you want to darken an area, don’t be afraid to go over the same lines multiple times.
- When using pencil, use a softer pencil and apply pressure to create darker lines for shadow areas.
- Use shorter lines with more density to represent the form of the subject. A greater number of shorter strokes with give the drawing more texture.
How to cross hatch: Step by Step
Outline your subject

Create a simple contour drawing of your subject. Capture the essence of the subject with a basic outline.
Draw the contours and details of your subject

When cross hatching more complex subjects, you should outline some of the most important details.
Identify the darkest areas

Identify the lightsource in your subject, as this will help you determine which areas are in shadow. The darkest areas of the drawing will be those furthest away from the light source. The lightest areas of the drawing can be left white and free of hatched marks, if you’re using a white paper.
Start hatching the shadow areas

Now you can start cross hatching the shadow areas of your drawing, using a variety of strokes. Start with light pressure and build up the density of lines as you go. Work your way around the drawing, adding more lines and building up the intensity of shading.
Choose how close together you want your lines to be. Closer lines will result in darker areas, while wider spaces will create lighter areas. If you’re drawing with pencil, apply more pressure to the areas that you want to be darkest.
As you cross hatch, start to fill in the space between your lines. This will result in a darker area. If you want a lighter area, leave more space between your strokes.
Hatch the midtones

Once you’ve finished cross hatching the shadow areas, you can start adding lines to the midtone areas. These areas should be hatched with lighter pressure if you’re using pencil, using fewer and shorter strokes.
Finish by hatching the lightest areas

The lightest areas of your drawing can be left free of hatch marks, or you can add a few light lines to create a sense of texture.
Add texture

Mix it up and add some texture to your drawing. Having too many disparate looking lines can look imbalanced and messy, but by drawing with largely consistent marks and then mixing it up at the end with some scribble patterns to represent leaf texture, for example, you can add variety to your artwork.
Cross hatching examples

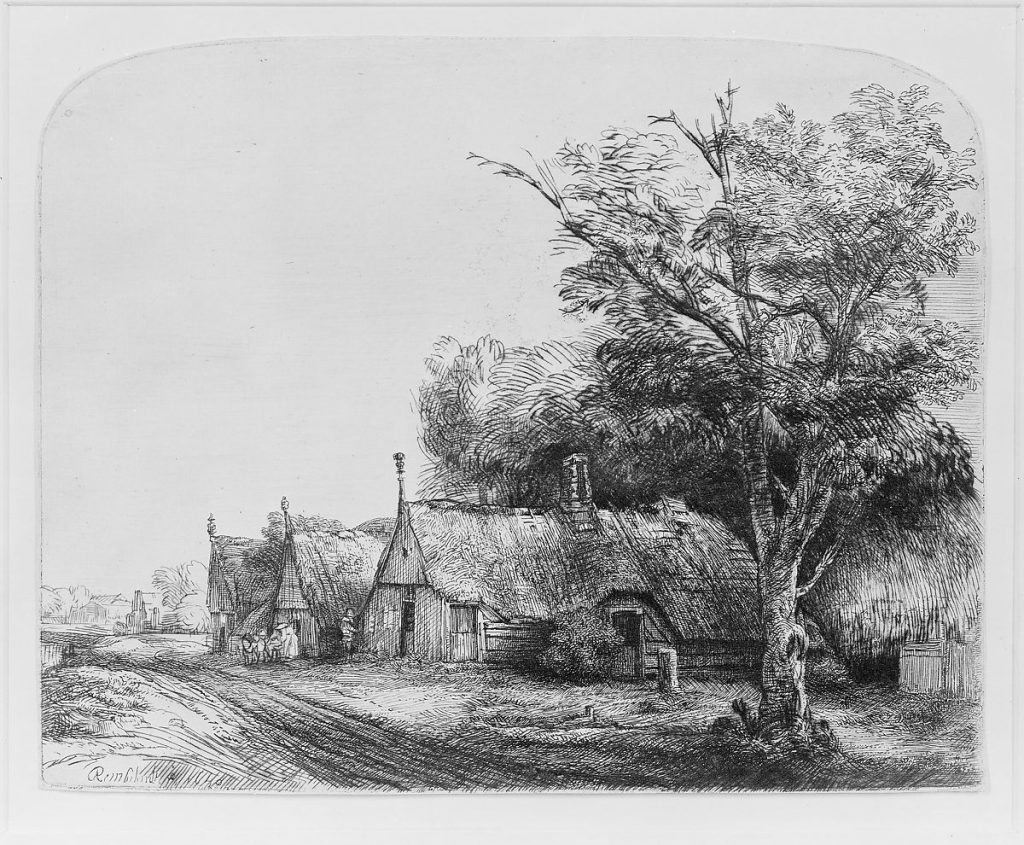
Rembrandt created a series of etchings, using the cross hatching technique to create a large value range. He drew a range of subjects, from self portraits to landscapes. In this self portrait, ‘Self Portrait with Curly Hair’, the highlights in the hair are represented by lighter lines that are spaced further apart from one another. This gives an illuminated and airy feel to the drawing.

In this drawing by Rembrandt, hatch marks are used to create the illusion of fur. The longer marks on the tail curve to the contours of the form and represent the longer tail hairs.

This silverpoint drawing by Leonardo da Vinci uses hatching to create soft shading and lines that curve around the form of the horse.
Types of cross hatching
Contour hatching
Contour hatching, also called curved hatching is a type of cross hatching, whereby the artist will use curving lines to represent the volume of the form with light and shadow.
Linear hatching
Linear hatching is created with parallel lines, that can be close together or spaced further apart. This technique is also just called hatching.
Cross hatching
Regular cross hatching is a type of hatching that uses intersecting lines, at right angles or diagonal to one another.
Cross hatching drawing tools
Pens or pencils with a fine tip work best for this technique. Pencils will allow you to vary the pressure you apply to the paper, resulting in lighter or darker areas. Pens will give a consistent line width. Markers can also be used for cross hatching, however they may bleed through thinner papers.
Cross hatching drawing exercises
Drawing exercises will give you the opportunity to practice a range of drawing skills, that are transferable to other areas of art.
Draw a series of straight lines
This may sound really basic, but your accuracy at creating basic, consistent straight lines is important when using this technique. First, start by drawing a series of short straight lines relatively close to one another, aim to use the same line width and spacing for each. Then gradually make the lines appear closer together.
Practice drawing long lines
Drawing long straight lines can exercise your ability at precision and pressure control. Instead of drawing by moving your wrist, hold your wrist still and move your arm with the pencil in long sweeping strokes by moving your shoulder. This way, you’ll be able to achieve longer accurate lines.
Speed test
When you’re comfortable with the basic lines, you can try to increase your speed. Draw a set of hatched lines, then perpendicular lines that cross over the first set. Time yourself for thirty seconds and see how many marks you can get done.
Shading a sphere
Start by drawing a light circle with a pencil. Then begin adding contour hatching lines that curve around the form. As you move away from the light source, make your lines darker. Work up to adding cross hatching to the shadowed areas.
Hatch a range of tones
Create a series of tone strips by drawing a line down a page and then adding hatch marks that get closer together as they travel down the page. Practice making a range of tones, from light to dark.
Fill a shape with cross hatching
Start by drawing an organic shape with pencil on paper. It could be a leaf, or a simple flower form. Once you have your outline, begin adding hatching lines within the shape, varying the pressure you apply and the spacing between lines to create different tones.
Create an illusion of space
In this exercise, you’ll need a reference photo or still life. Begin by drawing the outline of the object with pencil. Then begin to add hatching lines, making the lines closer together as they recede into the distance. This will give the illusion of depth and space in your drawing.
Copy a master’s artwork
Find a drawing by an artist you like, it could be a piece by Rembrandt, da Vinci, or someone else. Make sure the drawing includes cross hatching and hatching in the shaded areas. Analyse the drawing and look at how the artist has created the illusion of space, light and form. Look closely at the hatching techniques used, did they use a mixture of cross hatching alongside other marks? Try to copy the marks they made to create the subject. You will learn a lot from studying the work of great artists by taking in their approaches to popular techniques and subtleties of their mark making.
How to practice and improve at cross hatching
To improve at cross hatching and drawing in general, it’s important to commit to a regular drawing practice. Get a sketchbook and try drawing for 20 minutes per day. Whether that’s line drawing, shading or cross hatching, these are all practices that will improve your skills greatly over time.
Try the drawing exercises outlined in this guide and when you’re ready to complete a larger piece, break the drawing down into steps and layers so that you don’t get overwhelmed. Practising drawing skills does not always feel easy, but with consistency you will see the greatest improvements.
Finally
And that’s it! You’ve now learned how to cross hatch and create the illusion of light and shadow in your drawings. Experiment with different line thicknesses, densities and directions to see what effects you can create. And don’t forget to practice, practice, practice!
If you’re just getting started with drawing, we have a free ebook that we’re giving out to all of our readers. To get yours, join our Facebook Group, navigate to the Guides section and download the book. The group is a space for like-minded artists to share their art, tips and techniques.

THIS IS AWESOME THANK YOU SO MUCH FOR THIS. I HAVE JOINED YOUR FACEBOOK GROUP AND WAIT TO BE EXCEPTED.