
In this tutorial, we will walk you through everything you need to know about charcoal drawing: from choosing the right materials, to understanding the different techniques, to finding inspiration for your work.
We’ll also provide some tips on how to improve your charcoal drawing skills. So if you’re new to charcoal drawing—or even if you’ve been drawing for a while—read on!
Disclaimer: Fine Art Tutorials is a reader supported site. When you make purchases through links on this site, we may earn a small commission at no extra cost to you.
Choose your materials for charcoal drawing
When you’re first starting out with charcoal drawing, it’s important to choose the right materials. There are a few supplies that are specific to charcoal drawing. Here are a few things to keep in mind:
Types of charcoal
You’ll want to choose charcoal that is suited to your needs. Will you be doing large-scale loose, painterly style drawings or smaller detailed sketches? There are different types of charcoal available, including willow sticks, pencils, and compressed charcoal blocks.

Nitram charcoal is the most durable type of charcoal; it is resistant to breaking whilst also being soft enough to create smooth blends. Also, it’s a great choice for detailed work, as it can produce a crisp line when sharpened.
Willow charcoal is ideal for large-scale drawings, as it is soft and blendable. Vine or willow sticks can also be used to create quick sketches. There are also compressed charcoal blocks, which are good for large-scale drawings or for creating extra dark shadows and texture in your work.
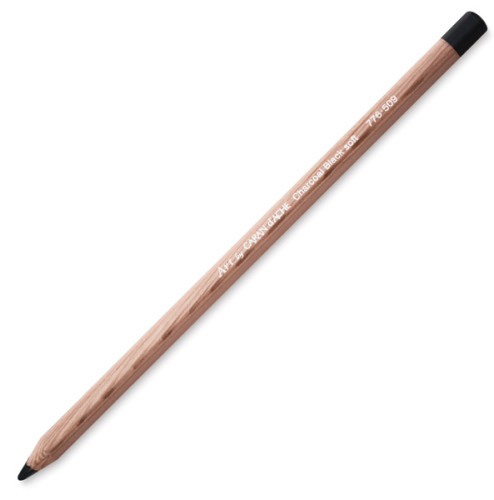
Charcoal pencils are a good option for detailed work or for sketching on the go. They come in a range of hardness, from soft to extra-soft. For a more detailed guide about different types of charcoal, read our review of the best charcoal for artists.
Charcoal drawing paper
The type of charcoal drawing paper you use is important. You’ll want to use a heavy-duty paper that can handle the gestural charcoal drawing techniques without tearing. The paper should have tooth or surface texture so that layers of charcoal adhere.
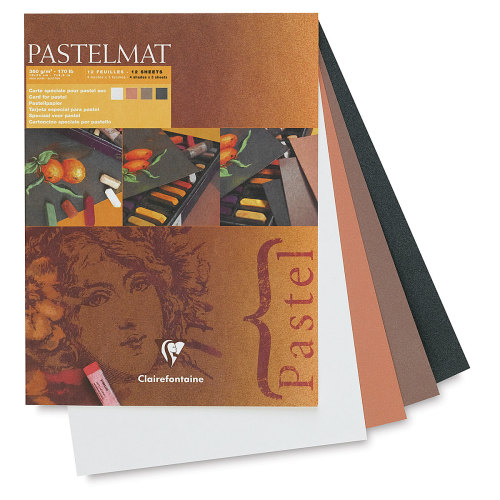
Papers designed for use with pastel are perfect for charcoal drawing as they have enough tooth to hold onto the charcoal layers. Pastelmat is a sanded paper that feels smooth and velvety to the touch. This paper provides excellent layering potential and reduces the need for fixative. Canson Mi-Teintes Touch paper is another sanded paper that is excellent quality and will give your charcoal drawings depth.
Other drawing supplies

You may also want to consider other charcoal supplies, such as fixative (to keep your charcoal from smudging), kneadable erasers, and blending stumps. Tombow Mono Zero erasers will allow you to erase extra thin lines and details, for those small highlight areas. Get a sharpening block to sand your charcoal to a point.
One awesome supply that can enhance your drawing practice is powdered charcoal. This can be brushed onto paper to create soft backgrounds, gradients, transitions and fill in large areas.
Now that you have an idea of the supplies you’ll need, let’s move on to charcoal drawing techniques!
Charcoal drawing techniques
Pencil drawing techniques used with other drawing mediums such as graphite are transferable to charcoal. With charcoal, you can create contour line sketches, hatch, stipple and create tonal sketches. However, there are some techniques are carried out differently, due to the unique properties of charcoal.
Blending charcoal
Charcoal is ultra soft and easy to blend. Blending with charcoal is much easier compared to other drawing mediums. Use a tortillion, chamois, blending tool or even a brush to create smooth transitions and smokey effects. If using a brush, make sure to use an extra soft brush. Brushes have more of a tendency to brush away particles of charcoal, whereas tortillions, chamois and blending tools will press charcoal into the paper.
Layering charcoal
Get a paper with a toothy texture like Pastelmat to optimise the layering potential of the drawing. Build layers gradually in the artwork to create matte, deep blacks. Start with light pressure and increase pressure with consecutive layers.
What are the unique properties of charcoal?
Charcoal does have some unique properties that you’ll need to take into account. For example, charcoal is darker than graphite and can create deeper blacks. Compressed charcoal can also be a bit more challenging to erase, so you’ll need to be careful when planning your composition and work in the shadow tones gradually.
Charcoal is soft, easy to smudge and blend. So you can create wonderfully smooth transitions and effects with this medium.
Methods and approaches to charcoal drawing
Charcoal drawing is different to drawing with other mediums like graphite or coloured pencils. Due to the softness of the material and the fact that it is easy to erase, artists can work with the subtractive method.
What is the subtractive method to drawing?
The subtractive method is where artists start with mid tones, then deepen shadows and refine edges. Finally, artists will lift highlights with an eraser. However, for the brightest highlights, leave the white paper bare.
The advantage of this approach is that it’s easy to make corrections and shift elements around. The structure of the drawing with start to take shape as you add in tonal values, as opposed to establishing form with a detailed drawing in the first step.
Create a range of tones by erasing back into the charcoal drawing. The aim is to increase the contrast of light and dark values and refine details as the drawing progresses. Remember, compressed charcoal and charcoal pencil is harder to erase than vine and willow charcoal, so make sure only to reserve these for the deepest shadows.
The opposite way of working with drawing mediums is to create a detailed outline drawing, then begin shading. Whereas, with charcoal, artists can choose to build details from the tonal masses. It’s a method than can make drawings appear loose, expressive and almost painterly in style.
How to create textures with charcoal

Use the charcoal on its side to pick up the texture of the paper. For example, if you’re using a toothy paper, the charcoal will grip onto the tooth and create a textured mark. Experiment with different charcoal types, papers and charcoal tools to create different effects.
Textured mark-making can be used for a range of subjects such as fur, hair, grass, fabric and more. Draw with charcoal pencil for sharp lines and blend out areas with a blending tool to create soft edges.
How to create a charcoal drawing: Step-by-step
Now let’s explore charcoal drawing in more detail with a step-by-step tutorial. This simple process will help you understand the basics of charcoal.
Mount your paper to a board
The first step, which is essential if you’re working vertically at an easel, is to mount the paper, or tape to a board with masking tape for surface stability. Alternatively, you can buy paper boards, like Pastelbord.
Plan the composition of the drawing

Observe and analyse your reference, then plan where you want the focal point to be in your artwork. Loosely and lightly sketch out the composition.
To ensure accuracy in your drawing. You could use the transfer method, the grid method, or sight measure and map.
Draw broad shapes
If you’re struggling with the drawing, remember that any image in a reference can be broken into constituent geometric shapes. Whether that’s the broad circle shape of a flower head, or the triangle shaped pointed end of a leaf. Draw out the simple shapes from your reference first, you can refine them later.
Shade tonal masses

Use a light touch to shade where the broad tonal masses are. Shade lightly where you see shadow, avoid shading areas that are lighter in tone. Build up tones on the paper and your drawing will start to take shape. In this step you will establish light passages in the drawing. Use a stick of charcoal, or a tool such as a tortillion with charcoal residue on the end to create these tonal values.
Increase contrast
Now that you have broadly established lights, darks and mid tones, you can work to increase the contrast. Layer charcoal, applying a little more pressure for the darkest areas. Use a kneaded eraser to lift highlights in the brightest areas, or to smooth the transitions between elements. Don’t worry about drawing hard edges, or seperate lines, it’s fine for the drawing to appear blurry, or as if different elements are smudging together slightly.
Refine and define edges
Look at your reference and try to describe the edges of different elements. Hard edges have sharp value transitions, whereas soft edges have smoother value transitions. For elements with hard edges, you could go in with a sharpened charcoal stick to add definition, or create a harder edge with a kneaded eraser.
Deepen shadows
Continue refining the drawing, increasing pressure for the darkest areas. With more layers of charcoal application, you may start to fill up the tooth of the paper, so that less of the paper’s texture is visible. Save the final shadow layers for those areas you want to appear as matte black.
Lift highlights
Use a kneaded eraser to lift lighter areas of midtones and to smooth transitions. The brightest light passages should have been left clear to reveal the white of the paper. However, if you’re drawing on toned paper, you can go in right at the end with a white charcoal or pencil to add the lightest highlights.
For tiny highlight details, you can use a Tombow Mono Zero eraser to lift small areas of charcoal.
Draw the details
Use a sharpened stick of charcoal, or a charcoal pencil to draw in the sharpest looking details. You can spend as much or as little time on the details as you want, but sometimes less is more. Try to only add details in where necessary, take a step back and consider: will adding more details affect the overall impression of the piece? If not, you can leave them out. This is a useful way to conduct a charcoal drawing, as it make the process more efficient.
If using toned paper, get a white charcoal pencil, or white coloured pencil and draw in the final lightest highlights.
Fix the charcoal drawing
The optional last step of a charcoal drawing is fixing it with a charcoal fixative. Make sure you use this outside, or in a well ventilated room, depending on the manufacturer’s instructions. With most fixative sprays, three coats should be enough to protect the drawing from smudging. However, some fixatives may cause values in a drawing to change. Check out our review of charcoal fixatives for more information.
How to start a charcoal drawing: 3 ways
The first way is to start with broad shapes and tonal masses, then deepening shadows and lifting highlights.
Alternatively, you could start with a loose contour sketch, to map out where the main areas and details of the drawing will be. This may be the most intuitive way to start your charcoal drawing if you are used to drawing with graphite.
Another way to start a charcoal drawing is by blocking in areas with charcoal powder. This is a more direct approach and can be used to create deep darks quickly. However, it can be harder to control charcoal powder and achieve subtlety. So, it’s best to use this method sparingly and build up layers gradually. A great way to use the charcoal powder, is to lightly brush over where you plan for the mid tones to be, so that you’re not working with a stark white paper.
Essential tips for charcoal drawing: Avoid beginner mistakes
Now that you know the basics of charcoal drawing, here are some essential tips to avoid making common beginner mistakes.
Don’t start with dark shadows
When starting a charcoal drawing, it’s tempting to want to go in with the darkest darks straight away. However, it’s best to start with mid tones and work your way up to the shadows. This will give you more control over the charcoal and help you create a range of tones.
Use gentle pressure when drawing with charcoal
One of the great things about charcoal is that you can create a range of tones by varying the pressure you apply when drawing. For example, use light pressure for mid tones and slightly more pressure for shadows.
However, avoid using too much pressure as this will make the charcoal harder to control, some types of charcoal are delicate and can break easily. The key to drawing with charcoal successfully is having a light touch.
Don’t focus on one spot
Focussing on one small spot of a drawing can lead you to agonise over details. This will prevent you from considering how elements interact with one another and the overall effect of the composition, when looked at as a whole. Take a step back from your drawing regularly and constantly move around the drawing whilst working. For example, focus on shading mid tones of a similar value in the entirety of the drawing, then the darkest shadows. Avoid outlining a feature, then filling it in. As this can create too much separation in a drawing. The goal is to create a sense of cohesion, to think of the composition as a whole and to focus on the relative values of the different elements.
Charcoal drawing ideas
If you feel just about ready to tackle some charcoal drawing for yourself, here are some charcoal drawing ideas to get you started.
Draw a still life: A great way to practice charcoal drawing is to set up a still life and draw it from different angles. This will help you get used to working with charcoal and experimenting with tones. Plus, you can practice measuring and sighting your reference, instead of working from a photo.
Draw a portrait: Portraits are a great way to practice charcoal drawing as they allow you to experiment with different techniques. For example, you can use charcoal powder to create smooth blends or smudge charcoal for a softer effect.
Draw from nature: Drawing from nature is a great way to get outside and explore your surroundings. It’s also a good way to practice charcoal drawing as you can experiment with different textures. For example, you can use charcoal to capture the rough texture of bark or the smoothness of water.
For more drawing ideas, including coloured pencil and graphite, check out our guide.
General drawing tips that can help you master the charcoal medium
Aside from learning about the charcoal medium specifically, you should learn skills that will make you a better artist, regardless of your medium.
Focus on rendering values accurately
Values in a drawing are simply how light or dark a tone is. It’s the relationship between these values in a drawing that can make it look realistic. The best way to accurately render values is to start with midtones or tonal masses and gradually increase contrast. Most often, subtlety is key.
It can help, when working from a photograph, to put a greyscale filter on your reference. Make sure the filter doesn’t also toggle the contrast, however. This way, you can accurately see the value relationships, without the colours confusing the image.
Another way to help artists with accurate values is to draw on toned paper. By starting from a midtone, you can discern between value relationships with ease. Of course, you may need a white pencil to hand for those brightest highlights.
Pay attention to edges
In an artwork, edges are where one tone meets another. They can be hard or soft, depending on the light, time of day or atmospheric perspective in the reference. Soft edges blur into one another, hard edges consist of sudden shifts between values. Elements in the foreground will likely have harder edges than those that appear to be in the distance for example. Use edges in a drawing to create a sense of realism and depth of field.
What are the benefits of working with charcoal?
Charcoal offers some advantages. For example, charcoal is easier to smudge and blend than graphite, so you can create softer edges and gradients.

When you shade with graphite pencils and apply some pressure, you can get an unwanted side effect. The pencil marks start to look shiny and reflective. This is a common problem in graphite drawing that makes photographing artwork tricky. Luckily, you won’t have this problem with charcoal. Marks made with charcoal appear rich, matte and deep black. Apply as much pressure as you want to create your shadows without the drawing appearing reflective.
Should you work at an easel with charcoal?
Charcoal is a naturally dusty and crumbly medium, working vertically at an easel can help reduce mess. Working at a vertical angle can help with precision and particular drawing techniques. Mount or tape your charcoal paper to a board, such as an MDF board to provide surface stability whilst working. Additionally, drawing with a charcoal holder can lengthen the charcoal stick and make it easier to hold.
How to sharpen charcoal
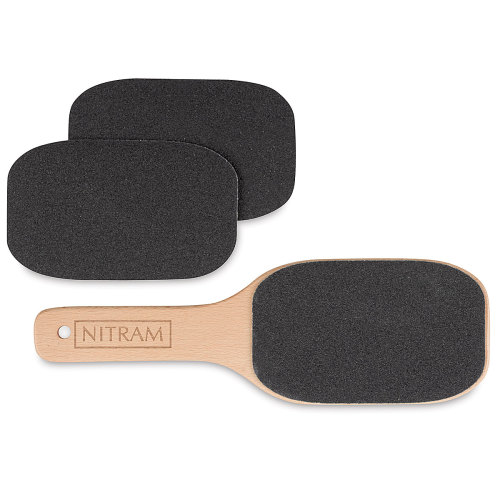
Sharpen charcoal with a sanding block, such as this one by Nitram. This will create a fine point and help render details. Make sure to get a durable charcoal like Nitram charcoal that is resistant to breaking, so that your charcoal pieces last longer. To sharpen, hold the charcoal in one hand and use the other hand to hold the sanding block. Gently rotate the charcoal against the block until it’s sharpened to your desired point.
To sharpen charcoal pencil, use a craft knife. Push downwards on the pencil casing to create a long tapered point.
Can you use charcoal with other mediums?
Charcoal can be used in conjunction with other mediums. For example, you could use charcoal to create an underdrawing for an oil painting. Charcoal is also a popular medium for creating preliminary sketches for other types of artwork. It can be used with other drawing mediums, such as graphite and alongside soft pastel. Avoid using it over oil pastels, oil pencils or oil paint as it will have trouble adhering to the surface.
Finally
When you’re starting a charcoal drawing, the most important thing is to experiment and find a drawing method that works best for you. Charcoal is a versatile medium, so have fun exploring all the different ways you can use it.
We hope you enjoyed this charcoal drawing tutorial for beginners. Now get out there and start practising!
If you’ve found anything on this site especially useful, you can make a donation to me through PayPal. I take a lot of time to research and write each topic, making sure each tutorial is as detailed as possible and I make all my content freely available. Any small donation (even the price of a cup of coffee!) can help me to cover the running costs of the site. Any help from my readers is much appreciated :).
Follow the link in the button below to support this site.
It’s a very useful article.
Thank you, I find your tutorial very helpful and am excited about moving forward.
So educative
very helpful
very informative. thank you