Charcoal is a unique drawing medium, in that it is soft, erasable and enables artists to create dramatic differences between light and dark values. In this list of charcoal drawing ideas, find ideas to help you create striking classic still lifes, textured landscapes, expressive gesture drawings and more!
If you’re looking for some inspiration, check out these 14 charcoal drawing ideas, and find a tutorial for each idea.
Disclaimer: Fine Art Tutorials is a reader supported site. When you make purchases through links on this site, we may earn a small commission at no extra cost to you.
Expressive charcoal gesture drawing
This technique is all about capturing emotion and movement in your drawings. To do this, you’ll need to use fast, fluid strokes with your charcoal. Experiment with different line weights and speeds to create a variety of effects.
For example, if you want to convey energy and movement, try using heavier lines that are closer together. If you want to create a more calming effect, use lighter lines that are further apart.
You can also experiment with different drawing techniques to create more depth and dimension in your drawings. Try using cross hatching or tonal shading to add shadows and highlights.
One tip to make your charcoal drawings appear more expressive, is to tape your paper to a drawing board and stand up at an easel to draw. Hold your charcoal stick at its base, rather than close to the tip and draw in sweeping strokes by moving your elbow, rather than by moving your wrist. This way, you can create larger marks across the paper and it will give you greater control over the medium.
Portraits, figure drawings, wildlife and animal portraits all look great using this style of fast and expressive drawing. Try creating a gesture drawing. Choose subject, this could be a reference photo that you found on a stock site, one of your own photos, or you could even attend a life drawing class. Then aim to capture the movement and gesture of the subject by working quickly, draw the head, the line of action of the body and the arms and legs adjoining to the torso. It takes practice to draw fast and expressively, so don’t worry if your first drawing doesn’t turn out how you expect.
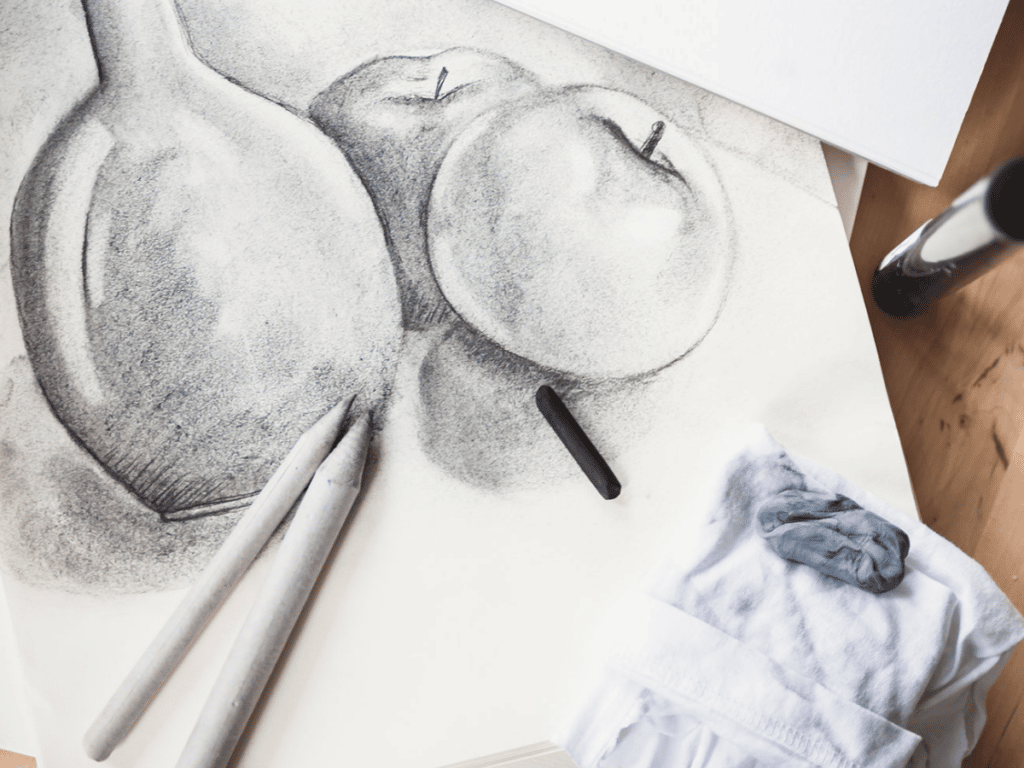
Still life charcoal drawing
To capture the details of an object, you will need to use small, precise strokes with your charcoal.
Another tip is to use a piece of carbon paper to transfer your original image onto your drawing paper. This way, you can focus on the details and not worry about getting the overall shape of the object correct.
Still life drawings are a fun introduction to drawing from life in a controlled environment where the lighting and conditions remain the same. It’s good practice to draw from life to improve your observation skills. Set up still life arrangement with whatever you have around the house, this could be crockery, vases, glasses, fruits or flowers. Make sure you have a good view of your reference and that you’ve set the lighting up so that it won’t change over the course of the session. Sketch your objects, starting with the broad shapes and finishing with refining the details. For detail work, get a charcoal pencil, or sharpen a charcoal stick with a sanding block to taper it to a point.
Draw a river landscape scene
This type of drawing is all about capturing the beauty of nature. To do this, you will need to use a variety of line weights and shading techniques.
Use a charcoal pencil for details and small contrasted areas, such as small shadows on the tree bark and leaves.
In this video, Miroslav demonstrates how to start a charcoal piece, beginning gradually with light values, then increasing the depth and values as the drawing progresses. He smooths out the transitions between elements by blending with a brush, or paper stump.
Shade areas with the tonal shading technique, by varying the pressure on the charcoal stick or pencil for areas of shadow and highlight.
Finally, don’t forget to add some finishing touches to your drawing. Trees, bushes and flowers can all be added to give your landscape drawing a bit of life. Use a kneaded eraser, or an eraser with a fine point like the Tombow Mono Zero to lift highlights to complete the piece and make the light areas pop.
Use the subtractive drawing method
The subtractive drawing method is all about creating a drawing by adding and removing charcoal from the paper. This can be done using an eraser to remove charcoal and a charcoal pencil for fine details.
This type of drawing is often used for creating portraits, as it allows you to create a range of tones and values. It can also be used for creating other types of drawings, such as landscapes or still life scenes.
When using the subtractive drawing method, it is important to start with a light touch. You can then add more pressure to create darker areas. Brush powdered charcoal onto the surface to start with a light mid tone, or lightly shade areas to block in the largest shapes on the drawing with the side of a charcoal stick.
The trick is, to increase contrast and refine lines and the drawing progresses, it’s about finding the subject in the abstract charcoal marks. Almost as if you are moulding the figure. You can start with softer edges, use an eraser and a charcoal pencil to create harder edges and find the form in the drawing.
If you make a mistake, don’t worry! Simply erase the area and start again. The beauty of this drawing method is that it is very forgiving.
Once you have finished your drawing, you can add some final touches with a white charcoal pencil or a kneaded eraser.
Make a quick study
Charcoal is one of the best mediums to use for creating quick sketches. For example, you could plan the composition of a larger piece you want to work on by sketching with quick sweeping lines.
You could also use charcoal to do a quick study of someone’s face. This can be useful for practicing portraiture or for memorising a person’s features.
When doing a quick study, it is important to simplify the subject matter. Don’t worry about getting all the details correct, just focus on the overall shapes and proportions.
Once you have sketched out the basic forms, you can start to add some shading. Work from midtones and light to dark, to create volume and depth in the drawing.
Use powdered charcoal
Powdered charcoal is an amazing drawing tool. It allows you to brush charcoal onto the paper, to create smooth gradients and soft realistic edges. It’s especially useful for realism drawing and portraiture drawing.
Use powdered charcoal to draw a portrait. Start with the basic shapes of the face, blocking in where the shadows will be. Use the subtractive drawing method to remove highlights with an eraser and refine details with a charcoal pencil as the drawing progresses.
Create a cityscape with contrasting values
To create hard lines and precision, get a hard charcoal pencil. Choose a cityscape that’s familiar to you, or find a photo reference of a city you’ve always wanted to visit from a stock image site.
Begin by sketching out the basic shapes with light lines. Then, start to darken the lines you want to keep and erase the excess. Work on one area at a time, slowly building up the drawing until you’re happy with the results. Use the one point perspective drawing method to achieve accuracy in the building proportions. Highlight specific areas like streetlights or building windows to make them stand out.
Do an abstract drawing
When working with charcoal, there are no rules! You can let your imagination run wild and create whatever you want.
One way to approach an abstract drawing is to start with a simple shape or form. Then, build up the drawing by adding more lines, shapes, and shading. Use drawing techniques to create interested textures with your charcoal pencil, like hatching, stippling, or rubbing the charcoal on its side to pick up the texture of the paper. Draw geometric forms, render high contrast between light and dark values or detail patterns to create interest in your abstract piece. Abstract drawings can be as easy as you make it! If you want to work your way through a list of easy things to draw, check out our guide. It’s a great place to start for beginners wanting to practice.
Draw a portrait from a photo reference
Find a photo reference online, from a stock image site or from your own photo library. Put the photo into black and white, as this will enable you to see the true values and halftones more clearly. Use an eraser to create highlights, and a charcoal pencil to refine details. Try to work on the drawing as a whole, rather than focussing on tiny details as this will help you create a harmonious looking piece. Slowly build up the drawing, modelling the figure from the midtones until you’re happy with the results. In this example, the artist has highlighted the hairs in the beard and the lightest tones to make them stand out.
Make sure to use a sharpened charcoal stick, or charcoal pencil for detailing fine sections of detail, like hairs or eyelashes in an eye drawing.
Create a drawing inspired by an old master
Choose your favourite drawing or painting by one of the old masters. This could be a da Vinci, Rembrandt or a Vermeer painting and try to reinvent it with the charcoal medium.
Focus on how the famous painter rendered light and shadow in the painting. One tip is to find a photo of the painting to use as a reference, then put the photo into black and white, so you can better see the value range and tonal transitions. Old masters such as Rembrandt would use techniques to make the focal point of the painting more salient, such as increasing the contrast between light and dark values. This would bring the focal point of the painting forwards for the viewer. Recreate these techniques in your own drawing, and focus on the brush strokes, noticing whether they are loose or detailed.
Use chiaroscuro in your charcoal drawings
The term chiaroscuro originates from the Italian words for “light” and “dark”. It is a technique that uses strong contrasts between light and dark values to create the illusion of three-dimensionality.
To use this technique in your drawings, start by sketching out the basic shapes with light lines. Then, begin to darken the shadow tones. Leave the white of the paper to show through for the highlight tones. For extra depth, use a soft charcoal pencil and apply a little pressure to create areas of jet black shadow. These areas should be in the background. The use a kneaded eraser to lift light charcoal marks to reveal the white of the paper beneath, to create stark highlights.
Do some studies from nature
There’s nothing like drawing from life to improve your skills. Head outside and find a subject to draw, whether it’s a flower, a leaf, or a tree. Pay attention to the way the light falls on the subject and how the shadows are cast. Use a range of values to create depth and interest in your drawing.
Take a sketchbook out with you, or get a plein air easel and tape your paper to a drawing board. try to capture the essence of the scene before the light changes. Drawing outdoors can be challenging if you’ve never done it before, one tool that can help frame the scene is a viewfinder. This can help you to see how elements will fit together in a drawing, so that you have a clear view of the perspective, focal point and composition.
Draw a blended seascape
Test your charcoal blending skills and draw the smooth ocean surface. Make sure to get a blending tool, like a brush, Sofft tool or chamois. Start off with a light touch and blend the shadows on the water into the mid tones. There are rarely any hard edges in seascape drawings, so use a light touch and soft strokes. Artists could opt to use charcoal powder to achieve extra smooth gradations.
As you move from the midtones to the shadows, add a little more pressure to the charcoal pencil. Use circular motions with the blending tool to create a smooth gradation.
Draw a realistic tree
Trees are perfect subjects for charcoal drawings because of all the interesting organic forms you can create and the value range you can achieve in the shadows on the bark and the highlights on the leaves. Begin by sketching out the basic shape of the tree with light lines. Draw the branches and then start filling in the details of the bark. You don’t have to copy the reference exactly when you’re working on drawing organic forms, tree shapes and imperfect, which makes them forgiving as a subject. Work on one area at a time, slowly building up the drawing. Make it as detailed as you want! Grab a charcoal pencil and detail the shadows of the bark and get a fine tipped eraser like the Tombow Mono Zero to lift small highlights.
Finally
We hope you liked our list of charcoal drawing ideas! If you managed to try some of these ideas and you like how your drawings came out, feel free to share them on our Facebook community!
If you liked this guide, share it on social media using the buttons below.