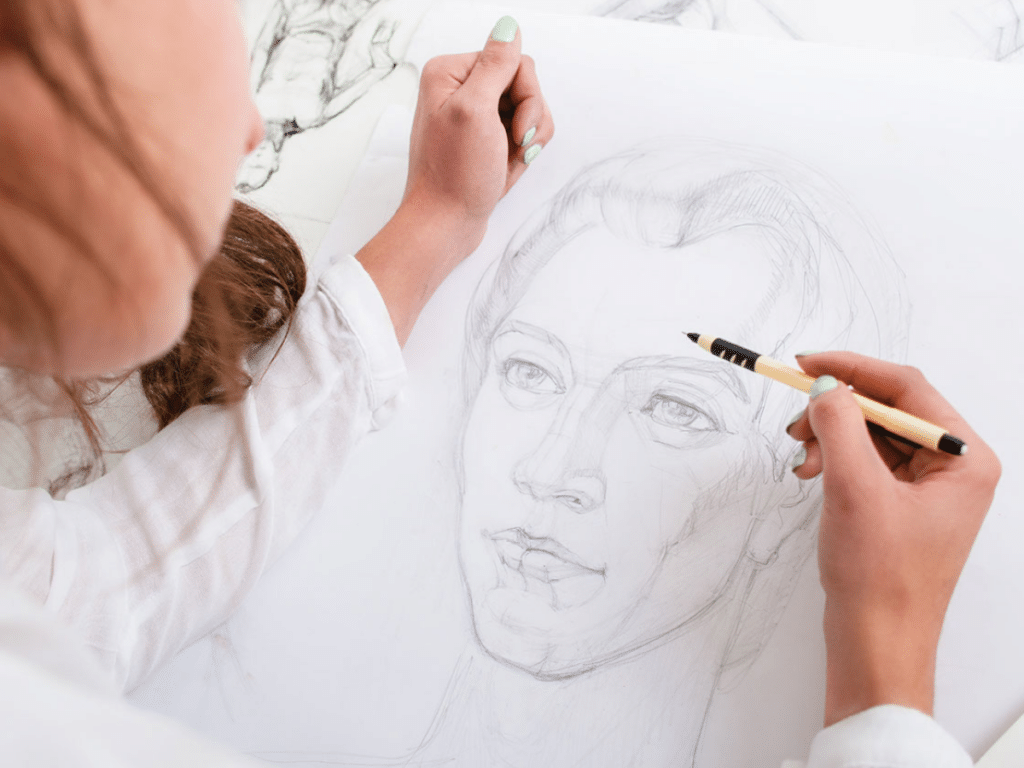
Drawing a head can be daunting for any artist, beginner or experienced. But fear not! By following the Loomis Method you will have a solid foundation to create realistic portraits that really come alive on paper.
In this guide, learn how to draw a head from scratch, with easy to follow steps. All you need is a pencil and paper to get started!
Disclaimer: Fine Art Tutorials is a reader supported site. When you make purchases through links on this site, we may earn a small commission at no extra cost to you.
Draw a head from any angle
This is the first of a short series of tutorials on how to draw a human head using the Loomis Method. This first tutorial demonstrates how to draw a head from a front on perspective—It’s super quick, simple and designed to give you the basic rules of the method as succinctly as possible so you can refer back to it for a re-cap whenever you need a quick refresh.
This guide also focuses on adding the features and starts to get a little more complex. In the next guide, we’ll look at the Loomis Method to construct a human head from a side view. If you want to learn more about the Loomis Method and draw the head from a 3/4 perspective, check out our tutorial. Drawing the turned head is more complex that drawing a head from the front, but it’s well worth the effort.

How to draw a head: Step by step
Here are all the steps to draw the head from the front, starting with a circle. At the end, we’ll give you some additional shading tips so you can take your head drawing to the next level.
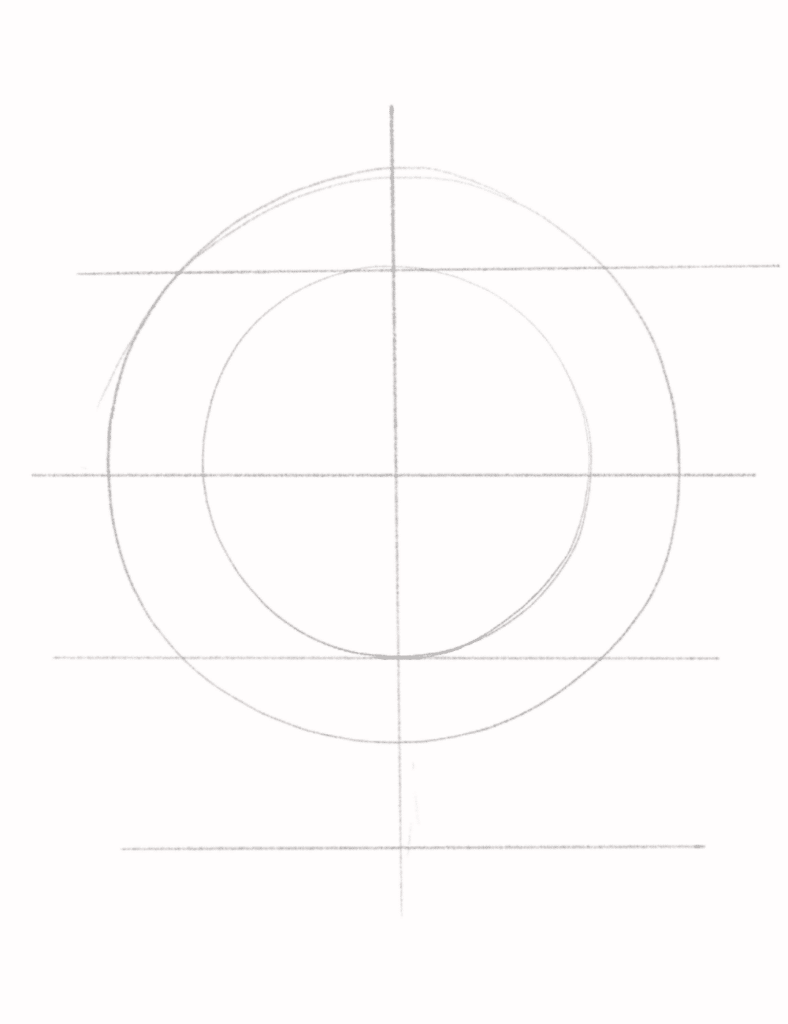
Draw a circle

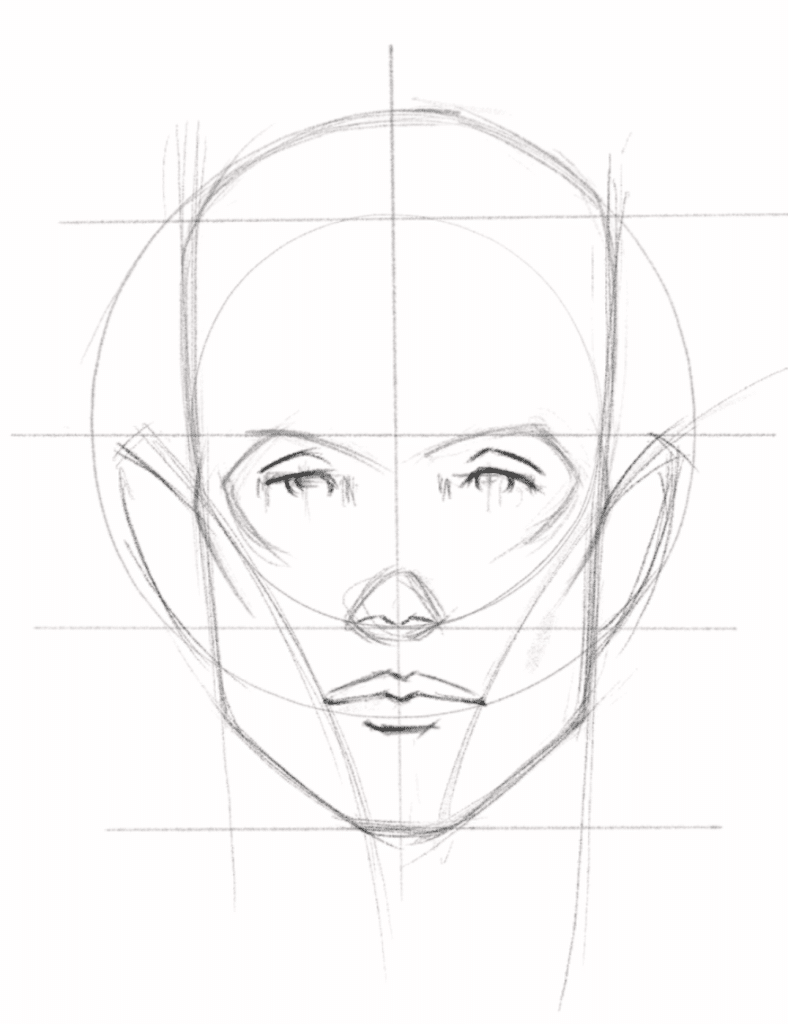
The starting point for this head drawing is a simple circle shape. This circle represents the cranium part of the head. From here, we will add more guides to determine where to place the chin, hairline, nose and other features.

Draw an inner circle

Draw a circle two thirds the size of this within the first circle. A quick side note: this 2/3 measurement has become modern Loomis Head lore but if you read Loomis’s book, “Drawing The Head & Hands”, he actually tends to construct a slightly smaller inner circle—approximately 55-60% of the size of the outer circle. This has implications for your head’s proportions but experiment and see what works best for you.
Divide with a horizontal line
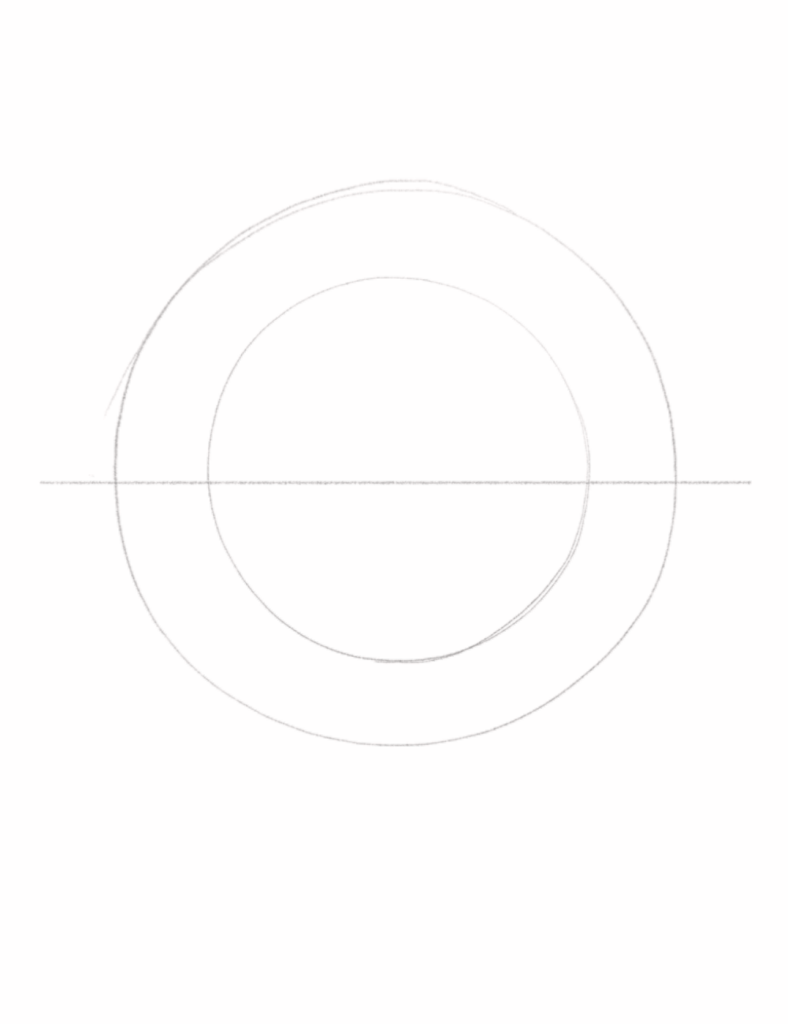
Draw a horizontal line halfway between the two circles, cutting them in half. This will equate to the brow line.
Draw a vertical line
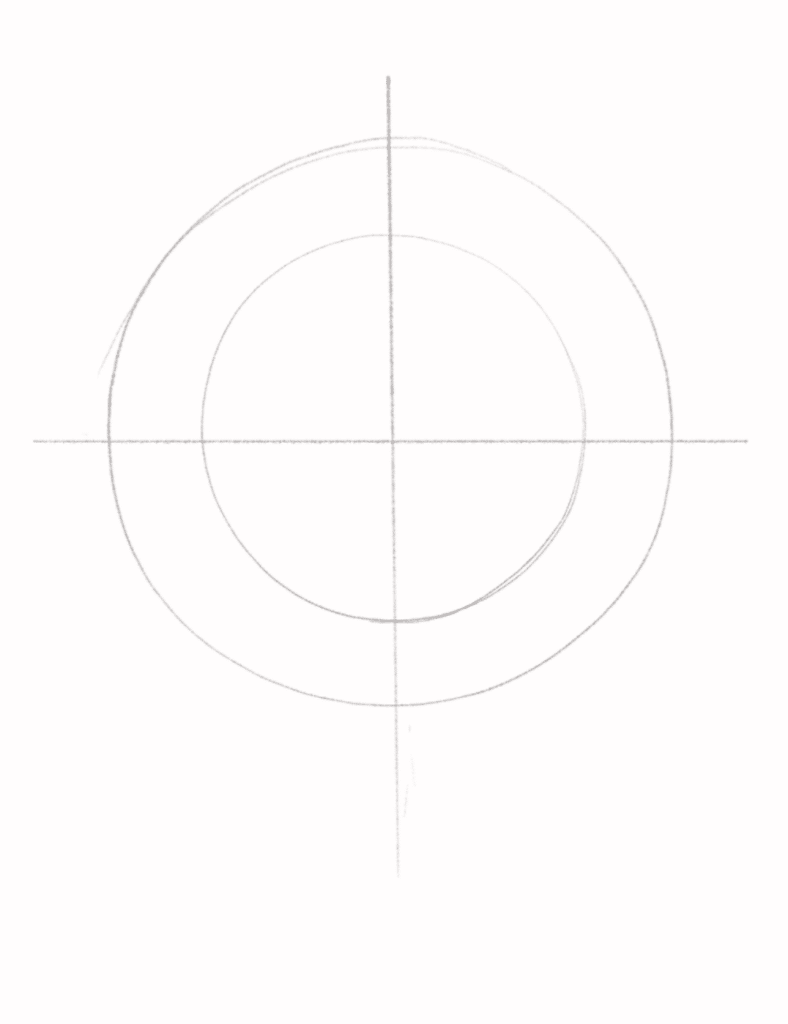
Drop a vertical centre line down the middle of the two circles.
Measure the nose, chin and hair lines
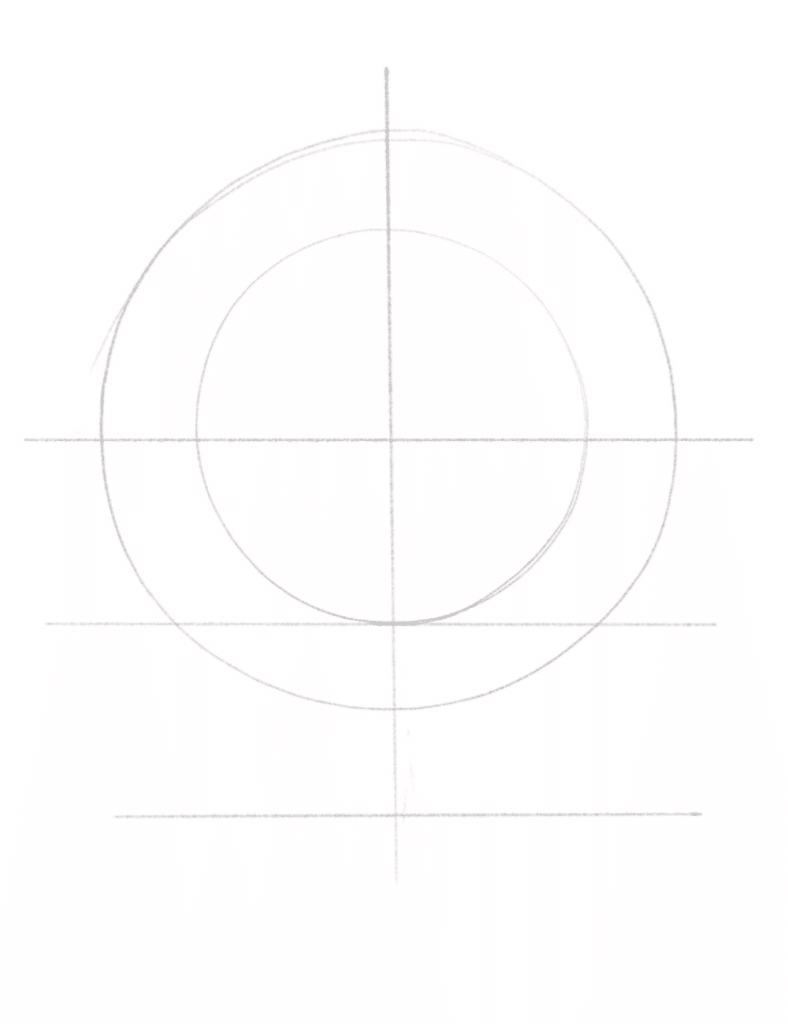
Take the measurement between the horizontal centre line and the bottom of the inner circle and mark off the same distance below the inner circle.
The bottom of the inner circle equates to the nose line and the equal measurement you’ve dropped below this marks the bottom of the jawline.
Mark off the top of the inner circle as well, as this will equate to the hairline. These markers are equally proportioned, as the human face is roughly divided into equal thirds. The harline to the brow measures around one third of the face, then the brow to the nose is another third, the nose to the chin is the bottom third. It’s useful to remember these measurements when approaching drawing the face.

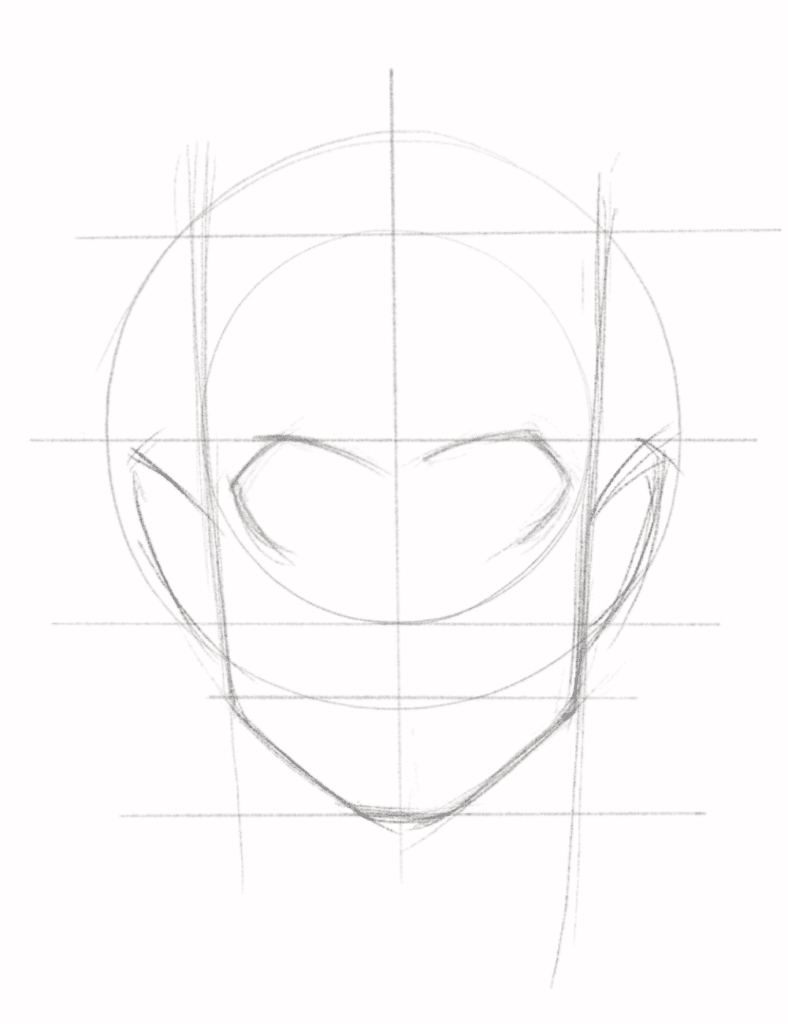
Mark the sides of the head
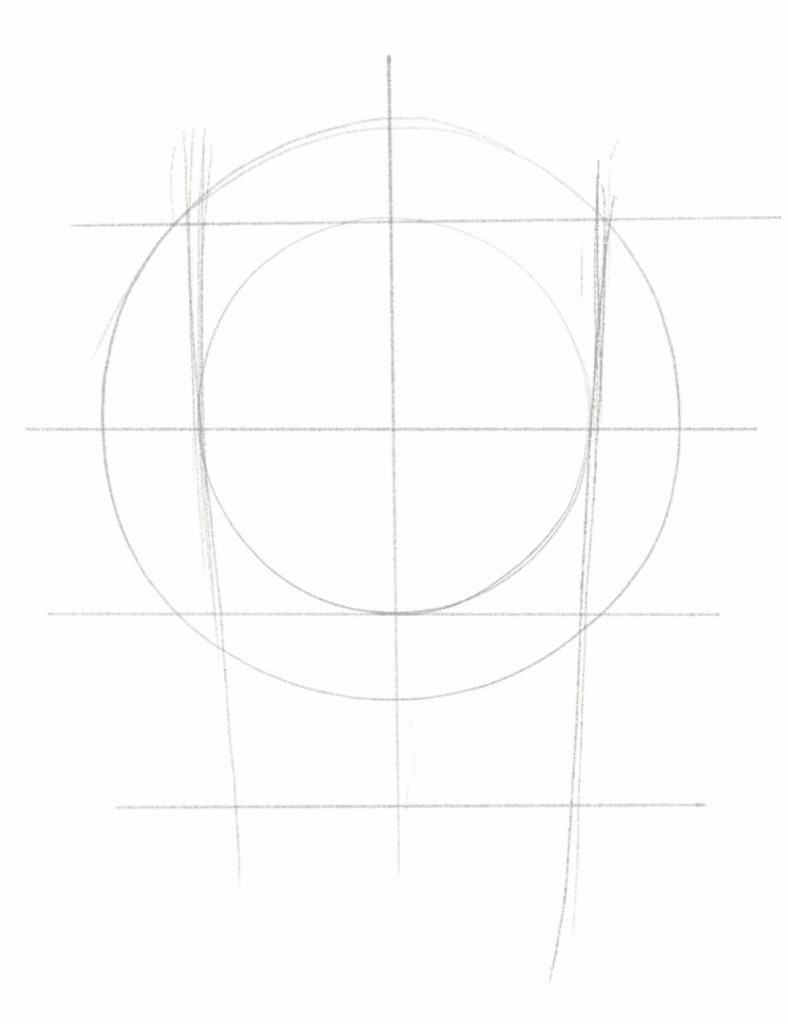
Slice off the left and right sides of the outer circle with vertical lines at the outer edges of the inner circle. These will represent the side of the head.
You can flare these lines down and inward to capture the more typical taper of the jaw and slightly round off the upper half to more accurately capture the roundness of the cranial mass. You might also want to note that the inner circles representing the side planes subtly flare inward which is more noticeable at this angle.
If I want to capture these side planes, I’ll usually just pull in a couple of gently arcing lines from the back two corners of the square forming the side of the head with the extended horizontal of the hairline and estimate where they’d meet the bony protuberances of the brow. You can also play about with the angles of the side of the head and jaw line (either inward or out) to exaggerate or change the character of the head you’re drawing.
Measure the mouth
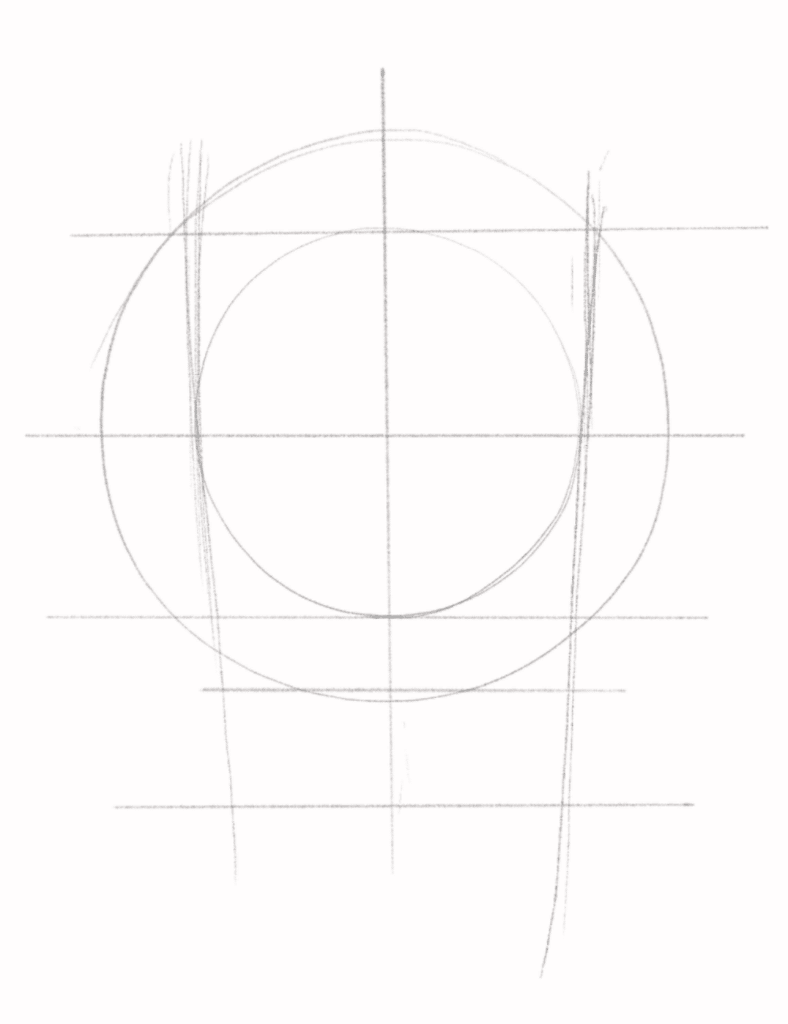
Between the marks representing the nose and the bottom of the jaw, mark a horizontal line approximately a third to halfway down this measurement from the nose. This will mark the line of the middle of the mouth. Extend this line through the vertical lines representing the side of the head, the jaw will change angle slightly below this line from a straight on viewpoint.
The shape of the jaw can dramatically influence the character of the head you’re trying to draw so play about with it and alter this shape to suit.
Define the jaw width

This is where you’re going to have to adjust depending on the type of head you’re drawing. Rounder, smaller and narrower for a more feminine chin or squarer, larger and wider for a more masculine one.
The width of the chin is usually slightly smaller than the width of the mouth. I find that the vertical distance between the middle of the mouth line and the bottom of the chin line can be a good approximation for the width of the chin if you flip the measurement 90 degrees to the horizontal.
Draw the ears
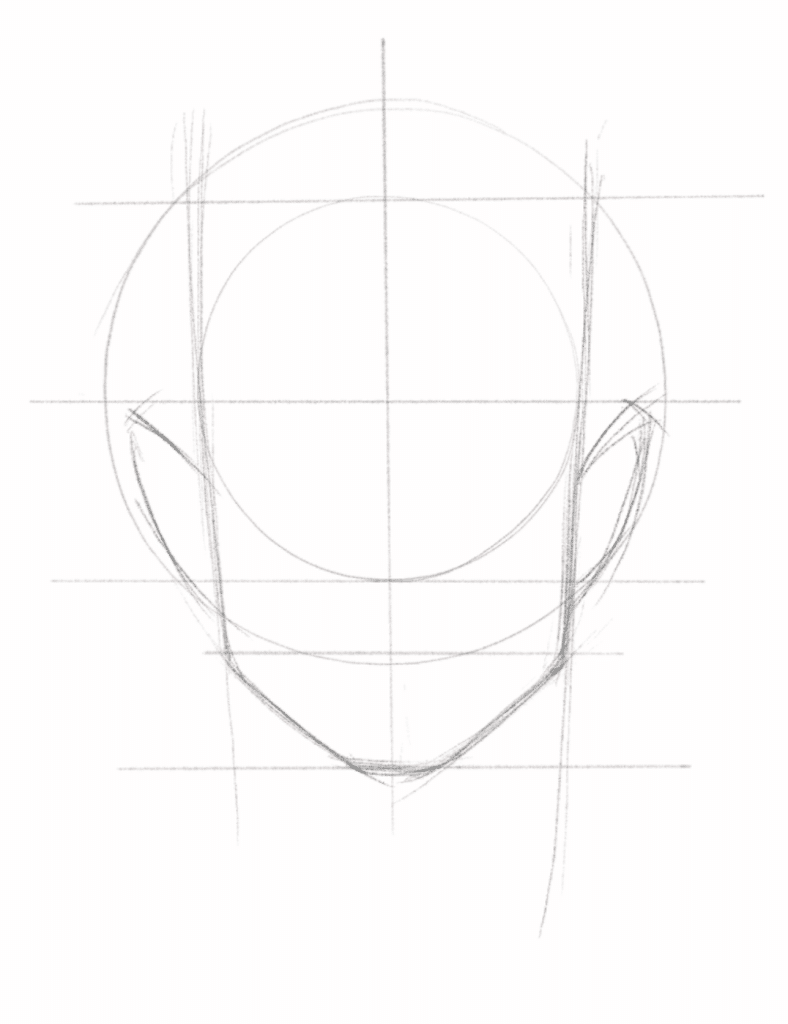
Draw the ears on the side of the head using the distance between the nose line and the brow line for the height of the ears. This actually gives us quite large ears so I generally prefer to do them as little pixie style triangular things and set the top of the ears slightly lower. This is purely personal preference, you may want to draw yours as a more typical “C” shape. You can draw them as elephant ear shapes if you’d like, I’m not judging!
Draw the eye sockets
Now were going to want to chisel in the shape of the eye sockets.. Think of a hybrid hexagonal aviator sunglasses type shape for each socket—more hexagonal for males, rounder and more aviator-like for females. I tend to just indicate the sides of the sockets and the sloping inner angles of the glabella (or ‘keystone’ as its sometimes referred to).
Width of the mouth
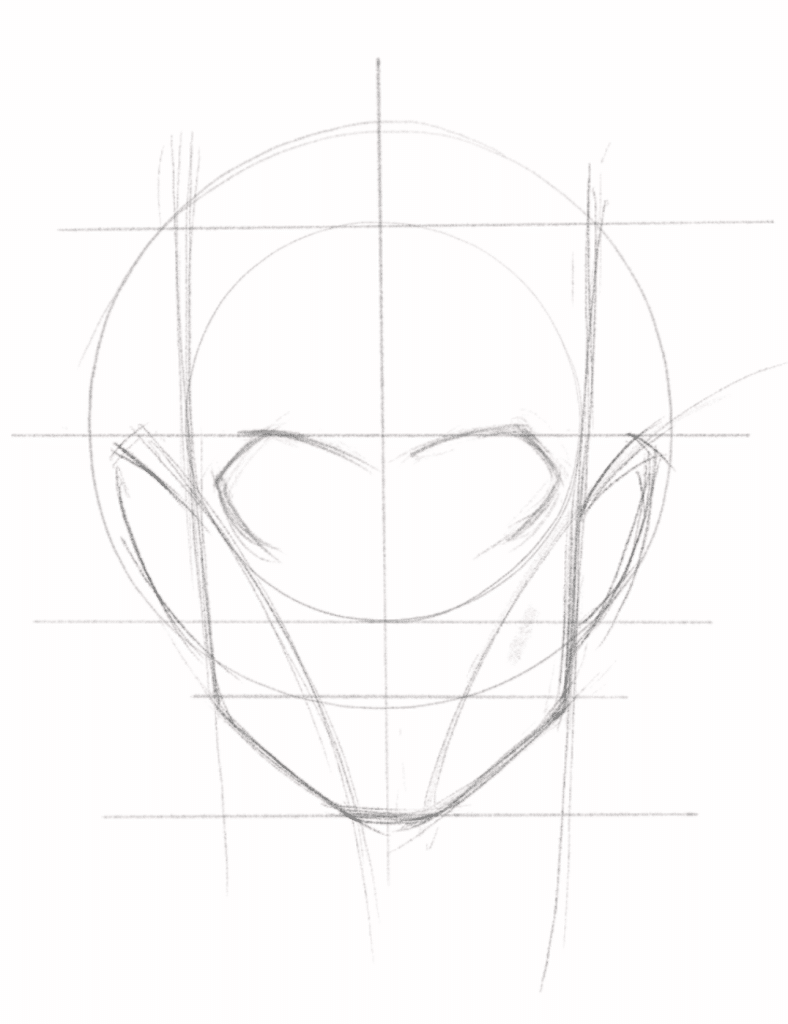
The place in which the rhythm lines of the cheekbones intersect with the mouth line, should give us the width of the mouth. This is approximately one third of the distance down between the nose line and chin line.
Marking off the eye placements
Coming straight up from the corners of the mouth will indicate the centre of the eyes. The head is five eyes in width. Mark these divisions off under the brow line and draw your eye shape. To keep things simple and clean at this stage, I’ll just indicate the top eyelids with a horizontal line.
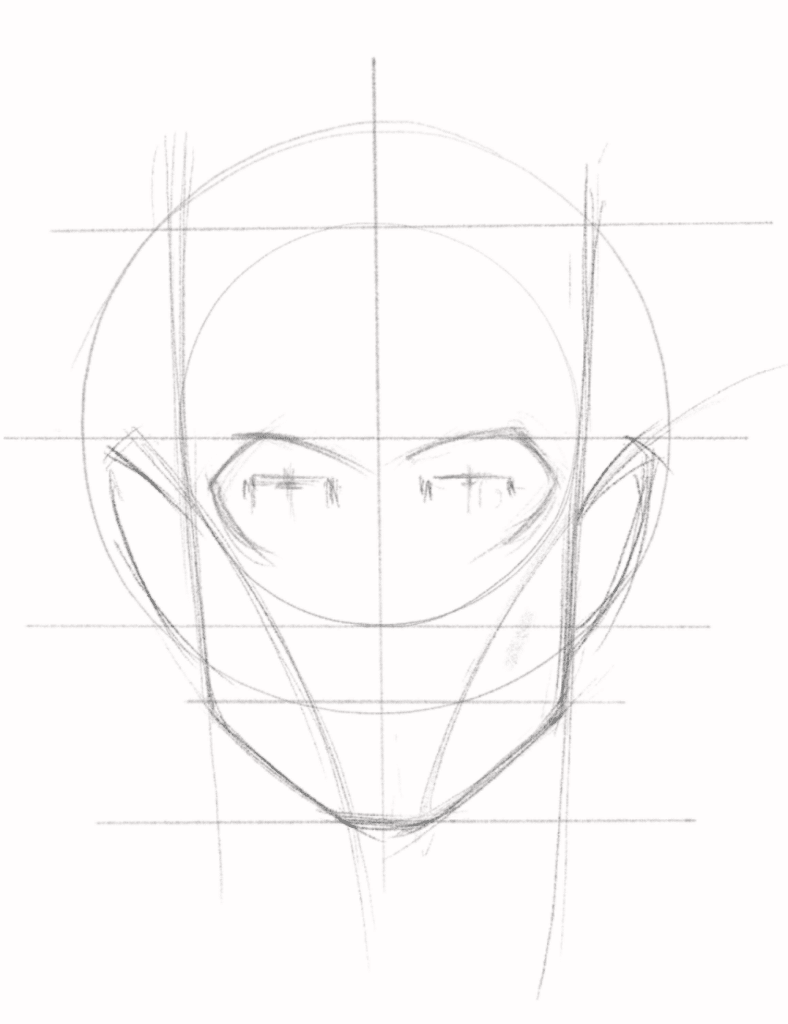
Placing the nose
The width of the nose can be estimated by drawing lines straight down from the inside corners of the eyes. At this angle, I prefer to estimate this and use a rounded triangle shape to get a general feel for the lower part of the nose. If you’re not comfortable with estimating this, you can create a simple straight on version of the planar nose. I demonstrate in the 3/4 view Loomis head tutorial.
Indicating the underside of the nose
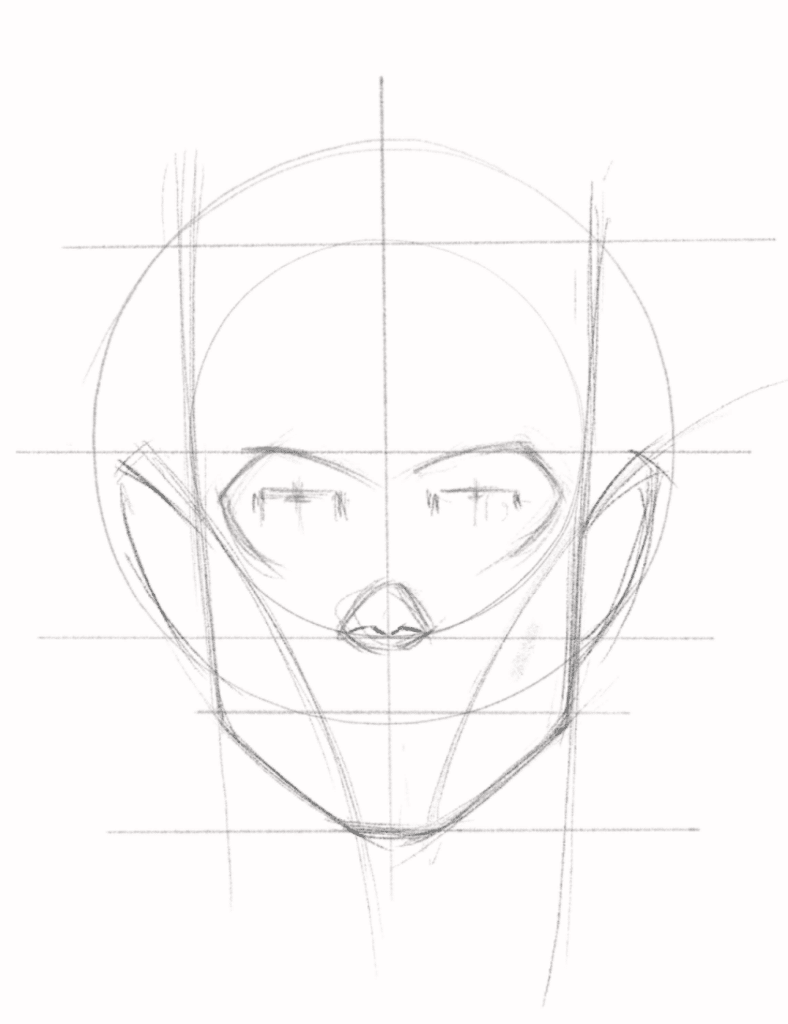
We can now indicate the underside tip and wings of the nose with an elongated “M” shape. With the dip of the “M” representing the tip of the nose.
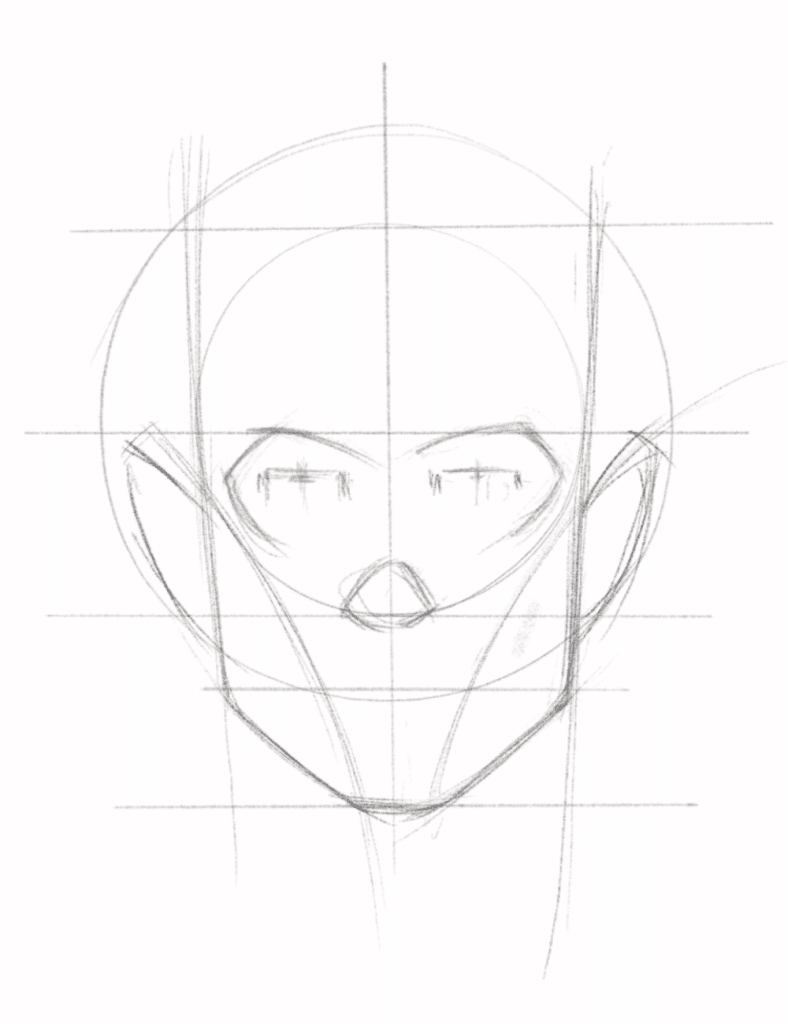
Draw the mouth
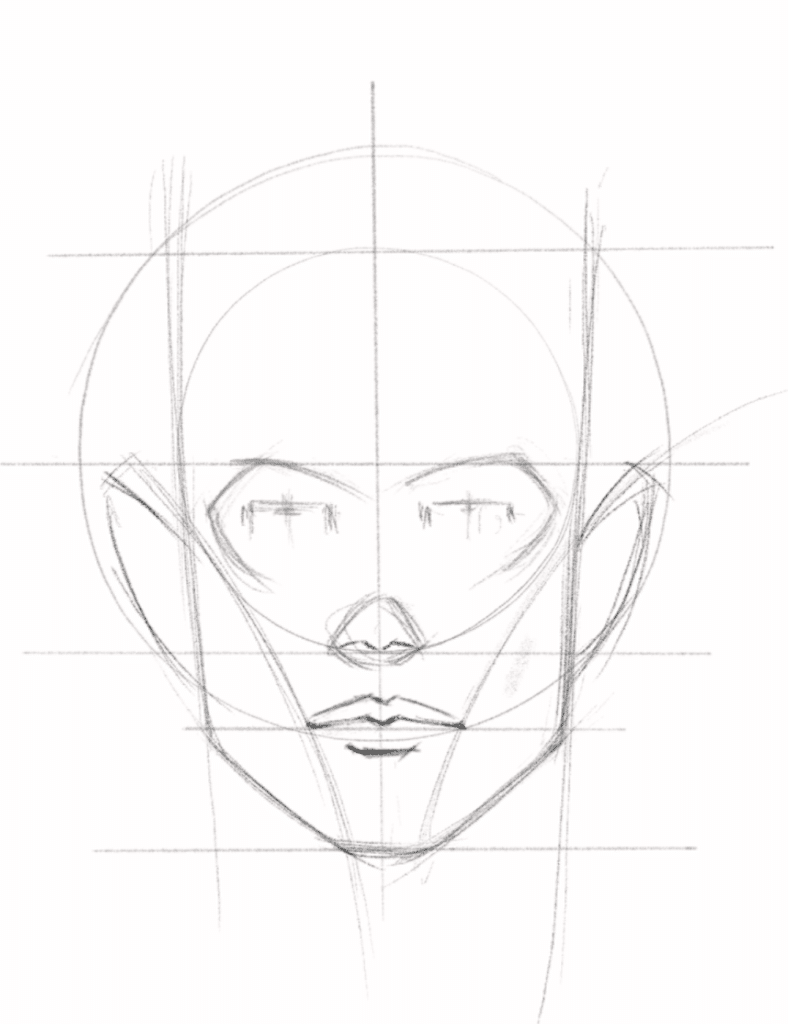
Try to keep in mind that the mouth wraps around the cylindrical muzzle of the teeth. It’s not so apparent in this view, but being aware of it can help prevent the mouth and lips from looking like they’ve been painted on. I’ll use an elongated “M” for the middle of the mouth. Then draw a little upturn of the feet of the “M” to indicate the corners.
The cheekbones
Let’s also draw the cheekbones out a little to emphasise them, using the cheekbone rhythm line as a guideline. A concave cheek bone curve will make our face look a little more masculine. Whereas a convex one will make it look more feminine.
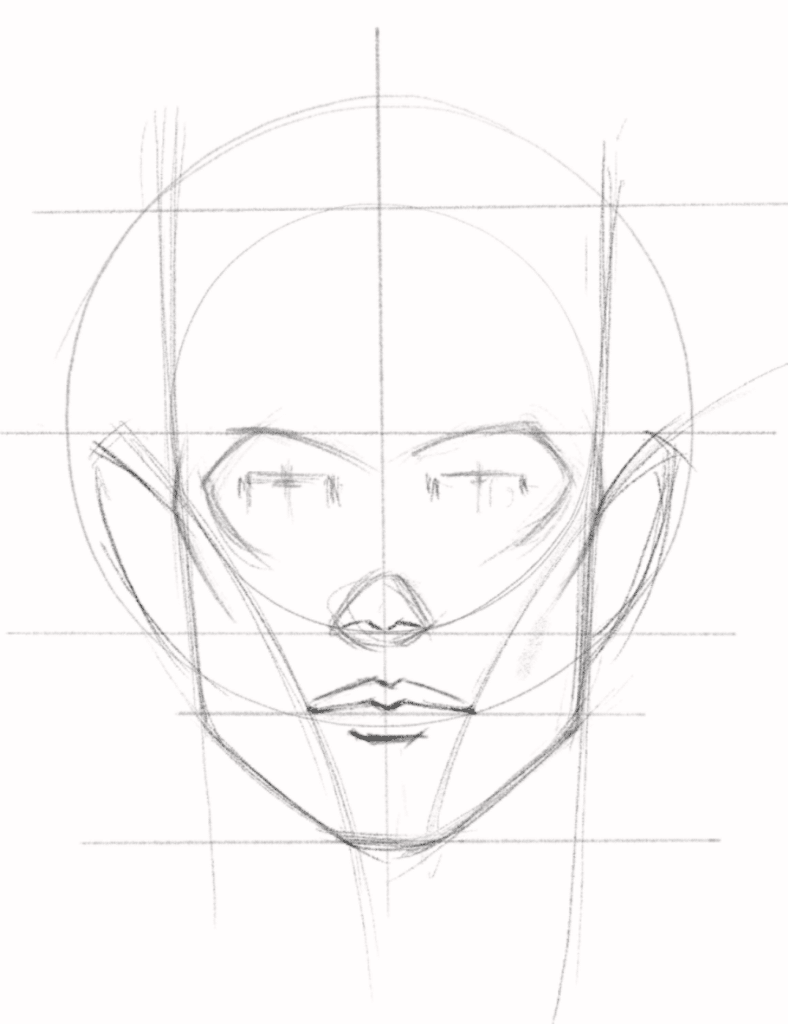
Refining the eyes
Let’s also finish off the face by refining our eye shape. You can use many different eye shapes to create different types of characters or expressions. However, remember that you’re fundamentally wrapping the thickness of the eyelids round the front part of the ball shape of the eyeball.
Don’t over-emphasise the detail of the eye shape at this point though. A couple of angled or curved lines to suggest the upper lids, plus the addition of the bottom 3/4 of a circle to suggest the iris will do for now.
Rounding off the head shape
Let’s also round off the top of the head the side planes a little to suggest the cranial mass.
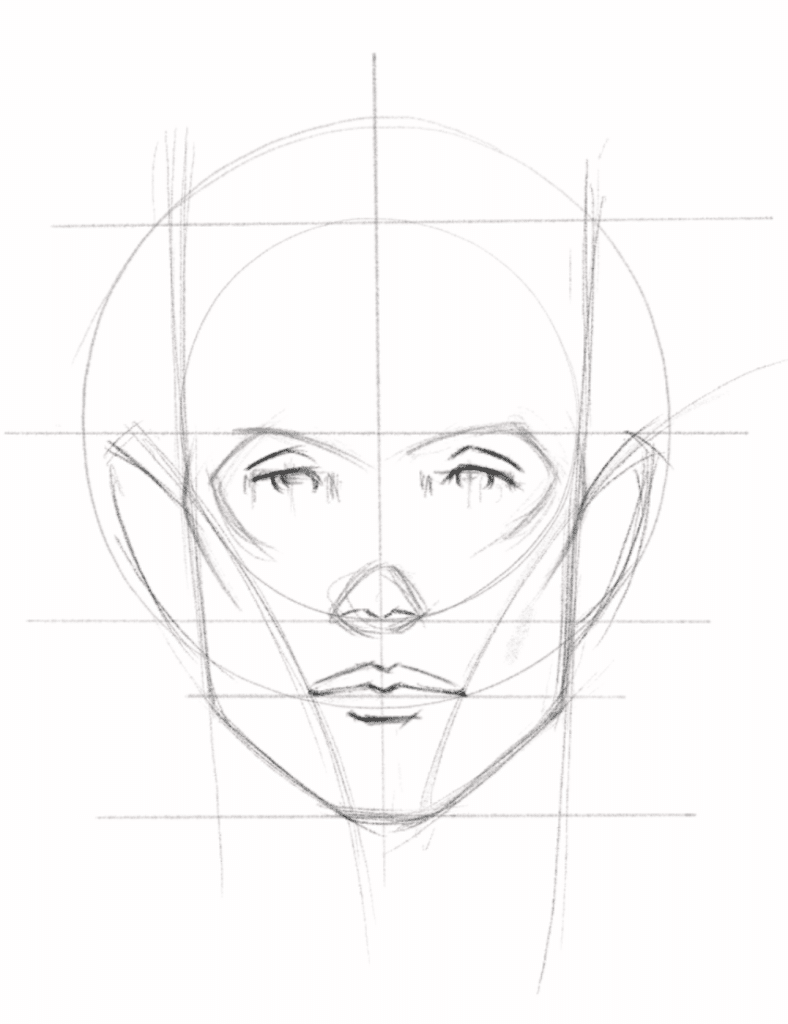
The hair and eyebrows
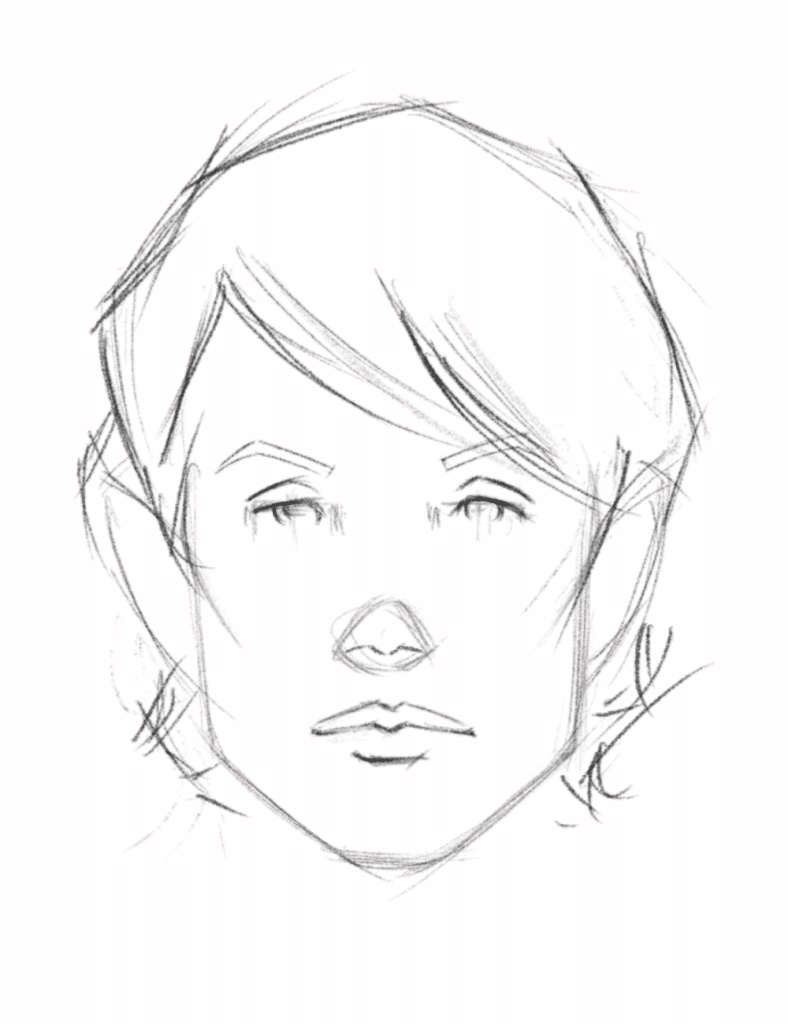
There’s our basic front on Loomis head. I’ll add in a few lines to indicate some hair. I’ll also add in some eyebrows following the general outline of the upper eye sockets. Now, we’ll erase our guidelines and construction lines as needed and we have our basic finished head drawing! If you want to learn how to draw the head using the Reilly Abstraction approach, we have a guide on that too!
Head shading tips
- Get a soft pencil, so you can shade a large range of values in the drawing. 4B or 6B graphite pencils are much softer and appear darker on the paper compared to HB.
- Start with light layers when shading, this is so that you can easily erase mistakes. Then increase the contrast between highlights and shadows as the drawing progresses.
- Kneaded erasers are great for subtly lifting midtones, whilst fine tipped erasers are great for easing details. Then tortillions are an excellent tool for blending.
- Differentiate between light midtones and pure highlights, hardly any reflected light on the face will appear as pure white. Similarly, the darkest shadows will appear sparingly in a drawing. Take time to analyse a reference to gauge the relationship between the values.
- Blend edges of shadows to create realism. Take notice of the shape of shadows on the face, of cast shadows, shadow overlaps and reflected light in shadows.
- Use your favourite shading technique. Hatching or stippling can add texture and rhythm to a piece.
Use the Loomis Method to Draw a Skull
Skull drawings can help artists better understand the underlying anatomy of the head, which in turn, can help with portrait drawing. Follow the tutorial, which starts with the Loomis method of drawing proportions to draw a realistic skull.