
Drawing a side profile from scratch is no easy feat. Accurately placing the features and achieving the correct proportions requires a method and practice.
In this side profile drawing tutorial, learn how to draw a side profile of a face, using the Loomis Method. Construct the head and face from scratch using basic shapes and guides to measure out the proportions. Once you’ve established the structure of the head, you can move onto adding facial features.
I will also give you tips on how to create realistic shadows and highlights to give your drawing more depth and dimension. By following this step-by-step tutorial, you’ll be able to draw a side profile portrait that looks realistic and full of life.
Disclaimer: Fine Art Tutorials is a reader supported site. When you make purchases through links on this site, we may earn a small commission at no extra cost to you.
Watch the video tutorial
Follow along with the video to draw this portrait of a woman’s head from the side profile perspective. I break the drawing process into steps, from drawing the basic geometric shapes for the proportions, sketching the features, then shading the drawing.
Draw two circles

Our starting point for our side profile drawing is a simple circle shape. This circle acts as a guide for the cranial mass, so make sure to draw the circle as large as you want the head to be in your drawing. Then, inside the first circle, draw an inner circle that should be around two thirds the size of the first circle. Start the drawing with light lines, so you can erase the guides later.
Indicate face plane

Divide the two circles in half. This shows us where the side of the face ends and the back of the head starts. Then, drop a vertical line down from the side of the outside circle to indicate the face plane.
Mark the brow line

Draw a horizontal line through the centre of both circles to give the brow line. In this Loomis Method construction, the brow is marked halfway down the circle, representing the head.
Mark the hairline

The next step is to mark off the hairline by bringing a horizontal line over from the top of the inner circle.
Measure where the nose will be

Mark off the base of the nose line by bringing a horizontal line over from the bottom of the inner circle.
Measure the chin position

Take the measurement from the brow line to the base of the nose line. The position of the chin will be this same distance, down from the nose line. The four lines, which represent the hairline, brow line, nose line and chin line, split the face into equal thirds from the hairline.
Measure the mouth

Mark off a line approximately one third down the measurement between the nose and chin line to find the line for the middle of the mouth.
Draw the jaw

Draw the shape of the jaw from the bottom of the inner circle, bringing it down to the chin line.
Changing the angle quite tightly at around a third of the way down between the two horizontal lines. The angle and softness of this curve will make your drawing’s face more feminine or masculine.
Place the ears

Draw a “C” shape between the brow line and nose line mark, adjacent to the vertical centre line to give the ear placement.
Draw the nose

We’re going to indicate the nose in this view with a simple triangle or “N” shape with the typically upturned underside of the nose starting at, unsurprisingly, the base of the nose line where it meets the face plane. The top of the ‘L”—the top of the nose, is slightly inset into the front plane of the face where it then turns back up into the under-plane of the glabella.
Draw the eye

From this angle, I find it easier to place the eye first and indicate the socket around it. A little capital “A” shape, tipped on its side, with a curved crossbar to represent the eye and eyelids from the side view works pretty well here. Locate the eyeball placement just below the brow line and sitting on the line of the inner circle.
The eye socket
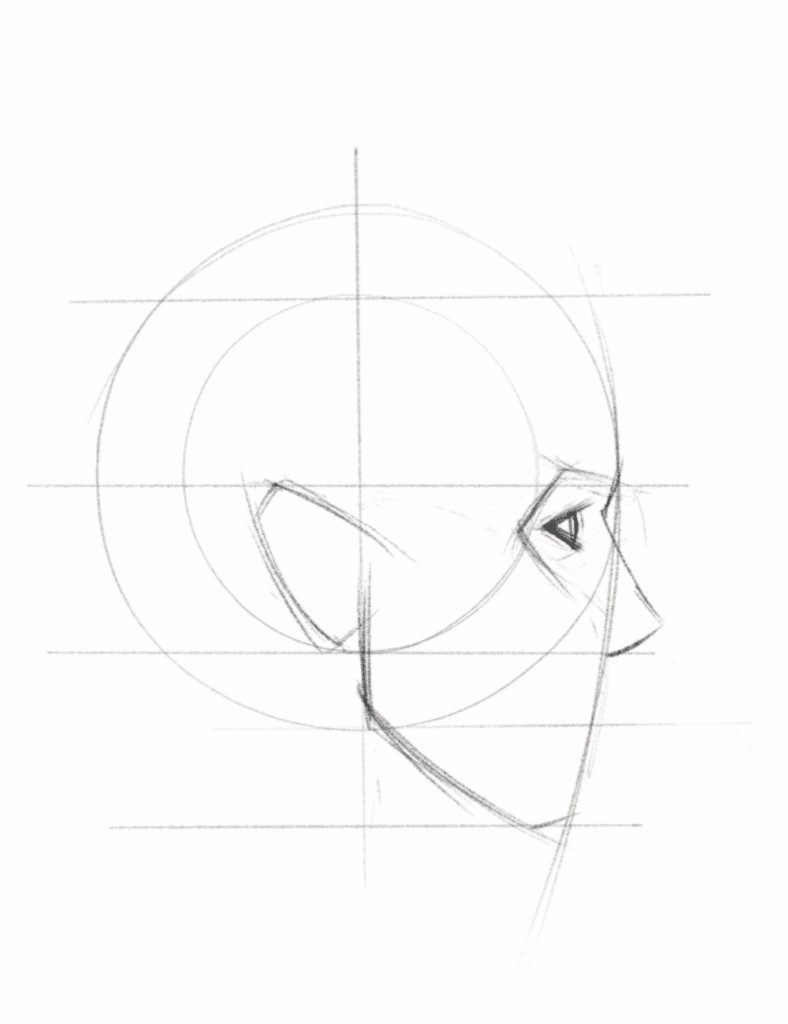
The eye socket can be drawn in as an open arrow shape (with the arrow pointing towards the ear). It sits largely in the top half of the space between the brow and nose lines, jutting slightly above the brow line and aligned more or less with the inner circle (or in the gap between the inner and outer circles if you use Loomis’s original smaller inner circle). Then, from the top of the eye socket arrow, draw a slightly downward angled line. This represents the underside of the browtop and of the eye socket.
Draw the mouth

Bring a slight curve out of the face plane below the nose line to represent the muzzle shape of the mouth. Draw the upward diagonal of the underside of the upper lip. Then connect this with a curve to the base of the nose to indicate the philtrum.
Draw a tipped up “L” shape at a similar angle to the upper lip to indicate the lower lip but adjust the shape for your model. Bring this tipped up “L” in towards the face plane so the upper lip overhangs the lower lip.
Indicate the chin

This only needs to change angle slightly from the face plane. I prefer to square the chin off at the bottom and indicate the underside of the bottom lip at the top of this line.
The hair

I’ll add on some of the volume of the hair. Remember to keep in mind that you want to think of the hair as a full 3D shape with several plane changes. Erase the guidelines and there you have it! A finished side profile drawing. From this contour drawing, you can add shading with a softer pencil. Use whatever shading technique you like—tonal shading will provide the most realistic results.
Shading tips: Side profile drawing
- Before starting the shading, establish where the light is hitting the face. It can help to lightly outline where the shadows will be.
- Use a soft pencil like a 4B or 6B and a kneaded eraser to lift mistakes.
- Start with light shading, then gradually increase the contrast to darken shadows.
- Pay attention to the edges of shadows and midtones and how they blend into one another. Get a tortillion to blend these tones.
Finally
Drawing a realistic side profile requires careful planning and attention to detail. By using the Loomis Method, you can easily create the basic structure of a head and face from scratch. Once you have established the proportions of your side profile portrait, all that is left is for you to add the facial features and realistic shading. With practice, your drawings will improve in no time!
Now that you know how to draw a side profile, why not try drawing a head from the front or drawing the turned head? If you want another method to draw a head, try the Reilly Abstraction approach. With practice, your skills will improve and your drawings will become more realistic. Have fun with it! If you’re interested in learning more about drawing, check out our complete list of drawing tutorials.