
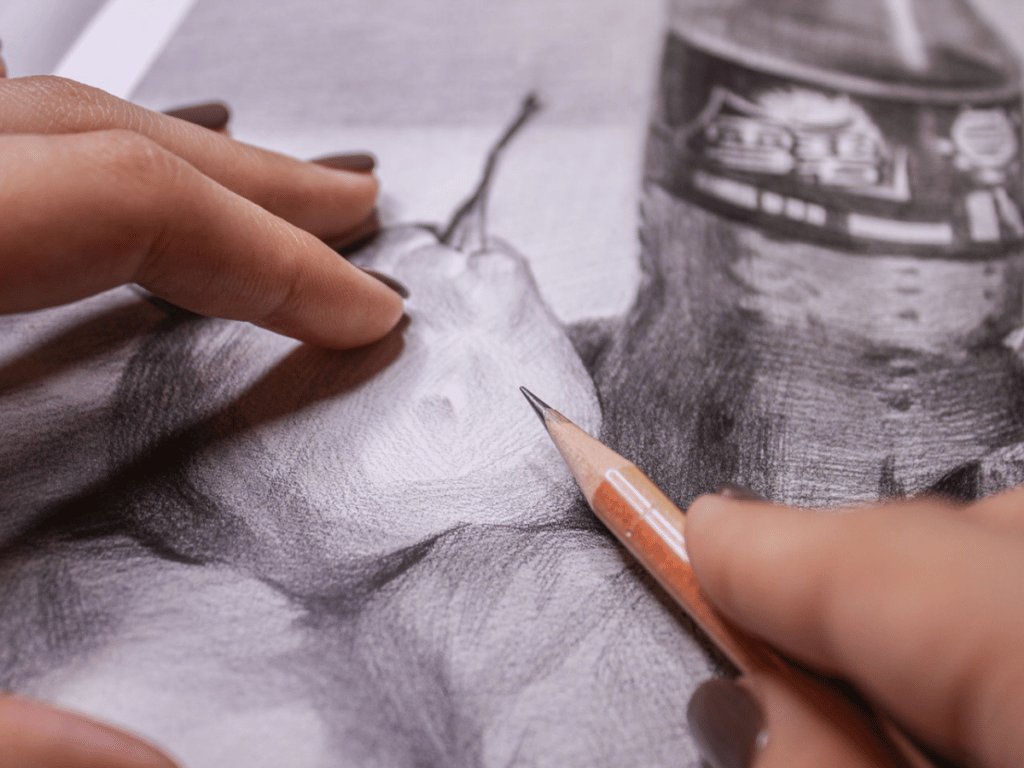
Shading techniques enable artists to create a range of values and a contrast between highlights and shadows. Different shading techniques will produce different kinds of textures, patterns and results.
A drawing is a combination of line and tone. Shading is what takes a drawing from looking two dimensional, to appearing as if it has volume and form. Shading techniques give the artist more control over the values produced, whilst creating texture and depth.
Below are six common shading techniques that artists use to achieve rich tonal variation, with deep shadows and bright highlights. Discover tips for how to master each technique yourself.
Disclaimer: Fine Art Tutorials is a reader supported site. When you make purchases through links on this site, we may earn a small commission at no extra cost to you.
Tonal Shading

Tonal shading is the process of altering the pressure applied to the pencil to create shadows and highlights.
This is the easiest and most intuitive shading technique, that most people use when they start learning to draw.

By applying an even amount of pressure to create a smooth mark, artists can block in large areas with consistent values. Apply more pressure and create darker marks, then reduce the pressure for lighter midtones. For the highlights in a drawing, you can let the white of the paper show through.

The benefit of this technique is that you can create a smooth appearance. For drawings that have smooth surfaces, skin texture or for realistic drawing styles, this technique would be most suitable.
Tonal shading is an excellent technique to use with mediums such as charcoal and graphite. This is because they have soft leads that enable the artist to vary tone with the pressure applied. Artists can also use powdered graphite or charcoal and brush it on the paper. With this, artists can achieve lighter and more even tones for smooth results.
Hatching

Hatching is a shading technique that involves creating thin, parallel lines. These can be used to create areas of light or shadow in your artwork. This technique can be varied by changing the length and angle of the lines, as well as adjusting their thickness and spacing.
The hatching technique can also be used to create movement and direction in landscapes or figures. If you are using mediums like pen, ink, silverpoint, or etching, hatching is a great way to create variation in values.

Parallel hatching appears clean and tidy, with uniform, straight lines. This consistency and repetition creates harmony in the shaded areas of the drawing, which can add interest to the composition of the piece.
Vary the darkness, thickness or density of the lines to create areas that appear darker or lighter. You can change the direction of hatched lines for different sections of the shadows in the drawing to add variety to the piece. Choose to follow the general plane of the contours of the form, or guide the viewer towards a focal point with the line direction.
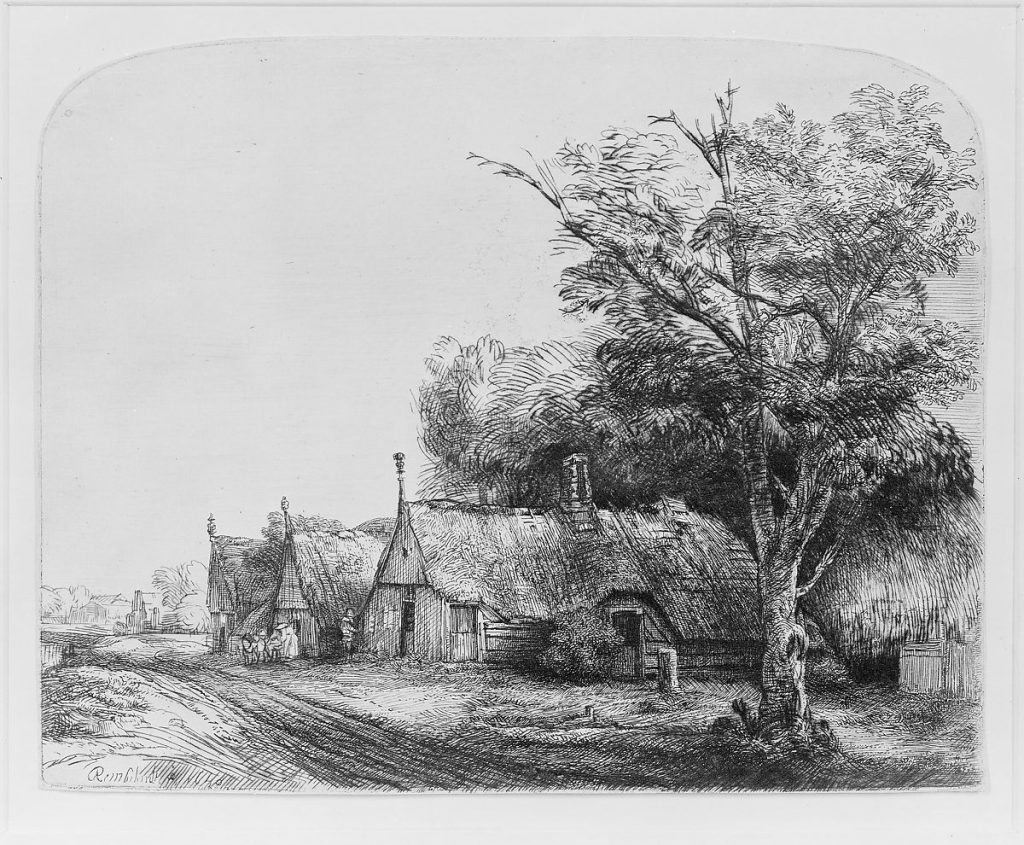
Hatching is a technique that has been used by many famous artists, such as Rembrandt, Leonardo da Vinci and Albrecht Dürer. All of these artists made use of hatching in their artworks to add texture and depth. In this etching by Rembrandt, you can see hatched vertical lines to show the planes of the houses. Then he used diagonal lines to show the flat land, which emulates the texture of grasses. Rembrandt also used cross hatching to build shadow tones.
Cross Hatching
Cross hatching is similar to hatching, but it involves crossing two sets of thin, parallel lines to create a more detailed and textured look. This technique can be used in many ways, from creating subtle shadows and shading to creating bolder textures in your artwork.

Draw the parallel lines closer together to create the appearance of shadow and further apart for the midtones and highlights. You can also vary the amount of pressure applied to the pencil to create darker or lighter areas, dark lines closer together represent a dark shadow area.
Cross hatching is a great way to add extra depth and contrast to your drawings, as it allows you to create multiple layers of tonal variation. It can also be used to create dramatic effects in landscapes, portraits or figures.
To improve your cross hatching skills, start by simply drawing a series of lines. Try to make each line you draw look uniform and consistent. Then, try drawing longer lines, keeping them uniform. Apply pressure to create a series of uniform dark lines. When your lines have uniformity, then move on to challenging yourself to creating the perfect gradient with cross hatched lines. Start by outlining a square or circle shape, then shading the darkest area with marks that are close together and darker in value. Slowly transition to the midtones by applying less pressure to the pencil and spacing the cross hatched marks out more.
Contour hatching

Contouring, or contour hatching is similar to cross hatching. However, instead of drawing crossed, straight parallel lines, draw the lines so that they curve to the contours of the volume of the form that you are trying to represent.

Contour hatching is a shading technique that better portrays the volume of a figure or scene. It adds texture and rhythm to a drawing (and you can use the technique with pen, ink or etching materials), but it adds a sense of realism by showing the complexities of the curvature of the form. Where parallel hatching and cross hatching has a flat effect, contour hatching better communicates the planes of a subject or object.

Contour hatching can be parallel, or crossed and you can layer hatched lines. Vary the direction, darkness and pressure applied to create different effects. Contour hatching can be used in an abstract way to improve the composition of a piece, to represent movement. However it’s more commonly used to depict realism in form.
Stippling

Stippling is a shading technique that involves creating small dots of varying densities to create tonal variations in your artwork. This technique also works well when used together with other shading techniques, as it helps to add extra texture and depth to your drawings.

This technique involves repeatedly dotting the page, with dots in closer proximity representing darker values. It can take a long time to use dots for shading, however once you get into the flow of creating the dotting action, it can be quite meditative. The results can be striking—when the viewer steps away, the dots appear to blur together, creating shadow and highlight tones, however, get up close and see patterns of individual dots.
Scumbling
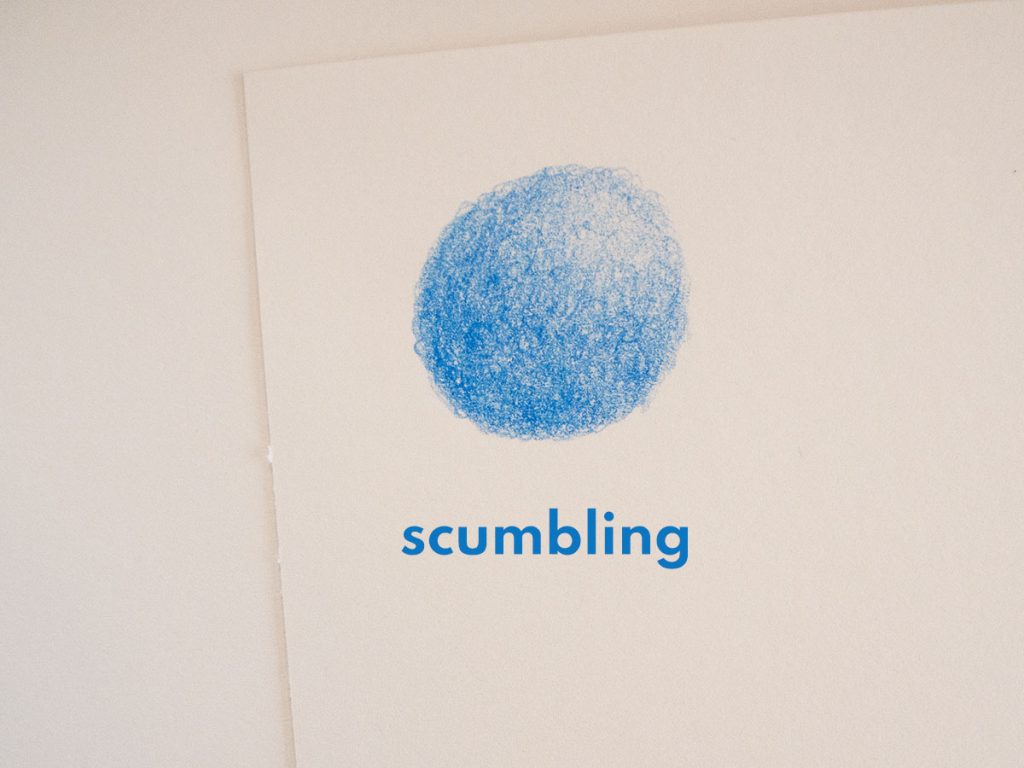
Scumbling is a shading technique that involves scribbling in circular motions to create textured shaded areas. The holes in the circles let the white backdrop of the paper show through, which creates the appearance of light. For darker areas, apply more pressure and create multiple layers of scumbles.
The beauty of this technique is that it allows you to capture subtle details that would otherwise be difficult to achieve with other techniques. Additionally, scumbling can be used to create soft gradations of light and shadow in your artwork, which can help to create more realistic looking drawings. If you want your drawing to look full of life and rhythm, the scumbling technique can introduce enough variety to create a unique appearance.
The benefit of using different shading techniques
By using techniques such as hatching, cross hatching, stippling and scumbling, artists can achieve not only depth in their tones and a large value range, but also texture, movement, rhythm and harmony.
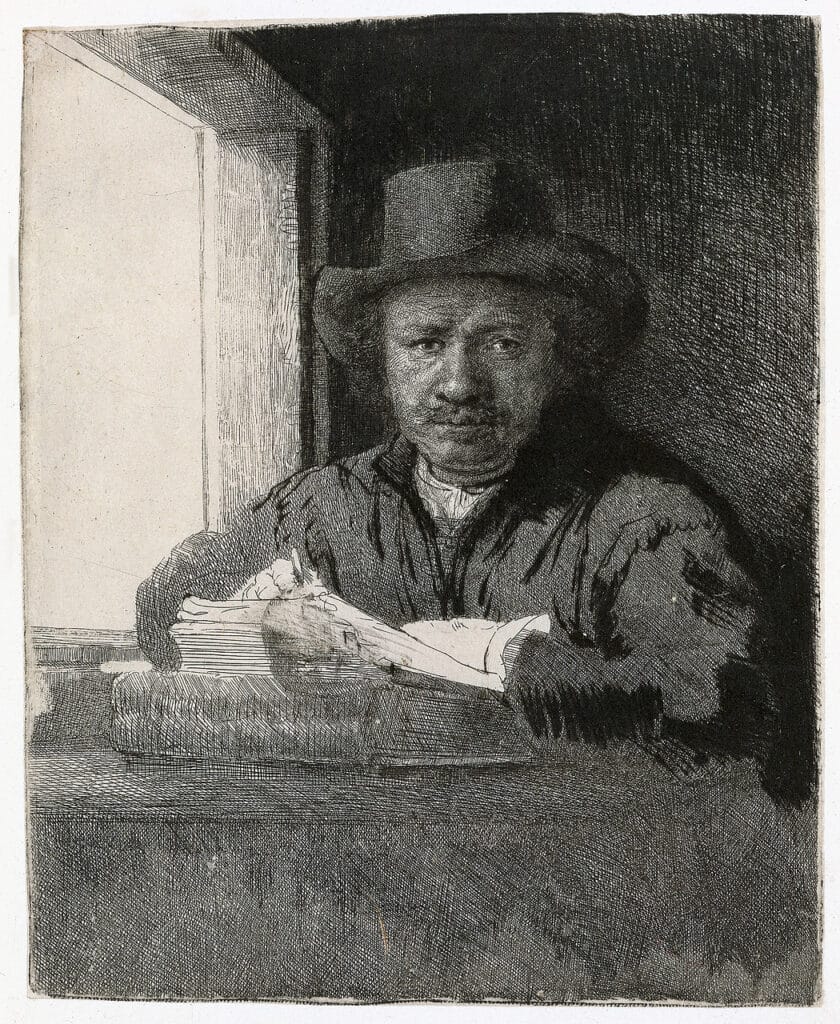
You can use shading techniques like hatching with mediums other than pencil or charcoal, like pen or ink. Artists such as Leonardo da Vinci used the hatching technique because he worked in silverpoint medium. Then, Rembrandt produced multiple etchings over the course of his lifetime in which he used hatching and cross hatching techniques. The etched hatched marks in his Self Portrait Drawing at a Window swirl in short movements to create the shadows of the drawing. This movement and rhythm of this piece lead the viewer’s eyes around the drawing and create an intensity of emotion.
Shading techniques create value
The purpose of shading, is to create a value range in an artwork. Values refer to the relative lightness or darkness of a colour, irrespective of its hue or saturation. Creating a value range, then is about creating light and shadows in an artwork. To create a high contrast between the lightest and darkest values, the tonal shading technique is the most effective. Apply pressure to a soft pencil or charcoal stick to create the darkest values, and leave a lighter touch for the lightest values.
What is shading?
Shading is a technique used by an artist to create tonal variations in their drawings or paintings. By applying shading, an artist can achieve the desired level of contrast between light and dark values.
Shading is a specific method that forms a part of the drawing process, that is used to create the appearance of volume and form. It can transform the depiction of a subject or object, from appearing two dimensional and simply made of contour lines, to appearing three dimensional.
Shading techniques differ from drawing techniques, as shading techniques describe how the artist creates a value range in their piece, to create the appearance of light, dark and volume.
Shading tips
- Start with light pressure, then gradually build the darker values. This way, if you make a mistake, it will be easier to erase. Starting tentatively results in more accurate finished pieces.
- Explore different materials and tools to create various textures. Pastels, charcoal, chalk and ink pens can all help to achieve certain effects.
- Be aware of the edges in your artwork– soft edges blur the boundary between two tones, whereas hard edges provide a more precise definition of where one stops and another begins.
- Experiment with different values and textures to create interesting effects. You can use a combination of techniques, such as hatching and cross hatching, to achieve the desired result.
- Get a value scale to help you determine value relationships better. Spend time looking at your reference, to determine where the darkest values are, the midtones, reflected light, light values and brightest highlights are and their relationship to one another.
How to hold the pencil for different shading techniques
To create long, sweeping, even strokes with a pencil or charcoal stick, the best way to hold the pencil is with the overhand grip. This turns the pencil on its side, so the plane angle between the paper and lead is less than around 10°. By holding the pencil like this, the artist can maximise contact with the pencil lead and paper, rather than using the tip. This works especially well with charcoal or graphite that has been sharpened to a long point and it applies to the tonal shading technique.
The tripod grip is reserved for creating detail. This grip will work best with the stippling technique, the hatching or scumbling techniques, if you want to use the tip of the pencil to create thin lines. This is the most common way to hold a pencil and is the grip that you most likely use for writing.
Practise these shading techniques to improve your drawings
Knowing of and understanding these techniques is the first step to improving drawing. However, it’s only with practice that any artist can improve their accuracy and develop their individual flair. These shading techniques in their most basic form are easy to practise, if you don’t have much time to commit, then start by shading basic shapes.
When you have more time, grab a sketchbook and combine your knowledge of shading techniques with some drawing exercises. This way you can put your skills to the test and move from simple shapes to more complex values.
Finally
In conclusion, shading techniques are an essential part of any artist’s toolkit. By experimenting with different techniques, you can create amazing visuals that bring your artwork to life. So don’t be afraid to experiment and explore these techniques to see which one works best for you!