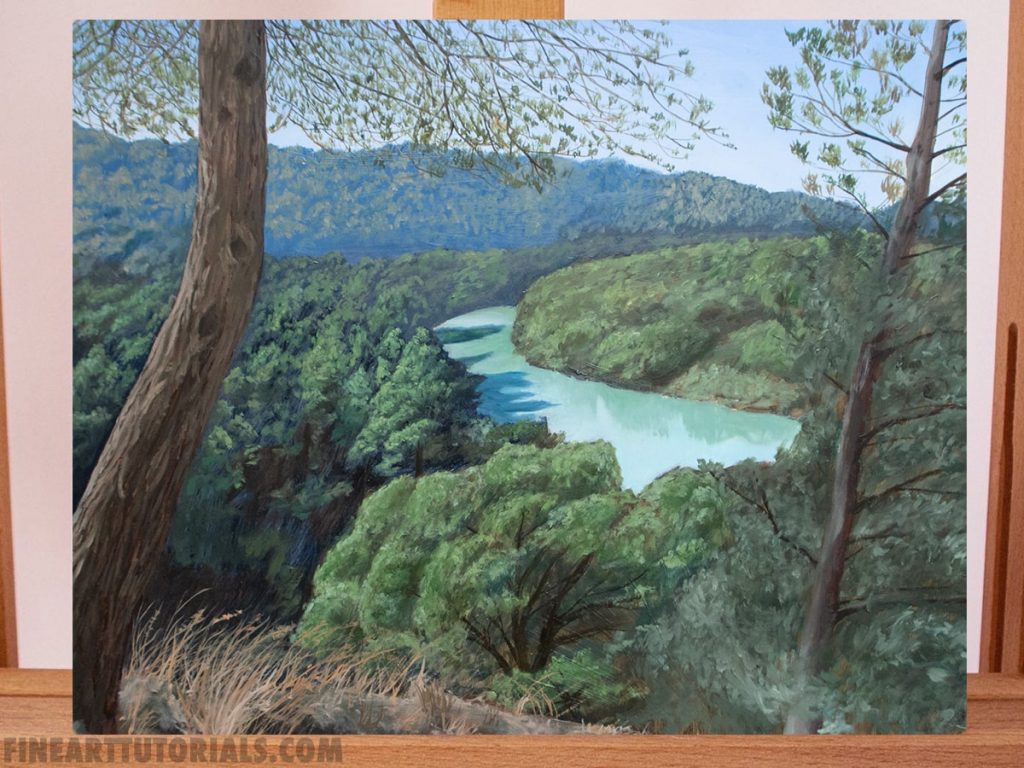
Realism painting doesn’t have to be hard. If you break the process down into steps and put the time and practise into it, you’ll find yourself creating works that look more and more lifelike.
Realism painting is the attempt to represent the subject as it appears in life, without stylisation or artistic convention. Painters will depict life accurately. The subject’s form, colours, details and light will be painted as the artist sees it.
Disclaimer: Fine Art Tutorials is a reader supported site. When you make purchases through links on this site, we may earn a small commission at no extra cost to you.
Why choose to practise realism painting?
There are so many reasons to choose to paint in a realistic style. You might love getting lost in details. It might even be that you want to use it as a foundation to practice with, but build your own style upon.
Realistic paintings really can be breathtaking and completely engrossing for both the painter while they’re painting and the viewer while they’re soaking in the details.
By learning to paint in a realistic style, your painting skills will rapidly improve. Realism artists are forced to analyse their reference and to be accurate with the portrayal of details. This painting style encourages artists to pay attention to subtle tonal transitions and the true colour of the reference before applying colour to canvas.
The skills acquired whilst painting realistically will give you a greater command over your materials. Many painters who ended their careers painting in styles such as impressionism, surrealism and expressionism trained in realism first.
Realism painting isn’t just about copying your reference to a tee, but if you want to do that it’s totally fine too! Many artists who paint with a realistic style will plan their composition, tweak colours and make certain elements stand out. They do this to evoke particular moods and accentuate an atmosphere in a piece. A realism painter can show great technical skill, but also break the rules to create pieces that are novel and unique.
Realism painting supplies
To paint realistically, you will need to make your paint runny. Get soft, fine tipped brushes that allow you to paint details.
Detail brush

Brush shape

Regular sized brushes are for blocking in shapes and filling in larger areas, but the key to painting in realism is having some good detail brushes.
Liner and rigger brushes have long bristles that taper to a sharp, needle point. Rigger is the name given to brushes that are larger, whilst liner brushes are the same shape as rigger but ultra-thin.
Get a liner brush in a size 0 for tiny details, like branches of a distant tree, or single hairs. Rigger brushes that are slightly bigger can be used for a variety of details, like ripples in water and small highlights. The great thing about liner and rigger brushes is that due to the long brush fibres, they hold a lot of paint. With them, artists can draw long, uninterrupted lines across their surface. Another feature of the rigger and liner brush which makes them unique, is that the length of the bristles absorb shakes from your hand. This gives a neater line.
Round brushes are great for detail work too. They have short bristles so they don’t hold as much colour. The brush point isn’t as thin as a liner brush. If you want to fill in small sections of your painting, a round brush would be the best tool for the job. Check out our guide for a more comprehensive look at how to paint details.
Brush fibre
If you paint in oil, sable or synthetic sable is the best kind of brush fibre to buy. This is due to its softness. Natural hair brushes work wonderfully with oil.
Synthetic fibre brushes are more resistant to the alkaline binder in acrylic paint compared to natural hair brushes. So I would generally advise getting synthetic brushes instead if acrylic is your medium of choice.
Get a blending brush
Blending is an essential technique in realism painting. Create seamless gradients and soft edges.
Soft round and filbert brushes would work for blending small areas of your canvas. However, a goat hair mop brush is the best option for blending large areas like sky or background colours.
Smooth surface
A smooth surface is essential for painting in detail. If you work on a cotton or linen canvas, you might find that the texture of the canvas can obscure fine details and break thin lines of paint. When you’re working with soft brushes and trying to paint small details, surface texture can become an obstacle.
A wooden panel that has been sanded and primed is the best surface for painting in realistic detail. Paint will appear perfectly smooth on top. This is a plus if you potentially want to make prints of your work. Surface texture of a wooden panel won’t be visible in print.
You’ll find with a wooden panel that paint will glide off of your brush and you’ll be able to create long unbroken lines. Ampersand panels come primed with a smooth coat of gesso. Paint on these with either oil or acrylic straight out of the box. It means you don’t have to do the surface preparation yourself, which can save a lot of time.
Mediums
A glazing medium to make paint runny and transparent will allow you to paint in detail and layer colour realistically. If you choose to use a rigger or liner brush, you will have to lower the viscosity of the paint.
If you are acrylic painting, get this glazing medium by Winsor and Newton to make paint more fluid.
For oil painters, there are several different mediums you could add to get this effect. Simply adding a couple of drops of linseed oil to the paint mixture will make it runnier, slower drying, glossier and more transparent. Add a bit of solvent to the mix to speed the drying up.
Brush soap
Use brush soap instead of solvent to clean materials. As it conditions brushes, helping them retain their spring and last longer.
Create an accurate drawing before you start
Other than drawing freehand, there are a couple of ways to create an accurate drawing on your painting surface.
The first way is to use the grid method to scale up a reference photo you’ve taken. Read this guide for an in-depth tutorial on how to use the grid method.
Another way of creating an accurate drawing is to sketch out your composition on a piece of paper first, then either use the grid method or transfer the drawing onto the surface. This way, you don’t have to commit to drawing straight onto your surface.
Learn to mix realistic colours
Colour mixing is maybe the most complex and important skill you will learn in painting. I have a more detailed tutorial on how to mix realistic colours, refer to that here.
To mix colours that appear realistic you’ll need a colour palette that gives you a large chromatic range. This will include forms of the primaries, red, yellow and blue to mix together to make other tones and hues on the spectrum.
In pigment form, the primary colours are magenta, cyan, and a mid yellow (transparent yellow by Winsor & Newton is close to primary). To make your palette more rounded you could add a few more tubes to your palette, like ultramarine blue, cadmium red and cadmium yellow. Then you’ll need white and burnt umber or black to make shadows and highlights.
The first step of mixing a realistic tone is identifying and isolating the colour in your reference. This can be tricky to do just from looking at your reference. To help, you could use a photo editing tool like Photoshop to pick the colour from the photo. So you see its true value and tone in isolation.
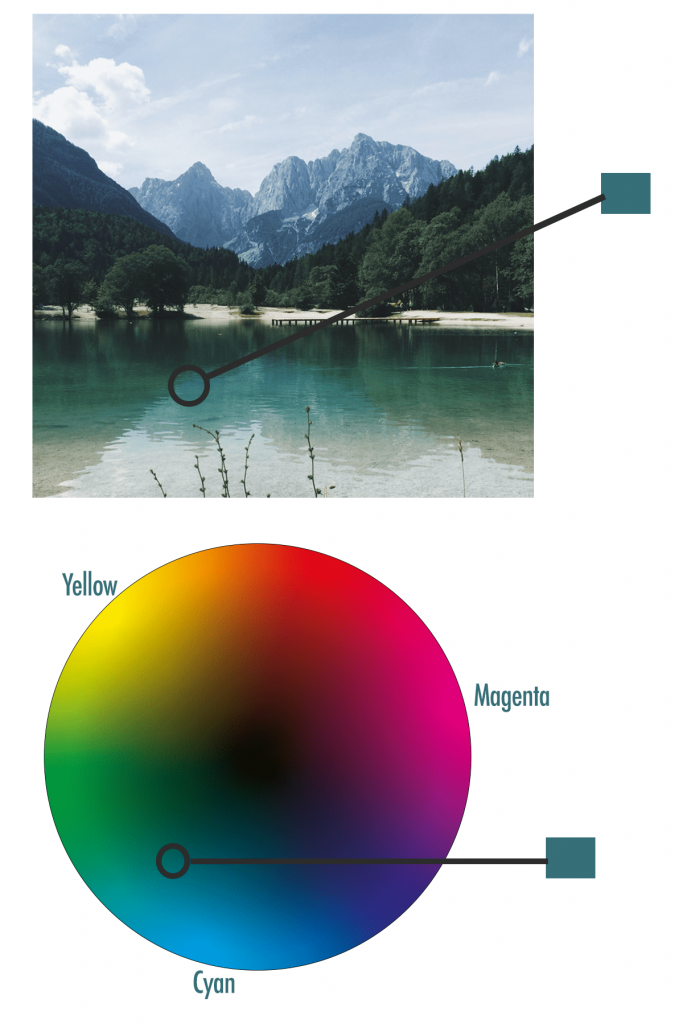
Then, use a colour wheel to gauge where the colour you intend to mix is placed. Its placement will tell you more about how to mix it.
For example, in the example above, the colour is closest to blue, but leans towards green. You’ll know to mix a higher proportion of blue and a smaller proportion of yellow. If you could describe the colour as being more neutral, you need to tone the saturation down by mixing in some of its complementary colour. The complementary colour is the colour that sits on the opposite side of the wheel. In this example, the complementary colour would be magenta.
When making a colour less saturated, create more harmonious tones by mixing complementary colours rather than by mixing in grey or black.
Layer your painting
You can create realistic effects by layering your painting with wet on dry paint. By layering wet paint on wet paint, details may get lost and colours are more likely to muddy together.
Create your first layer by either using the blocking in technique, or creating an underpainting. Blocking in is where you roughly paint the abstract shapes and forms of your painting, broadly in the colours as seen in the reference. Add detail and highlights in the final layers of the painting.
Underpainting is a technique that is a little more complex: it is used in the first layer of a painting, as an alternative to blocking-in. Draw out the structure and form of the painting before applying colour. The underpainting could be detailed and painted in a single colour, usually a fast drying earth pigment. Then transparent layers of glaze are applied on top of the dried underpainting to change the colour and tone of the layer beneath.
By painting layers of glaze to a dry painting, you can achieve fine lines and hard edges.
The fat over lean rule
When layering a painting, always follow the fat over lean rule. This is the principle all oil painters follow to create a sound structure in their painting. Unwanted outcomes like paint cracking or warping can be avoided by layering in this way.
The fat over lean rule is easy to understand. ‘Fat’ oil rich paint is applied over paint that has less oil content. For example, if a paint layer has been thinned with solvent, you could apply neat oil tube paint over it. If you’ve added an extra few drops of oil medium to a paint mixture, apply this over straight tube paint.
It’s fine to use a similar quantity of medium in each paint layer too. Just make sure if you’re using solvent to only use it in the first layers of a painting. Never layer solvent on top of paint that has a higher quantity of oil.
Apply this rule to acrylic paint too. Thicker, slower drying paint should be applied over paint that has been thinned with water.
Add depth to your painting
Realistic looking paintings have depth. Distance and depth can be portrayed in a few different ways. Draw to create perspective, use edges to create variety and use colour to portray distance and focal points.
Drawing perspective
The drawing stage of the painting is where you will establish the perspective of the piece. If your painting is a portrait or landscape, it’s likely to contain mostly organic shapes, so you might not need to create a technical drawing first.
For artists who draw cityscapes and include other more angular subjects like furniture, carefully drawing out the perspective first will be crucial to achieving realism.
The most important thing to consider when painting landscapes is where the horizon line is and how all the other elements in the painting relate to it. A horizon line in a painting also shows the viewer the angle at which they are seeing the different elements of the painting. If tall buildings tower high above the horizon, it gives the clue that the person is viewing the scene from a low perspective.
Edges
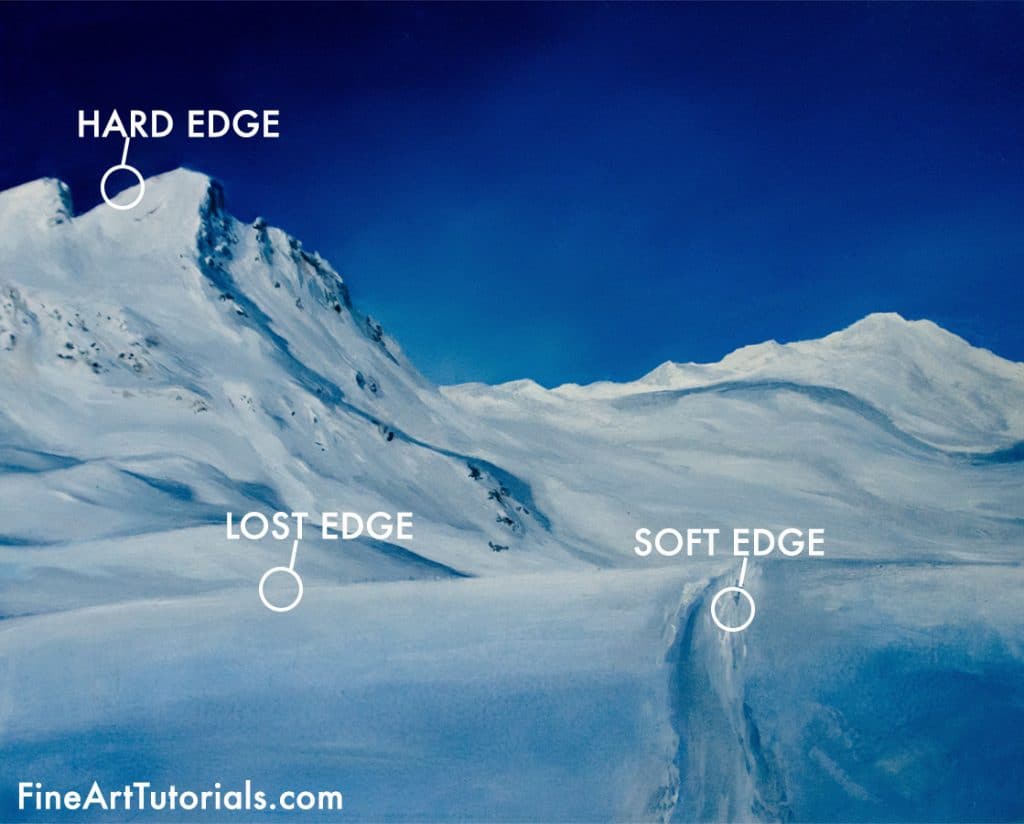
An edge is the separation between two landmarks in a painting. The landmark could be a feature on the face in a portrait, a mountain or even a leaf on a tree. In painting, edges can appear hard or soft. A lost edge is one that completely blurs into the shape of another landmark, where no distinction can be seen between one element and the other.
Edges of objects further away can appear softer and more blurred than those closer. Due to atmospheric perspective, we see objects with less clarity as they recede into the distance. For example, you will likely not be able to make out the edges of individual leaves from a distance, the colours will appear to meld together. If you want to bring another tree forward, create sharper edges around the branches and leaves to bring it into focus.
By varying the edges in a painting, you create depth of field and show which elements are closer to the viewer.
Colour
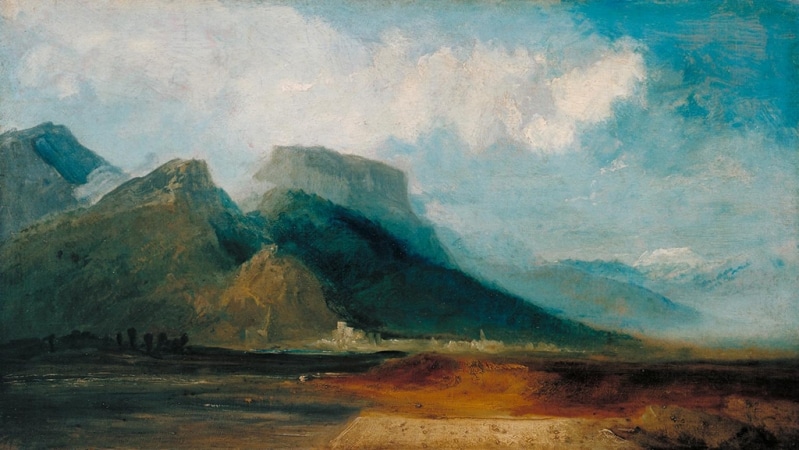
Atmospheric perspective makes colours on the horizon appear muted. The value (the relative light or darkness) of objects nearer the horizon will appear reduced.
The colour and value of a distant mountain will assimilate to the colour and value of the sky. It will appear much lighter than a mountain in the foreground and colours such as the green of trees or the greys of rocks will appear blue. The edges of the mountain would appear softer too.
The reason distant objects appear subdued and lighter is due to the way light scatters in the atmosphere. Light that has a high frequency like blue, is more likely to be reflected by molecules in the air than lower frequency light. So when you look at a distant mountain, you’re not looking at the colour of the mountain but the scattered blue light coming from the air in between you and the mountain.
Realism painting techniques
There are two techniques that spring to mind when practising realism painting. Of course, incorporate as many techniques into your painting as you see fit, but learning about these two should help you to achieve an even more realistic effect.
Glazing
Glazing can be done in oil, acrylic or watercolour. This technique involves applying a transparent layer of paint onto a dried painting. The purpose of the technique is to alter colours of the previous paint layers, add fine details and increase luminosity.
When opaque layers of paint are applied to a surface, they can sometimes appear flat and lacking in depth. By using transparent pigments suspended in oil to alter the colour profile of the painting, you can increase saturation and darkness of the scene to add depth.
Use glaze to alter the colour of small or large areas of the painting, to add warmth, or to darken. For example, if you are painting a sunset that you feel needs some warmth, you could create a fine glaze of Gamblin’s transparent orange in sections of the sky you want to brighten. Or if you’re painting a landscape with pink peonies, you could paint small sections of magenta glaze on the petals to show the brightest, most saturated areas. Use a glaze of burnt umber to deepen a shadow on a portrait to make it appear more intense.
Any transparent pigment can be used as a glaze. There are several glaze recipes you can use in oil, any medium or combination of mediums that makes oil runnier and more transparent will work. For acrylic, Winsor & Newton make their own glazing medium.
If you want to learn more about this technique, read our guide on glazing.
Blending
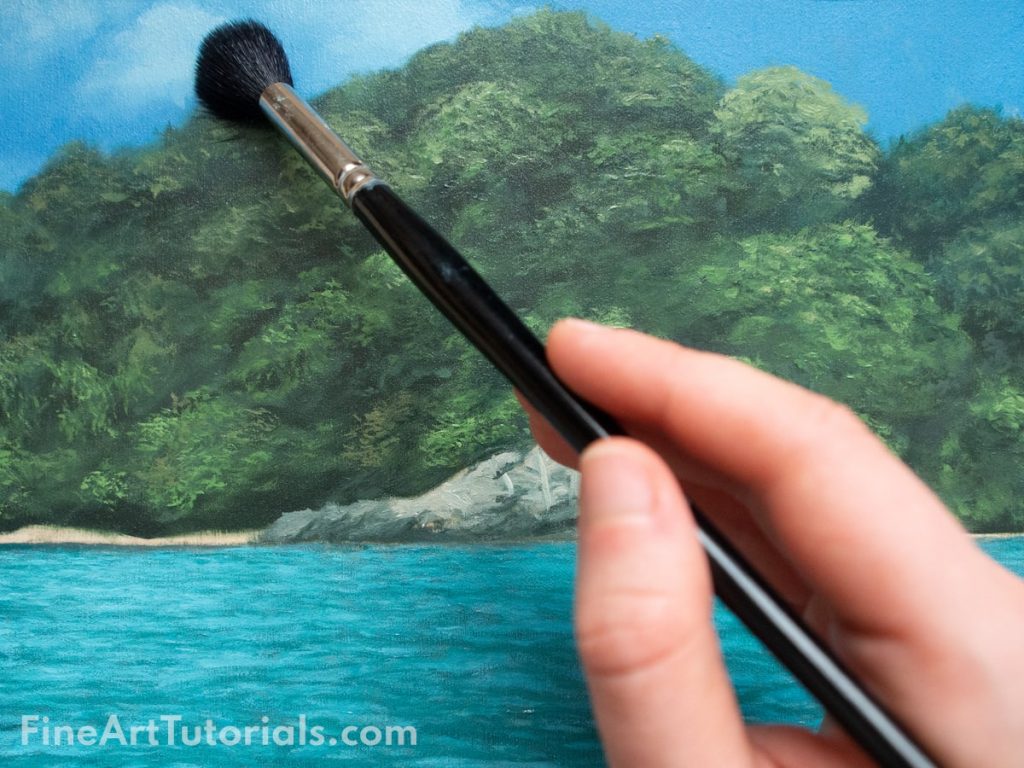
Another technique that is essential to learn if you want to start realism painting is blending. Get a soft filbert or goat mop brush to blend skies, seascapes or skin tones into gradients.
Oil paint can stay wet for days at a time, so is perfectly conducive to being blended. If acrylic is your medium of choice, get a slow drying medium to enable you to blend for longer. The technique is simple, ensure that the colours are wet and with a dry, soft brush, blend them together.
Extra reading
Art Fundamentals
Glean a better understanding of the fundamentals in art, with detailed guidance on how to use composition, light, depth, shape and perspective.
Color Choices: Making Color Sense Out of Color Theory
This book explains the complex subject of colour theory with practical demonstrations of how to interpret, mix and combine colours.
Anatomy for the Artist
Portrait painting takes time to master, this book provides brilliant references and six classes which demonstrate how to observe and draw people. Simblet outlines how the structure of the body can affect its appearance in portraiture.
Realism painting tutorial: Pin it!
If you’ve found anything on this site especially useful, you can make a donation to me through PayPal. I take a lot of time to research and write each topic, making sure each tutorial is as detailed as possible and I make all my content freely available. Any small donation (even the price of a cup of coffee!) can help me to cover the running costs of the site. Any help from my readers is much appreciated :).
Follow the link in the button below to support this site.