
How to paint details: for beginner and intermediate painters. This tutorial is aimed at those wanting to paint fine details in either acrylic, watercolour or oil paint. The principles are the same, despite which medium you choose.
Painting details can feel like a struggle when you have the wrong materials for the job. The right materials can assist you in creating accurate and precise shapes, edges and colour transitions.
Once you have the right supplies, manipulating the paint on the surface will feel smooth and easy. Follow along until the end to learn some essential brushwork techniques and other tips for detail painting.
Disclaimer: Fine Art Tutorials is a reader supported site. When you make purchases through links on this site, we may earn a small commission at no extra cost to you.
How to paint details: Get the right supplies
The formula to create successful detail paintings is the right brush, a smooth surface and fluid paint. The specific materials that will be suitable for your painting will depend upon the types of painting medium you’re using and the type of details you want to create.
The best brushes for small details
There are many different types of brushes for painting details. Choosing the smallest brush isn’t always the best option.
When working with a viscous medium like oil paint, small, soft brushes have a hard time releasing the paint from the bristles. The paint consistency needs to be altered to be much more fluid. Longer bristles can help with holding more paint so that artists can achieve unbroken strokes across the surface.
The best brushes for painting details will be on the soft side and for watercolour, brushes need to be extra soft.
Small detail brushes for acrylic painting
The best detail brushes for acrylic painting will have synthetic fibres as the binder used in acrylic paint can damage natural hairs.
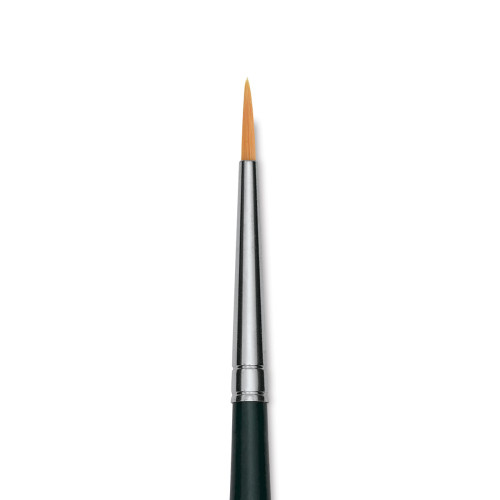
The Da Vinci Nova brushes have extra soft synthetic bristles and come in liner varieties. To use these with acrylic, make sure that paint is fluid.
Isabey Isacryl Acrylic brushes come in a pointed round variety that go down to size 2/0. They are simultaneously springy and easy to control.
Best detail brushes for watercolour painting
Kolinsky sable brushes are often regarded as the best brushes for watercolour painting, as they are versatile. Paint large washes or tiny details. The kolinsky sable brushes have a brilliant elasticity, as they retain their point whilst painting with their characteristic ‘snapping’ action. Kolinsky sable brushes are usually on the expensive side and there are other options if you don’t use animal products.
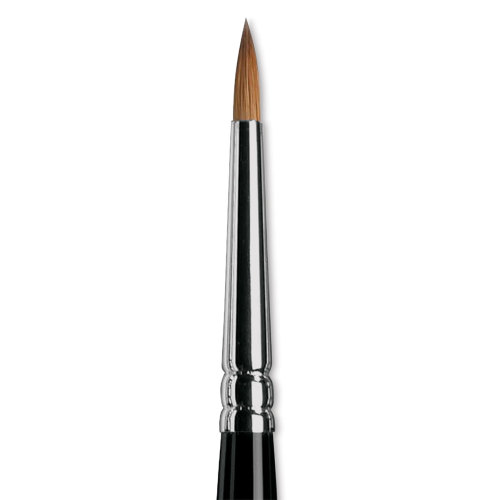
This Winsor & Newton series 7 kolinsky sable brush is a luxurious feeling brush, with a tapered point, they are made from the finest kolinsky hairs. This is reflected in the price, but this brush is worth the price tag. Because each brush holds its point so well, you don’t need to buy an extra small size. Medium small sizes such as 4 or six, will retain a sharp point but hold more water.
A cheaper, but quality option if you want a kolinsky sable brush is the Escoda Optimo brush. These are an excellent choice for fine detail artists. The bristles are longer than other brushes, which gives more control when painting long thin lines. The brushes are incredibly soft and are great for outlining but perform equally as well for large washes.
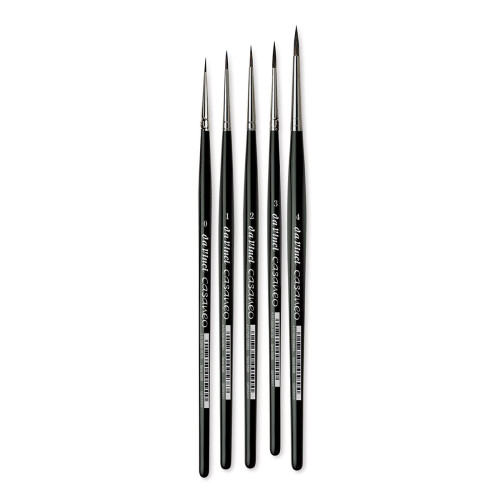
For artists who would rather use synthetic brushes, the Da Vinci Casaneo brush is unmatchable in its quality and softness. It comes in handy travel brush format for those who enjoy plein air watercolour painting. The bristles of the brush mimic the properties of Kazan squirrel hair, which is soft but has excellent elasticity for moving acrylic or watercolour paint across the canvas.
Detail brushes for oil painting
Oil paint brushes are made from either natural hair or synthetic fibre. Long handle brushes work best for oil painting; as painters usually paint with their surface propped up at an easel, the length of the handle is used to balance in the hand.
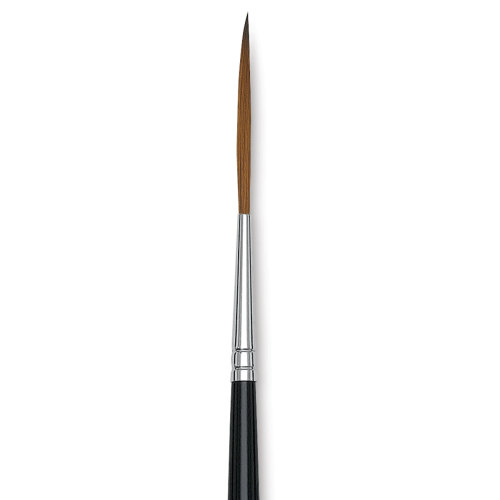
The red sable brushes by Da Vinci are the perfect option for artists working in detail. Soft yet flexible, they will move paint with low viscosity. The brushes come in a rigger shape which is great for lining.
Da Vinci Nova synthetic brushes work beautifully with oil paint. They are soft but also quite springy. This means you can work with low to medium viscosity paint. The brushes are great for detail work and blending.
Detail brush shapes
Round brushes are great for covering small areas of the surface. The bristles are short and taper to a point, which means that you won’t be able to paint long unbroken lines, as the bristles cannot hold enough paint. For filling in small areas of detail, and finishing touches, such as highlights, these brushes would work perfectly. Pointed round brushes are an ultra sharp variety of round brush.
Rigger and liner brushes have extra long bristles that taper to a needle sharp point. Because the bristles are long, they can hold more paint, meaning that you can make unbroken marks across the canvas. Use these types of brushes with ultra fluid paint. Not all brands create this style of brush, but Da Vinci Red Sable brushes have a liner variety, so do Escoda Optimo for watercolour. Use liner brushes for outlines in illustrative pieces, hair in portrait pieces, blades of grass for landscape pieces. Personally I use liner brushes all the time to paint distant ocean waves. For acrylic painters, Da Vinci Nova brushes come in a liner variety.
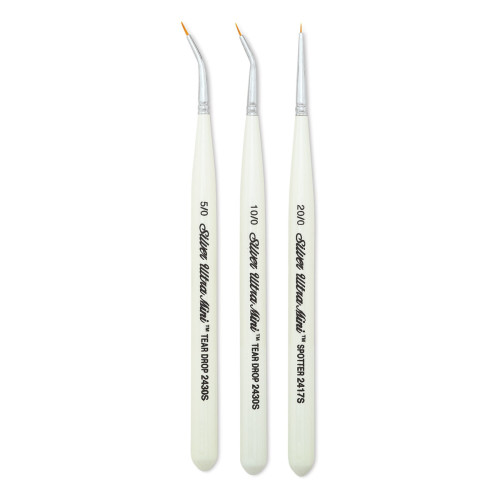
Spotter brushes have ultra short bristles and often come in miniature sets. They can’t hold as much paint as round, pointed round, rigger or liner brushes, which makes them great for a spotting action. If you’re completing a stippling piece, or if you want to use your detail brush for the tiniest of subtle highlights, like the highlights on a water droplet on a glass, this brush will work for you.
Surfaces for small details
Surfaces for painting details should be extra smooth. Often details can get lost in the weave of a cotton canvas if it hasn’t been sanded and primed to have a smooth texture. Cotton canvas has a natural prominent weave, whereas linen canvas is naturally smoother. Although this doesn’t mean that linen canvas is without texture.
The first option for painting on a smooth surface, is to buy a linen or cotton canvas, sand it and prime it with gesso to even out the surface texture. This method is suitable for oil or acrylic painting.
If you want to paint straight onto a surface, without worrying about doing any preparation in advance, smooth primed wooden panels are a brilliant option. They are smooth, archival quality and details look beautiful on the surface. These panels by Ampersand are excellent quality and they come in cradled varieties, so you can hang them straight away without having to frame.
Gessobord is another option for artists who want a no fuss, ultra smooth painting experience. They are slightly cheaper than the smooth primed panels and you can get an uncradled variety which are great for plein air painting. Brushes will glide over the surface, leaving details looking pronounced and unobscured.
For watercolour painters, the best type of paper for detail work is hot pressed paper. It is smoother than cold pressed paper allowing artists to paint in finer detail. However, it can’t take heavy washes in the same way that cold pressed and rough paper can.
Alter the consistency of the paint for detail work
When painting with oil or acrylic, it’s pretty necessary to use a medium to extend paint when working with fine details. This is because they are both naturally thick, viscous mediums. To paint in small details, the paint needs to be on the runny side.

Linseed oil will reduce the viscosity of oil paint, making the paint runnier and easier to work with. Colours will spread further on the canvas and the film will look glossier in appearance. When painting, make sure to stick to the fat over lean rule, where oil rich paint is layered over paint that has been thinned with solvent. If you want to make paint dry faster, you can mix linseed oil with some solvent such as turpentine or odourless mineral spirits. There are plenty of other mediums you can get that reduce viscosity, check out our oil paint mediums guide to find more.
Use fluid acrylics to paint in extra small details. Soft body acrylics like Liquitex Soft Body are runny and smooth, which makes working in detail feel easy. Golden makes a range of paint with various viscosities. Golden Fluid Acrylic is runny, doesn’t retain brush marks, would be perfect for using with a liner brush and great for the glazing technique. You can also use mediums such as glazing medium. To reduce viscosity with acrylic, read more in our acrylic paint mediums guide.
Watercolour is the least viscous medium you can get, which makes it brilliant for working in detail. Thin watercolour with water, or opt to use a medium like gum arabic which will retain the working properties of the paint, without compromising the structure of the paint film. Adding too much water to watercolour paint can make the film brittle. Read more about watercolour mediums in our guide.
Get a mahl stick
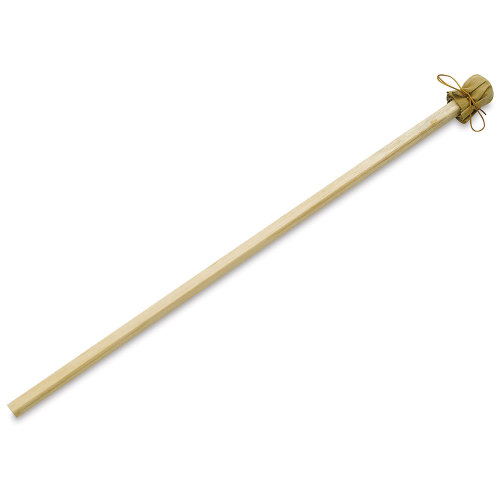
There are many benefits to using a mahl stick for those who like to work at an easel, especially for those who like to work large.
A mahl stick is a metre long pole with a pad at one end. It’s used as a hand support, so artists can rest their hands while standing to work. This is especially useful for areas of fine detail where a steady hand is required. Rest the mahl stick at the top of the canvas, or on the side, adjust its position depending on the section of the canvas you’re working on.
Mark making and texture painting
The important thing to understand about detail in painting, is that the aim is to create the illusion of detail. In most paintings, when you get up close, you will see an abstract swirl of brush strokes. It’s only when you step away that all the elements come together to make a whole.
Get creative in finding tools to use for painting different textures and mark making. For example, an old stiff brush that has splayed could be used to paint grass texture. Use it to lay down the appearance of multiple blades of grass at once, rather than using a liner brush to paint every single blade one by one.
This wonderful concept that makes oil painting feel faster, more immediate and efficient is illustrated perfectly by Stuart Davies.
Create a drawing before you start
To create accurate paintings with a lot of detail, it can help to complete a drawing before you start. If accuracy is especially important for you, for example if you’re working on a commission piece, it could help to use the grid method to create your drawing. Otherwise, it should be fine to roughly sketch where the different elements will be to establish the composition before you start.
How to paint details in landscape paintings
Use a rigger brush or a dagger striper for detailing blades of grass. Grass tones can be mixed with sap green, or if you’re using a primary palette, a mix of ultramarine, lemon yellow, burnt umber and zinc white. Blades of grass are often thicker at the bottom. So apply more pressure for the base of the blade of grass, gradually apply lighter pressure then lift the hand to trail off.

Use a similar tactic for painting branches, with a liner or rigger brush, apply light pressure to create organic shaped branches. They are often thinner at the tip and thicker where they join. Make sure the paint is fluid—add some extra linseed oil when painting with oils.

For details on leaves, or flowers, a round brush, or pointed round would work well. A small flat brush is the perfect tool for painting details on rocks.
For details in ocean waves, a slightly larger rigger brush (size 4) would give you the ability to make ripples, choppy peaks and foam. Vary pressure applied to the brush to create a varying thickness in the strokes.
How to paint details in portrait paintings
To paint a long thin line, like a single hair or eyelash in a portrait, you will need to make the paint extra fluid. Add a high proportion of linseed oil to oil paint, to acrylic paint add a glazing medium, or gloss medium. For painting elements like single hairs, it’s fine for the paint layer to be on the transparent side, as hairs can appear this way in life settings. Use a rigger brush, load it up with fluid paint and apply light pressure and draw it across the area you want the hair to appear. A rigger brush will work fantastically for applications like these as the long hairs absorb unwanted shakes from the hand, making the marks appear more smooth. Of course, you don’t need to paint all the hairs with a single brush! Just for those final details to add a touch of realism.
For details like reflections in the eyes, or highlights on the skin, use a small round or spotter brush. Often you’ll only need a small amount of your highlight colour which will be off white. Dot in the pupil or iris wherever you see reflections in your reference.
Paint edges
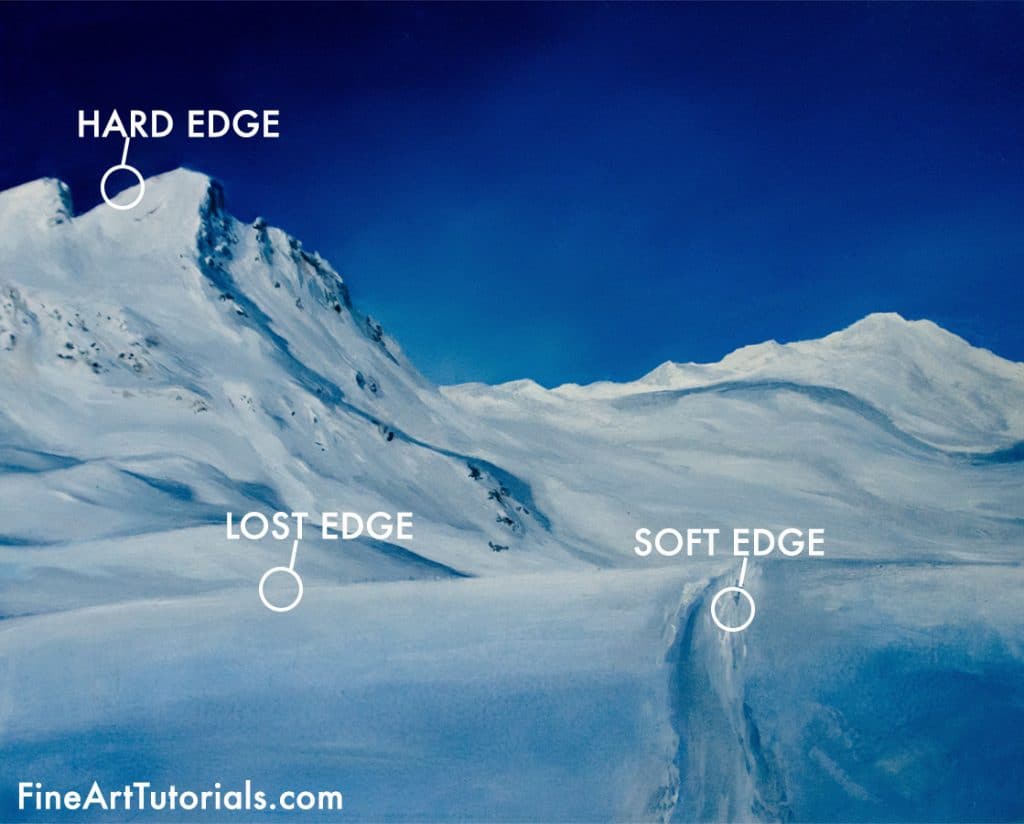
If your aim is to paint realism, there’s much more to the painting process than just portraying detail. Think about how these details relate to one another.
The edges of some details will blur into one another—these are called soft edges. Hard edges are where there is a distinct colour or value change between one element and the next. Lost edges will have an indistinguishable gradation between one element and the next, so it’s not clear where one element starts and the other ends. Pay attention to how each detail relates to the other elements around it to portray distance, depth and atmosphere in a painting.
Layer the details
To start a painting in layers, you might start by blocking in broad shapes. When painting in acrylic or oil, most painters leave the details and highlights until last.
Use masking fluid with watercolour to mask off areas that you want to remain light then peel it off and colour over them at the end.
To paint realistic artworks practise colour mixing
Painting in a realistic style with lots of detail is just as much about accurate colour mixing as it is about achieving those tiny details. Read up on colour theory and learn how to elegantly neutralise the paint to make colours appear as they do in life settings. Details really are just the cherry on the top of a realistic painting, as the impression of realism can be created much more successfully with accurate colour mixing.
Paint details with watercolour: How to control the paint
The difficulty with watercolour painting, is that watercolour seems to have a mind of its own. Colours can bleed into one another and move across the page in ways you don’t anticipate. You can harness the properties of watercolour and watercolour mediums to make the paint behave how you want it to.
For example, if you’re creating some detailed highlights, you can mask the paper. Use masking fluid or wax resist to prevent watercolour pigment from adhering to, or staining the paper. This means you can work on your whole painting, leaving essential details until last.
Use a lifting medium to separate layers and make it so that staining pigments don’t adhere to the paper properly. This way you can lift any pigment you like completely from the paper to reveal highlights.
Painting details: Further reading & learning
Check out these Realism Painting Classes on Skillshare.
‘Landscape Painting: Essential Concepts and Techniques for Plein Air and Studio Practice‘: This book will teach you how to render realistic landscape scenes without agonising over detail.
‘Disrupted Realism‘ is a book filled with inspiration of contemporary artists, taking the genre of realism to new levels.
Prints of the feature image ‘Horizon’ are available here.
If you’ve found anything on this site especially useful, you can make a donation to me through PayPal. I take a lot of time to research and write each topic, making sure each tutorial is as detailed as possible and I make all my content freely available. Any small donation (even the price of a cup of coffee!) can help me to cover the running costs of the site. Any help from my readers is much appreciated :).
Follow the link in the button below to support this site.