
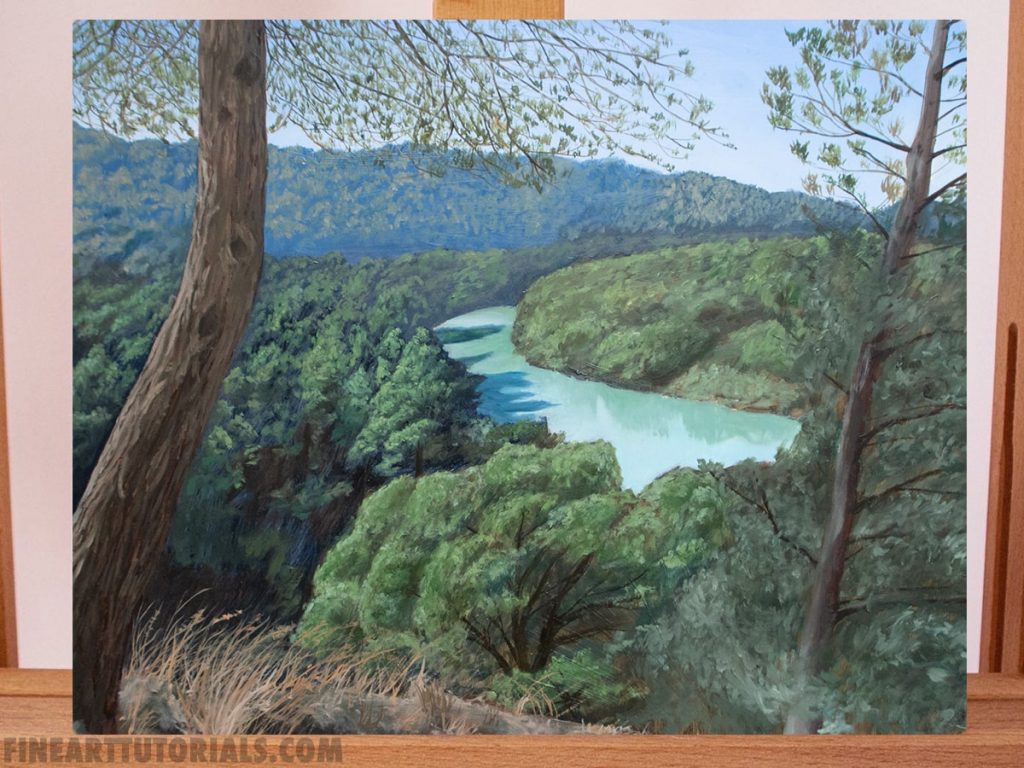
Blocking in is a popular technique that forms the first stage of the painting process for those using a layered direct painting approach.
Many painters will already have completed a drawing that they paint over.
Disclaimer: Fine Art Tutorials is a reader supported site. When you make purchases through links on this site, we may earn a small commission at no extra cost to you.
What is blocking in?
The purpose of the blocking in stage is to cover the canvas, so none of the white from your gesso ground shows through. This technique can be used as an aid for the painter, so that the colours and tones that are established whilst blocking in can be used as a guide for consecutive paint layers.
When blocking in, you don’t have to worry about the details of your painting yet. The aim is to establish the loose forms of different elements in your subject. Try to mix colours to match the tones and value transitions of your subject as you see them. This way, you will lay down the composition of your piece, so you can get a general feel for the atmosphere and impression you are creating from an early stage.
A good tip is to squint your eyes so your subject looks blurry, paint the prominent features you see in this blurry state, then add the details after this layer has dried.
What supplies do you need?
- Oil paint, or acrylic paint.
- Solvent, such as turpentine, odourless mineral spirits or oil of spike lavender. If you’re painting in acrylic, thin with water for the blocked in layer.
- Stiff brush, such as hog, or these synthetic alternatives.
- Your painting surface. You could have an underdrawing already completed.
How to use the blocking in technique
Observe your subject or reference and start by mixing colours as you see them. If you are fairly new to painting, and you haven’t had much practice mixing colour, spend a bit of time experimenting with mixing. Alternatively you can read this guide on mixing realistic looking colours to help.
Don’t apply the colour to the canvas until you are happy you have a match. A good tip for beginners is to try and neutralise colours so they appear less saturated. It’s easier to gradually make the painting appear more vibrant in consecutive layers than to tone it down. Beginners often gravitate towards laying down intensely vibrant colours if they haven’t yet learned how to neutralise them.
Look in your reference for subtle shifts in value, tones and colour transitions. You will replicate this on your canvas, maintaining the shapes and forms as you see them.
Generally, you will be applying darker colours first to the shadows in your piece. This will be done with thinned, fairly translucent paint. If there’s a large area of your painting that is lighter toned with dark details, then apply the light colour first.
One instance where this may apply is in an ocean scene during midday sun, the ocean will appear to melt into the horizon, as it appears to reflect more of the sun at a distance. In this case you’ll block in the light blue colour and add dark accents for waves when you come to you detail layer.
Some of the blocked in areas may remain exposed once you’ve finished your painting.

Blocking in painting: Pin it!
If you’ve found anything on this site especially useful, you can make a donation to me through PayPal. I take a lot of time to research and write each topic, making sure each tutorial is as detailed as possible and I make all my content freely available. Any small donation (even the price of a cup of coffee!) can help me to cover the running costs of the site. Any help from my readers is much appreciated :).
Follow the link in the button below to support this site.