Learn some new oil painting techniques to improve your skills. There are 12 on this list, ranging from common techniques, to lesser known traditional techniques used by the old masters.
Disclaimer: Fine Art Tutorials is a reader supported site. When you make purchases through links on this site, we may earn a small commission at no extra cost to you.
12 Oil Painting Techniques
There are 12 main oil painting techniques, each of which can form the basis of an artist’s oil painting practice.
Use multiple oil painting techniques in conjunction with one another to achieve a particular effect. For example, to paint realism, you may want to use a combination of glazing and blending.
Alla prima and impasto work wonderfully together, to create thick, textural ‘painterly’ artworks. Read on for more detail about each technique.
1. Glazing
Supplies you need for glazing: transparent pigment, glazing medium, soft brushes
A glaze in oil paint is the application of a very thin, transparent and oily layer that usually contains only a single pigment. This is spread over dried areas of the painting to create subtle shifts in hue. Artists can create warm or cool areas, enhance detail, deepen shadows and colour contrasts.
Glazing creates an incredibly unique effect in oil painting. When light hits layers of pigmented oil that sit separately from one another, it reflects off of the first opaque layer it hits. Then it refracts through consecutive translucent layers of colour.
This means that the colour on the canvas is mixed optically rather than physically. Due to the multiple layers of hardened oil, the appearance of the painting has incredible depth and an intensity of colour that a painter couldn’t achieve from mixing colour on a palette and applying it in one opaque, slightly matted layer.
Glazing oil painting technique examples
This technique has been used for centuries, by the likes of Rembrandt and Vermeer. Look how this painting seems to glow.

See this compared to a painting where colours are applied directly and opaquely to the canvas:

Can you see the differences? Vermeer’s Girl With a Pearl Earring has a softer, more luminous appearance. This is a result of using fine glazes. The colours in Freud’s painting appear more opaque, due to him applying colour directly without glazing. They are both masterful paintings, but this demonstrates the contrast in effects a painting can have on a viewer when different techniques are used.
Why use the glazing technique?
The luminosity that can be achieved by painting with the glazing technique is what draws artists to paint in this manner. Despite the time it takes to do so.
The glazing method can also facilitate the creation of details that would be difficult to achieve by applying thick opaque paint. Such as transparent looking thin wisps of hair.
There are some drawbacks to using the method, aside from having to wait for each layer to dry, it’s difficult to predict the resulting colour harmony of the painting before each layer of pigment has been applied. Of course, each layer alters the last, so paintings can very quickly darken if care is not taken. Also, layers of glaze can blur the appearance of detail, so details should be applied after, or glaze should be selectively applied to enhance it.
If you want to try this technique, make sure you select transparent pigment to work with. Then you’ll need to mix a small amount of the transparent pigment with a medium until it’s fluid. Find some glaze recipes and further details about the technique in this glazing guide.
Glaze works well applied over a monochromatic tonal underpainting, to create the colour layers. However, you don’t have to use the technique throughout the whole painting, you can apply a layer of glaze or two in the final stages to alter colours and contrasts.
2. Alla prima (wet-on-wet)

Supplies you need for this technique: oil paint, stiff brush
In contrast to the glazing technique, Alla Prima, Italian for ‘all at once’, is an incredibly spontaneous, quick and direct method of oil painting. Lucian Freud would have used this technique in his portrait (pictured above).
The aim of this method is to finish the whole painting before the paint starts to dry. As oil paint takes around two days to dry, a painting that uses this technique throughout will be completed incredibly quickly. This technique therefore lends itself to more gestural and dynamic brushwork, which can evoke a feeling of movement, which is a signature of impressionists.
You could also choose to paint one section alla prima, leaving previous layers to dry first.
It takes great skill to apply paint to the canvas, in the exact colour and form that it’s intended to be quickly in this way—it’s a skill that takes years of practice.
Wet on wet technique: examples
You can see from the work of impressionists, that vibrancy wasn’t created from the appearance of light, as it is with artists that use the glazing technique, but by using contrasting colours next to one another.
Look at this painting by Monet, palettes of complementary colours are used to create the appearance of light.

Singer Sargent’s application of paint was very clean and intentional, with minimal mixing he created works that appear soft.

This technique has been used for centuries, but rose to fame in the 18th century when more vibrant pigments were available. Artists like Monet would take their canvases out on location and paint wet-on-wet attempting to capture the scene before the light changed, using thick brush strokes.
Layering is optional. Some artists choose to start with an underpainting, thinning the faster drying transparent pigments (usually darker colours like the earth pigments) to use as their shadows, then gradually laying on thicker more oil rich paint mixtures, finishing with titanium white from the tube, maybe mixed with another colour to alter the hue as the highlights.
For a more in depth look at the technique, consult this alla prima guide.
3. Blending
Supplies you need for blending: soft filbert brush, or goat mop brush
The beauty of oil is that it stays wet for days at a time. This means that you can take time to blend colours into seamless gradients and create incredibly subtle hue and tonal transitions.
The effects you can get from blending in oil are unlike other mediums such as watercolour and acrylic. Painting in acrylic, you only have a small window to blend paint, usually only half an hour or so before it completely dries. This means that the artist either has to work very quickly, or create a scale of colours in between the two they are trying to mix to replicate a blended gradient.
Oil paint is usually applied to a surface with a relatively stiff brush, usually made from hog hair or a synthetic alternative, however this does depend upon the consistency of the paint. When blending, however, use a soft brush. A brush made from goat, sable, or a synthetic alternative works incredibly well for this.
A filbert brush shape is ideal for blending work because it’s relatively stiff and holds its shape at the ferrule (metal clamp on the paintbrush) but has a round, soft tip perfect for blending. With this brush you can get a more controlled and precise blend.
Use the blending technique to create realistic effects
Train your eye to notice hard edges, soft edges and lost edges in a painting. Hard edges indicate a sharp transition from one element to another, a soft edge is a smooth transition and a lost edge is so smooth, it’s barely noticed. You can use blending to vary the edges in your painting and therefore the relationships between different sections. This way you can achieve realistic effects.
Think about the areas in your subject where the colours seem to blend into one another, like subtle shifts of warm and cool tones in skin, or graduations of darks and light in clouds or where the sea seems to fade into the sky on the horizon.
The technique itself is easy, apply paint to the surface with your normal painting brush. Make sure the colours you want to blend are both wet. Then get a soft, dry brush and blend the two colours together.
4. Scumbling
Supplies you need for scumbling: stiff brush, tube paint
Scumbling is the technique of layering on an opaque lighter film of unthinned paint to a dry area of the painting. Because the paint will come straight from the tube, it will be quite thick on application. The resulting effect is broken brushstrokes. Use a stiff brush with this technique, as it will pull some of the paint from the surface, revealing the layer below.

From this technique, you can achieve a soft or light appearance in your paintings. Use it to soften the edges of landmarks in the distance, or to make clouds appear fluffy.
5. Impasto

What you need to paint impasto: a medium to thicken paint, palette knife, stiff brush
Create an impasto painting by applying paint to a surface in thick layers. Using this technique, a painter can achieve incredible texture in their work. A painter may use a palette knife or stiff brush to apply the paint and the brush or palette knife strokes are usually left visible.
Many artists apply their impasto brush strokes in swift sweeps, often mixing colours on the canvas. The overall effect is one of expressiveness and movement through the use of colour and texture.
Oil paint naturally has a thick and stiff consistency, so the addition of a medium isn’t necessary. Due to the long open working times of oil paint, especially in thick applications, impasto painters will add a medium to speed up drying time and give the paint more body.
Choose a medium for impasto
When it comes to selecting a medium for impasto work, there are many.
For silky, thick and fast drying properties, add Liquin Impasto medium. Just bear in mind that this is an Alkyd, not an oil medium. To maximise surface adhesion of the paint, use Alkyd in each layer of the painting.
The addition of wax to a medium can give a thick matte appearance. This is not to be confused with encaustic (hot wax painting), as an oil medium, cold beeswax is used.
Cold beeswax dries fast and is very thick. It stays in the position you place it, as it doesn’t have self levelling properties and it can create ‘short’ paint, where it snaps from the canvas in a peak, rather than stretching or trailing. You can create some interesting effects by using this.
To learn more about this technique, read the impasto guide.
6. Underpainting
Supplies to create an underpainting: earth pigment, solvent
Monochromatic underpaintings can be used to establish values before colour is applied. The technique is also used to draw out the structure of the painting and the composition can be determined at this stage too. It’s almost exclusively used as a first step in the painting process, occasionally a toned ground will be painted before the underpainting.

This technique is commonly used in the indirect painting method whereby coloured glazes are applied on top of an opaque layer of tints and shaded areas.
Commonly, earth pigment is used thinned with solvent for this former stage in the painting process. This is because earth pigments dry faster than any other pigment, often drying overnight if applied thinly enough.
Because earth pigments are dark, if painted on a light ground, you could rub away the colour to show the lighter areas of your painting. Some artists will choose to use titanium white for their highlights.
Underpaintings can be used to create warm or cool undertones in a painting, or add some vibrancy, depending on which colour is chosen.
Which pigments can you use for an underpainting?
Whichever pigment you choose for the job, make sure it has tonal variety. Meaning that you can establish the dark and lighter areas with it. Using a colour like yellow wouldn’t work as it’s too light and can only really show highlighted areas.
You don’t have to use an earth pigment for your underpainting, a transparent pigment is best, one that can create a value range from light to dark.
Burnt Sienna is a brilliant pigment to use for seascape artists, as it is a deep orange brown pigment. This creates contrast with blue layers that are applied on top. Burnt Umber is a popular choice, so is Raw Umber, Magenta and Ultramarine.
Some types of underpaintings have their own names given to them. For example, Verdaccio is a mixture of black, white and yellow, resulting in a soft neutral green. This can be used to render a complete monochromatic underpainting before applying glaze on top.
You may have heard of grisaille, similar to verdaccio, black and white are used to form a complete monochromatic image. Grisaille is also used to emulate sculpture. Because black pigment, such as Ivory Black, has blue undertones, Grisaille is especially effective when layered on top of a warm ground, such as Burnt Umber. This way, when the paint is layered cleverly to show the ground through, a range of colour temperatures can be achieved.
7. Dry Brush
Supplies: stiff brush, tube paint, paper towel
This technique gives a distinctive look that can create texture and movement in your work.
Paint is applied with a brush that is relatively dry, but still holding pigment. This technique works with paint that is highly viscous and thick, the brush is wiped on tissue paper before paint is applied to the canvas to remove oily residue.
A painting completed in monochrome with stiff hog brushes can give the appearance of charcoal.
8. Blocking in
Supplies: solvent, tube paint
Artists use this technique as a way to start an oil painting. By blocking in, you completely cover your canvas with paint so that no white from your gesso ground is showing.
To do this technique yourself, study the colours in your reference. You need to decide the base colours of different areas and shapes in your painting. For the most part, this will be a single tone to establish loose shapes of your subject. You don’t need to worry about painting any details at this stage, the idea is to get a rough picture, upon which you can layer the highlights, shades and details once it has dried.
To read more about this technique, take a look at the guide to blocking in.
9. Imprimatura
Supplies: solvent, transparent pigment
Another term for imprimatura is toned ground. It is a stain of colour that is applied to a prepared surface. This is often the first stage of the process for oil painters, however many artists leave this stage out.
There are benefits to this technique. The first being that it’s easier to establish light and dark tones when working from a mid-toned canvas.
Another benefit is that depending on your painting style, not all your paint layers will be opaque. There may be transparent areas of your painting where you can allow the imprimatura to shine through.
You can also use an imprimatura to seal your underdrawing, making it easier to trace over at a later stage.
For imprimatura, just like underdrawings, artists commonly use earth pigments as they dry quickly. However, any transparent pigment that you can achieve a mid-tone from would work.
If you want to establish light tones at this early stage of the painting process, you could wipe away paint in areas where you anticipate that the light sources will be coming from.
Read our guides on how to choose a colour from imprimatura and how to create a toned ground to learn more.
10. Chiaroscuro

Chiaroscuro is the method of creating high levels of contrast in your painting. It is Italian for ‘light-dark’ and is a compositional technique. Bold contrasts in shaded and highlighted areas create drama and affect the composition of the piece.
Leonardo Da Vinci was known for developing this technique, Rembrandt and Vermeer were known for using it in their paintings. Artists used this technique throughout the Renaissance and Baroque art movements.
11. Sgraffito

Supplies: Palette knife or brush handle
Sgraffito is a technique where decoration is applied to the surface of wet paint by removing areas of the paint film to reveal the layer below.
Use the end of a brush handle to scratch away at the surface, to achieve very fine details. Rembrandt used this technique in some of his portraits for very fine highlights in the hairs of his subjects. To scrape away larger areas of paint, use the side of a palette knife.
The technique will work differently if you are working on a textured surface, such as a canvas with a prominent weave. This is because some of the paint will settle in the weave, which you won’t be able to remove by scraping. This can give more of an uneven or grainy effect.
12. Sfumato
Supplies: goat mop brush
The literal translation of Sfumato from Italian is ‘softened’ or ‘soft like smoke’. This technique was developed by Leonardo Da Vinci, you can see the technique used in the dark areas of his paintings—look at Virgin on the Rocks.

The key to this technique is in creating gradual colour and shape transitions. Outlines appear soft and hazy and shapes seem to blend into one another. The purpose is to emulate how the eyes perceive subjects that are out of focus—the artist leads you to focus in on a particular area by making the details sharper rather than blurred. This is similar to the blending technique, but it is used for stylistic effect.
Oil painting techniques: the basics
If you’re a complete beginner, it’s useful to know some of the basic principles of oil painting before you try the other oil painting techniques on this list.
Paint fat over lean
Oil painting is a medium which is commonly applied in layers to a surface. Layer lean paint first (i.e. paint that has been thinned with solvent). Then apply fat layers over these thinned layers. Fat layers are those that contain more oil. For example, you might start a painting by thinning your colours with a little solvent, then apply paint straight from the tube over this layer. Equally, you could apply paint with the same ratio of oil in each layer, just make sure you don’t apply thinned paint over oil rich paint.
This application technique is called ‘fat over lean’. it’s a guideline oil painters follow to create structurally sound paintings of archival quality. If you apply solvent thinned paint over an oil rich layer, the paint film will look chalky, dry and it may crack. Read more about the fat over lean oil painting technique in this tutorial.
Understand the properties of oil paint
Oil paint is a slow drying medium. However, different pigments can dry at different rates. For example, burnt umber is fast drying and titanium white is slow drying. If you layer faster drying earth pigments first, the first layers of your painting will dry quicker. Then you can think about adding slower details and highlights last.
It’s possible to level out the drying times of oil paint with a medium. Oil paint mediums will alter the properties of paint, changing characteristics like transparency, drying time, viscosity and finish (glossy or matte). For example, linseed oil will increase drying time, reduce viscosity and make colours more transparent and glossy. Cold wax will increase the thickness of paint, make it dry faster and dry to a matte finish.
Consider getting quality oil paints if you’ve decided that you enjoy oil painting and want to invest in it as a hobby. Even if you want to take it further and try and make your works saleable. Brands such as Gamblin, Michael Harding, Blockx, Schmincke, M. Graham are all professional quality. Their paints are highly pigmented, perfectly lightfast and use quality binders. Winsor & Newton’s Artists oils are also a great choice. They are slightly cheaper but have a high pigment content.
Oil painting techniques and materials
Find the best supplies for each oil painting technique, understand what they are and what they do.
Glazing oil painting technique supplies
- A glazing medium: This ‘Fat Medium’ by Chelsea Classical Studio is made with Linseed oil and Damar resin. It gives the paint a wonderful satin finish. Or use linseed oil to increase transparency and reduce viscosity. Discover more glaze recipes here.
- Soft brush: Sable brushes from Da Vinci, or synthetic sable give the ability to render even layers and precise details.
- Transparent pigment: Look at the tube of your oil paint brand. Pigments that are transparent or semi transparent will work as glazes.
- Smooth surface: On surfaces with less texture like smooth primed wooden panels artists can render details and fine glazes.
Wet on wet oil painting technique supplies
- Oil paint: Brands of paint that are stiffer like Old Holland are useful for last thicker layers of the painting. Opt for a slow drying paint like Blockx or M. Graham to increase the open working time.
- Solvent: This is optional. Thin paint with oil of spike lavender or turpentine in the first layer to speed up the drying process. Make colours runny when blocking in basic shapes
- Stiff brush: Hog hair, or synthetic hog hair brushes are best at applying thicker paint. Get a flat brush to create a more painterly style.
Blending technique supplies
- Goat mop brush: The softest brush for seamlessly blending fluid paint
- Filbert brush: Use this brush to blend thicker paint
Scumbling technique supplies
- Stiff brush: Hog or synthetic brush to create broken brush strokes
- Oil paint: Oil paint from the tube
Impasto technique supplies
- Stiff brush: Thicker paint should be applied with a stiff brush, like hog or synthetic hog.
- Oil paint: Old Holland paints have a thick consistency compared to other brands
- Palette knife: Apply thick paint with a knife for texture and body.
- Medium: Add a medium to thicken paint and speed up drying time. Liquin impasto or cold wax work perfectly for this.
Underpainting technique supplies
- Oil paint: Fast drying earth colours are suited to the underpainting technique: burnt umber and burnt sienna are great options
- Solvent: Thin the paint to make it dry faster and reduce viscosity. Use either turpentine, odourless mineral spirits or oil of spike lavender. You could also use Chelsea Classical Studio’s Lean Medium.
Dry brush technique supplies
- Oil paint: Paint straight from the tube
- Stiff brush: Made from hog or synthetic hog
- Paper towel: To wipe paint residue
Blocking in technique supplies
- Oil paint
- Large brush: You don’t have to worry about rendering details at this stage, so get a brush to cover larger areas of the surface
- Medium: a fast drying medium like a solvent or Liquin will allow you to block in shapes quickly so you can start working on your detail layers.
- Oil paint sticks: Shaped like large pastels, oil paint sticks are great for artists who like to draw on the canvas.
Imprimatura technique supplies
- Oil paint: Choose a transparent, fast drying pigment. Earth colours like burnt umber, burnt sienna or mars brown suit this technique best.
- Solvent: Speed up the drying process and thin your colours with solvent.
Chiaroscuro technique supplies
- Oil paint: high contrast colours. Darken paint with burnt umber, lighten it with titanium white. To create black, mix burnt umber and ultramarine
Sgraffito technique supplies
- Palette knife: to etch into wet paint
Sfumato technique supplies
- Oil paint: Paint that has a lower viscosity and slow drying time works will with this technique, so you can work seamless blends and gradients for longer. Look at brands like Blockx and Schmincke.
- Medium: Linseed oil reduces viscosity and slows drying.
- Mop brush: Goat mop brushes are perfect for blending, with soft fibres and a round or oval shape.
Books on oil painting techniques
Oil Painting Techniques and Materials: This book by Harold Speed analyses the techniques of the old masters, such as Hals and Rembrandt. He covers, at length subjects related to oil painting, such as materials and drawing from life. This book is suited to intermediate artists, who want to learn more about techniques, colour theory, tones and values.
Portrait Painting Atelier: Old Master Techniques and Contemporary Applications: For those interested in portrait painting, this book provides instruction on the old masters’ technique of layering glazes on a toned ground.
The Encyclopedia of Oil Techniques: A unique visual directory of oil painting techniques, with guidance on how to use them: A practical and visual guide of different oil painting techniques, perfect for beginners.
Oil painting techniques for beginners
If you’re a beginner, think about the styles of art you’re attracted to the most and experiment with a few different techniques.
Oil painting techniques that feel most intuitive and therefore easy to pick up are blending, blocking in, sgraffito.
Techniques like impasto are fun because they require spontaneous brushwork and thick applications of paint. The other oil painting techniques on the list may take a little more practice to master.
Advanced oil painting techniques
Some of the techniques on this list require more thought, planning and skill to master.
If you’re applying glazes throughout the entire painting process, you’ll have to think about how each colour layer will alter the last.
Getting the colour profiles right takes practice. If you’re new to the glazing technique, try applying layers of glaze to alter colour profiles in smaller sections first. Use glazes in just one or two layers of the painting when you start out. Then work your way up to creating more glaze layers as you become more confident.
Alla prima is another more advanced oil painting technique. This is again because it requires thought, foreplanning and accurate colour mixing. It’s a direct method of colour application. So it works best when the artist is confident that they have mixed the right tone and placed it in the right spot on the artwork. Wet paint on the canvas can soon look muddy if overmixed.
For beginners wanting to try the wet on wet technique, I’d advise working on a small scale first. Or starting by painting wet on wet, then letting the paint dry if you feel like the colours are looking muddy. Remember oil paint is a forgiving medium, you can cover previous layers with opaque colours. When paint is wet, scrape or wipe away mistakes.
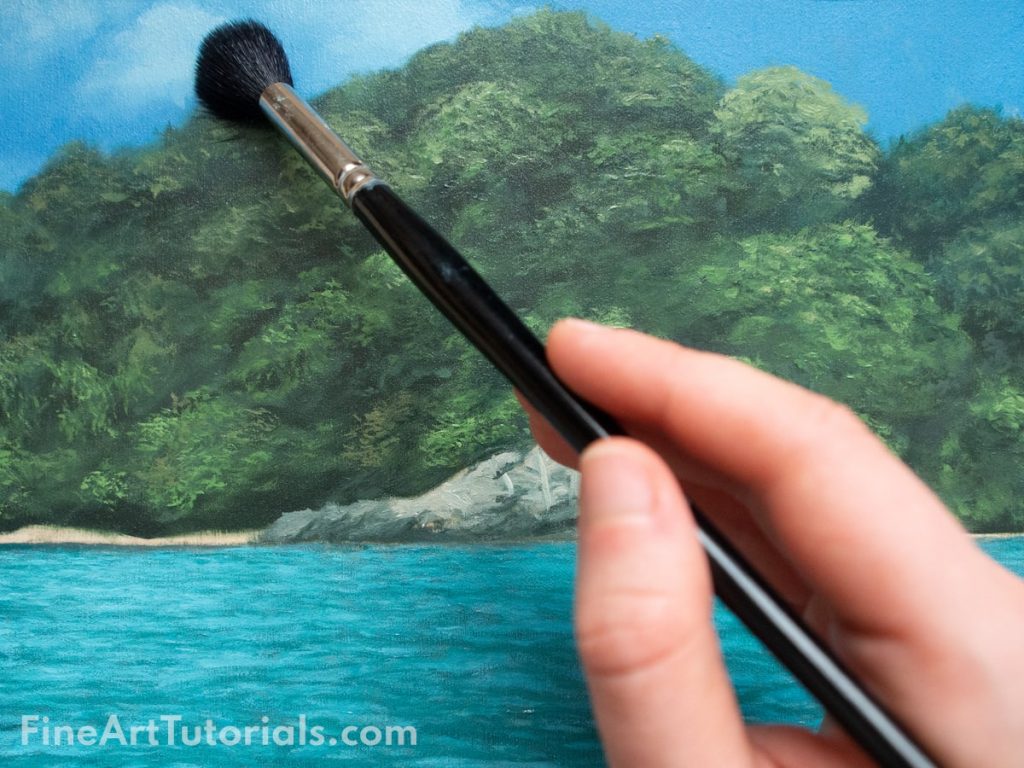
Feature image: an oil painting called ‘Tropical Waters’ painted by me!
Oil painting techniques: Pin it!
If you’ve found anything on this site especially useful, you can make a donation to me through PayPal. I take a lot of time to research and write each topic, making sure each tutorial is as detailed as possible and I make all my content freely available. Any small donation (even the price of a cup of coffee!) can help me to cover the running costs of the site. Any help from my readers is much appreciated :).
Follow the link in the button below to support this site.