
How to paint faster, 15 tips to speed up your painting process so you can produce more art in a shorter time frame.
Painting is an enjoyable and relaxing experience. But it’s possible to paint faster whilst maintaining a relaxed state of mind. Painting at a faster speed is about being decisive and intentional about applying marks of paint to the surface. It’s also about learning a process that makes you feel efficient and being economical with the materials you use.
Painting fast comes with practice. The longer an artist has been painting, as long as they have at some point made a concerted effort to try and speed up, the more likely they will be able to complete a painting at speed.
Making the effort to speed up the painting process can have benefits if you sell art, or plan to sell art. For example, if a buyer commissions you, it’s beneficial for both parties if the painting takes less time. When you first work out how much you will charge for a painting, you will likely factor in the time it has taken to paint it. Over time, as you have produced more work and have inevitably become a faster painter, you will be charging the same for similar pieces, which means more money per hour for the painting.
This guide won’t make you a faster painter overnight, but it will show you some tactics and exercises you can try to make you more of an efficient painter.
Disclaimer: Fine Art Tutorials is a reader supported site. When you make purchases through links on this site, we may earn a small commission at no extra cost to you.
Plan the composition first
The art of making the painting process quicker and easier for yourself is in making decisions with intent. A way you can do this is by spending some time on planning the composition of the artwork first. Learn some of the basic principles of composition in art then make a composition sketch with pencil or gouache.
For example, your landscape reference may include lots of grass details, but by composing the image so that the majority of the canvas is taken up with the sky, this would save you time on those details.
Create a series of thumbnail sketches to map out where the main subject will go, where the lightest and darkest elements will be and how the elements will fit together. Then look at the appearance as a whole and question whether you like it, or whether you want to try another composition. As the composition can make or break a piece, it’s much better to make a new small thumbnail sketch, rather than jumping into starting the painting without planning, getting to the end and deciding that you would have done it differently.
Simplify the painting
Take out unnecessary details: some realist artists revel in details, but usually tiny details won’t have a huge impact on the feeling of the artwork as a whole. Look at your reference photo or your scene carefully and consider what can you can remove. Focus on just a few elements that will have an impact on the impression you are trying to create from the scene.
For example, painting just three trees on the horizon instead of six will save you time, but would also make for a better composition. There is a concept in art called the rule of odds, which states that an odd number of elements, as opposed to an even number of elements makes for a more interesting and aesthetically pleasing composition.
Scenes in life are often busy and chaotic, so there is often a lot of room to alter the scene when recreating it on the canvas. Be a little ruthless with the simplification of your art. Test the composition with some thumbnail sketches, or in a mock-up first if you’re not sure.
Negative space

Incorporating negative space, or whitespace into an artwork can make for a better composition. This is because it will bring emphasis to the focal point.
Negative space doesn’t have to be white, it’s described as the space around the main subject of the artwork, which usually consists of a neutral background. However, it could also be a blurred looking background. Use negative space to demonstrate to the viewer the focus of the artwork. This saves you time detailing background elements that the viewer will likely not spend time looking at.
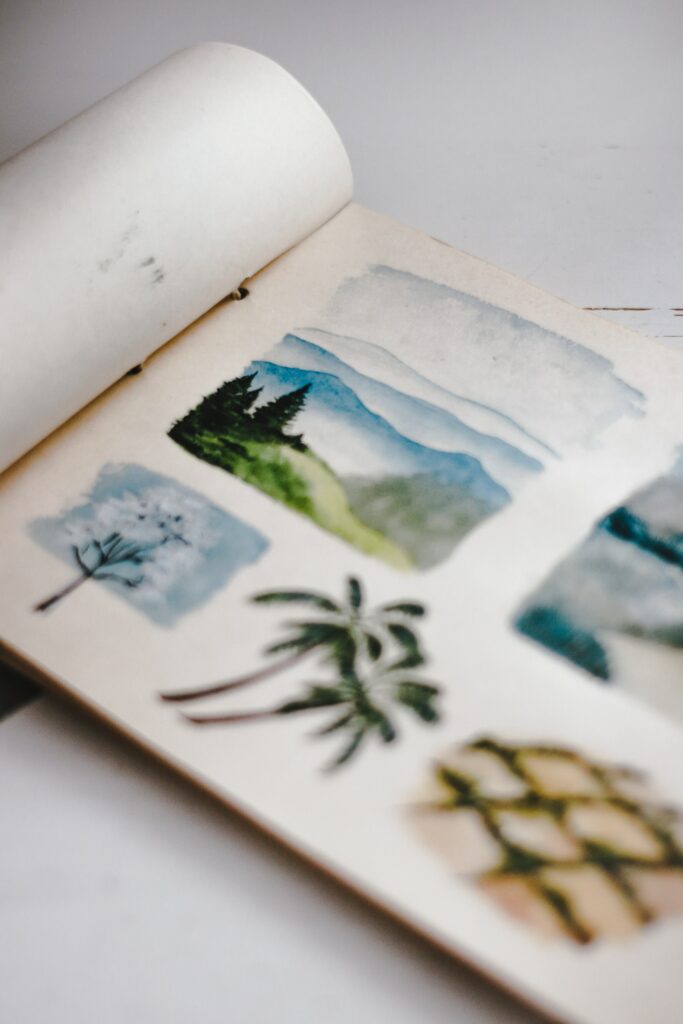
Use texture to create the impression of detail

If you want to create the impression of detail, you don’t have to spend hours with a tiny round paintbrush swiping away at every blade of grass.
When painting with watercolour, or gouache paint, use the dry brush technique on cold pressed paper to create texture. Bristles will naturally splay and cold pressed paper has a slight texture to it. Paint marks will appear broken, which is great for brickwork, rocks, water the texture of distant leaves, clouds, or even grass texture.
In the oil painting A Torrent in Norway by Singer Sargent, it looks as if he has used this dry brushing technique for the water texture on the rocks in the foreground.
A stiffer brush is required to create texture with oil paint. Use a hog or synthetic hog brush, in a flat shape, or fan shape. It doesn’t matter if the paintbrush is old—use the bristles to create the texture of multiple blades of grass at once, or variation in the land.
By creating the impression of detail you will cut a large chunk of time out agonising over details. If you enjoy detail work, you could create texture in the first layers of the painting, then leave highlighted details until last. This will make the painting look more realistic.
Mix colours first with a palette knife

Mixing oil colours before applying them to the canvas can save time. Preparing colour mixes first also means that the flow of painting won’t be interrupted by having to go back and mix extra colours during the session. Mix the main colours you see in your reference or scene if you’re painting en plein air, then throughout the session you will probably want to mix transitional tones to make gradients.
This tip mainly applies to oil painters as colours will stay wet on the palette for hours and even days at a time. Mixing colours first will also be helpful if you are working with Golden Open Acrylics and using a Stay-Wet palette.
Mixing with a palette knife is a time-saving trick for multiple mediums, including oil, acrylic and gouache. It keeps your brushes cleaner, meaning less time spent cleaning materials.
Save colours until the next session
It’s possible to slow the drying of both tube paint and mixed paint on the palette. To keep oil paints on the palette until the next session, cover with a palette sealer and put in the fridge. This helps paints to retain moisture, keeping the squeezed and mixed paints cool and preventing oxygen from drying the colours out. Doing this works best if you use a glass palette, as this helps to keep the oil paint cool. If you’re working on a wooden palette, wipe the mixed colours off before covering, this way they won’t dry and stick to the palette.
Keep mixed acrylic colours overnight in a Stay-Wet palette and optionally extend the open time with a medium. Keeping mixed colours over night helps speed up the mixing process for the next day!
Make a grid

Establish the structure of the piece first with a drawing. This way you don’t have to worry about proportions, perspective or the accuracy of different subjects when you’re absorbed with applying colour to the canvas.
If working from a reference photo, create a grid on the photo, then draw a grid with the same proportions and number of intersections on the canvas. Make sure to create an artboard in Photoshop with the same aspect ratio as that of your canvas. For example, if your canvas is 9×12”, create an artboard with a ratio of 3:4, for example 900x1200px. Then create a grid with three boxes horizontally and four boxes vertically. Scale it up to the canvas and use the grid lines as reference points for the positioning of different elements in the image. For a more in depth guide with photo examples, check out our guide on the grid method.
Of course, many artists will want to draw freehand and that’s fine too! You don’t have to use a grid as a crutch if you’re confident in your drawing skills, but it is a great technique to use to quickly get a drawing down as accurately as possible. Especially if you have time constraints, if you are submitting to a gallery or working for a client.
Paint loosely

The term ‘loose’ or ‘painterly’ describes the approach and techniques the artist uses whilst painting. There is less of a focus on realism and more of a focus on creating aesthetically pleasing compositions and colour combinations.
Use texture to create details and tonal gradations to create the appearance of smooth gradients—two features which can give the impression of realism.
Impressionists and expressionists can both be described as having painterly styles; it takes practice to get it right. The key is to stand up at an easel if you can, to encourage more gestural painting techniques. Be selective about details you include, try some gestural brushwork techniques and make sure to plan the composition before you begin.
Use large brushes
Large square brushes are perhaps the best shape for covering ground on the canvas. They are versatile too, as you can use the edge for fine lines and details. A large brush will help you to simplify the painting as you go, hold the brush near the end of the handle for long sweeping strokes. It makes sense too, to get the largest brush possible for the canvas you’re using, especially if you like working at a large scale.
Make sure that the brush fibre and stiffness also matches the viscosity of the paint you are using. For example, stiff, springy synthetic brushes work best for moving thick heavy body acrylic paint. To paint with thick oil paint a stiff hog brush, or synthetic alternative will be best suited for the job. Soft brushes such as sable or synthetic sable work best for low viscosity watercolour, gouache and ultra runny oil paint.
Speed up drying time
Gouache, watercolour and acrylic are all fast drying mediums. Oil paint, however, dries slowly. Because it’s not water soluble, it dries in a completely different way to water-based mediums. Rather than drying by evaporation, oil oxidises. This means that oil paint may feel dry to the touch in a few days, but thicker layers will take much longer to fully harden.
It’s possible to speed up the drying time of oil, so that the painting dries within a session. This gives the artist freedom to work at a quicker pace, painting multiple separate layers of colour in a shorter time frame.
Alkyd resins like Galkyd, Liquin and Neo Megilp will add body to oil paint, give it a glossy finish and speed up drying time by around half. Although check the information about the medium you choose, as the drying times may vary.
Another way to speed up the drying time of the first layers of an oil painting is to mix paint with solvent. Keep in mind that by mixing with solvent, it thins the paint and weakens the paint film slightly. So don’t mix too much solvent with paint and stick to mixing solvent into paint in the first layers of the painting. If you were to mix 1 part solvent with 1 part linseed oil to make your own medium, this would shorten drying time. This mixed medium could be layered beneath oil rich layers.
Avoid making beginner mistakes
Learn to avoid making typical beginner mistakes whilst painting to improve art skills and speed up your painting process. That way, you’ll spend less time correcting mistakes and more time painting intentionally. Plus you’ll be much happier with the results!
Learn to mix colours accurately by neutralising colours. Portray realistic value transitions and mix transitional tones to create smooth gradations between elements.
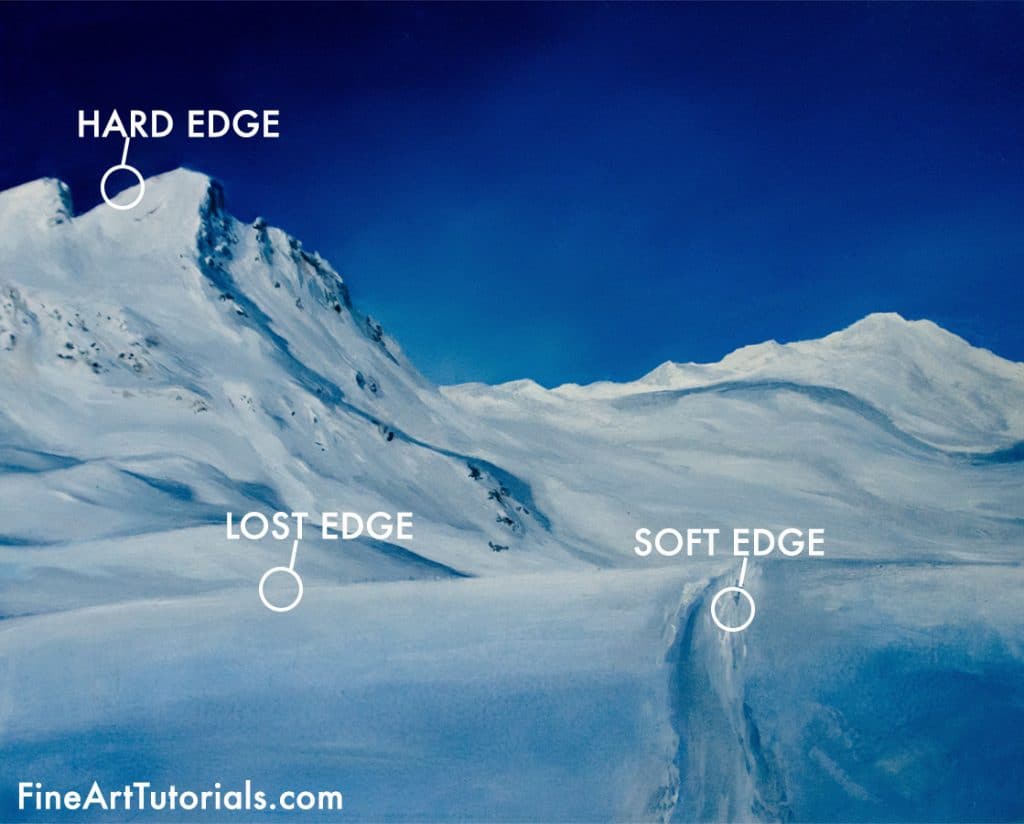
One particular skill that beginners often miss is paying close attention to edges in artwork. An edge in a painting can be described as hard, soft or lost. In a hard edge, there will be a clear distinction between two elements, represented with an immediate shift in either colour or value. A soft edge will appear blurred, whereas in a lost edge, the transition from one element to another will appear seamless. Use edges to convey extra information, such as atmospheric perspective, time of day, light source and weather conditions.
These are just some quick tips, to further understand how to avoid beginner mistakes in painting, read our tutorial.
Look at the whole picture
Regularly step back from your painting to consider the image as a whole. Viewers of art rarely step in to scrutinise every tiny detail of a painting. In most artworks, as you get up close, you will see an abstract swirl of paint brush marks and textures. When you step back, all these marks come together to create the impression of the subject.
Stepping back from the piece often to consider the composition and how different elements relate to one another will prevent you from spending hours on small details.
Don’t zoom in to reference photos
When working from a reference photo, it can be tempting to zoom in and focus on each individual small piece. However, that can throw artists off. When trying to convey the essence of a subject, it’s better to simplify rather than wasting time mixing extra colours and making extra brush marks to paint something that will essentially appear the same when the viewer looks at the painting as a whole. By zooming in and focussing on all the different details, it can also make finished pieces look disjointed, without clear focus.
Try a new painting style
With impressionism, expressionism and abstract painting artists can lay colours down fast with spontaneous brush strokes.
If you enjoy painting realism, you can still paint with loose brush strokes, but you may have to focus on honing your composition, drawing and colour mixing skills to create the impression of realism whilst using loose brush strokes.

Singer Sargent used clever compositions to create focal points and was a master at mixing colours to create a wonderful atmosphere in his works. He has a notably ‘painterly’ style, but also created realistic looking paintings. His paintings appear realistic due to the accurate colour mixing, gradations and use of values.
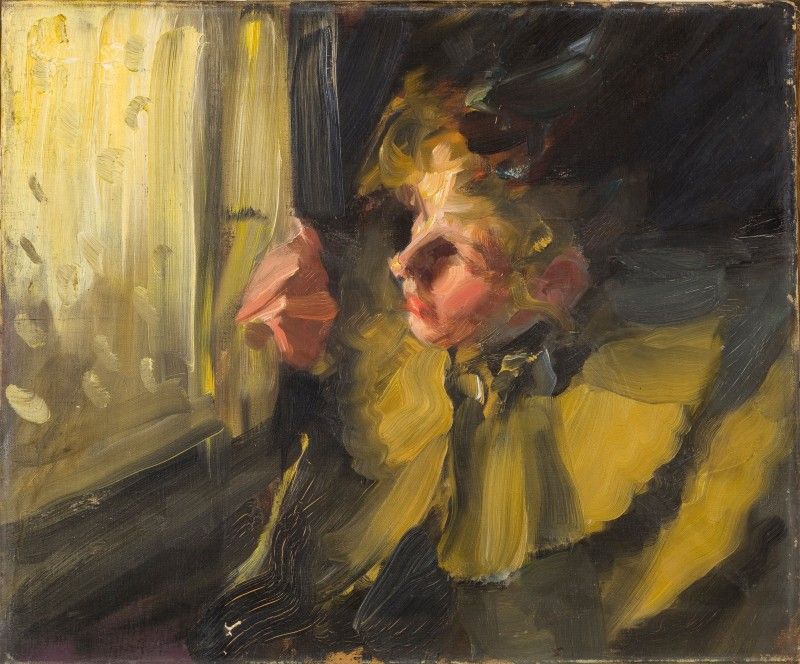
Anders Zorn created paintings with realistic values and often with loose, painterly brushstrokes. He also used his famous limited palette in many of his works, which consisted of just Ivory Black, Titanium White, Yellow Ochre and Vermilion. These colours enabled him to create realistic tonal ranges, with muted, yet striking colour combinations.
It takes more time to achieve certain styles in art compared to others. If you want to paint in a hyper realistic style, using a multi layered approach with oil paints, this may consist of creating multiple layers of glazes. This will take time as you will have to wait for layers to dry before applying the next. However, if you were to try the wet on wet (alla prima) painting technique, you could complete a painting in one sitting. The result will be a completely different style of painting.
Try a painting challenge

Challenge yourself to create a painting regularly, depending on your own time constraints. It might be that you could squeeze in a quick painting or drawing each week, or if you have more time to commit, a painting each day.
There are lots of challenges made popular on social platforms like Instagram that many artists participate in. One of the most popular ones is Inktober, which was developed by Jake Parker to help himself develop positive drawing habits. Each October, a series of drawing prompts are provided on the website, one for each day of the month. Artists follow these prompts and complete one drawing per day, posting it with the relevant hashtags on Instagram. This also helps artists find others participating in the challenge—it creates a real sense of community. Of course you can customise the challenge to fit your own time constraints or medium. For example, many oil painters do ‘Oiltober’ instead of Inktober.
Try starting your own challenge and share your progress on social media, for example a painting a day. Lots of people enjoy following along with these challenges, watching artists’ skills develop and improve. It’s also great to commit to posting consistently on social media if you are trying to grow your art account, as algorithms favour regular posting.
A painting challenge will encourage you to commit to a regular painting practice. The more you practice the more it is inevitable that you will reach your goal of becoming faster and more efficient.
Try some painting exercises
One exercise you could try, is painting using a timer. Try to complete as much of the painting as possible in the time you have given yourself. You will naturally start to take shortcuts and find ways to cut out the unnecessary. You could try painting the same subject twice. The first could be untimed, then the second you could give yourself a limit of two hours. Compare the two pieces after they are finished, are there noticeable quality differences? You may discover areas that you need to improve on first before you can speed up.
Of course, the time you set yourself will depend on the medium you use and your painting style. Gouache is a fast medium that dries quickly and is easy to set up and clean. So a gouache painting may only take two hours to complete, compared to painting the same subject in oils that may take around ten hours.
If you’ve found anything on this site especially useful, you can make a donation to me through PayPal. I take a lot of time to research and write each topic, making sure each tutorial is as detailed as possible and I make all my content freely available. Any small donation (even the price of a cup of coffee!) can help me to cover the running costs of the site. Any help from my readers is much appreciated :).
Follow the link in the button below to support this site.
Thank you