
Follow along with the steps and draw this snowy owl. To draw an owl, I first established the basic shapes of the head, body and wing. I then added the talons and feather details. The outline shape of the bird is fairly simple, but I spent more time on shading to achieve realistic feather textures.
In this tutorial, I’ll show you how to draw an owl outline, how to place the features of the face, claws and wings. Then I’ll show you how to create realistic details and feather texture.
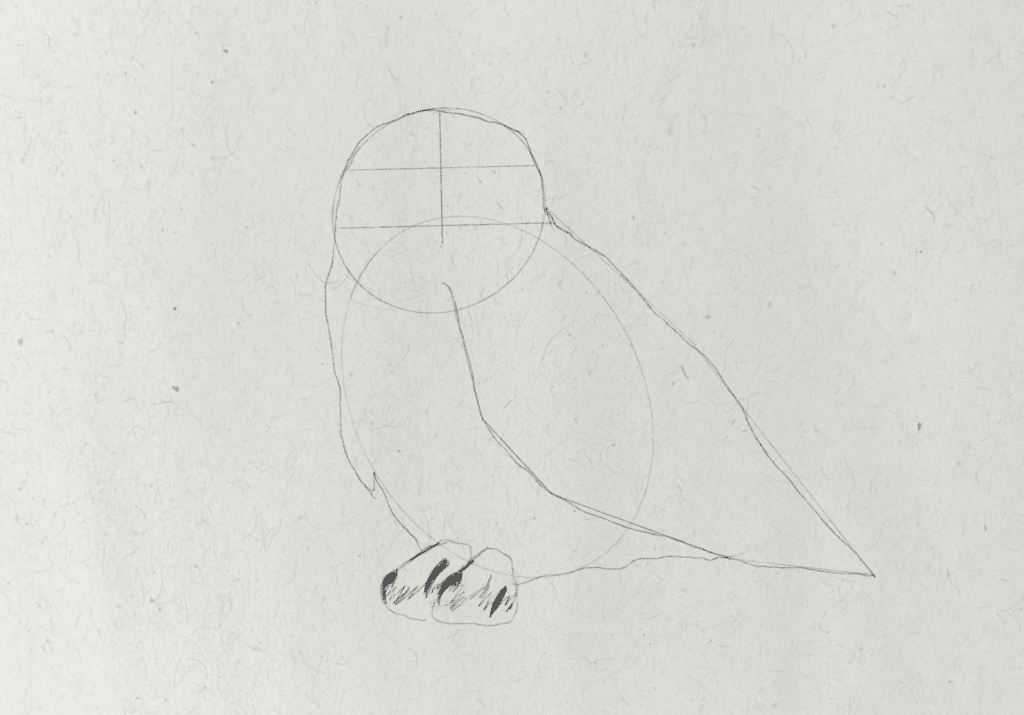
Step 1: Block in the basic shapes of the head and body
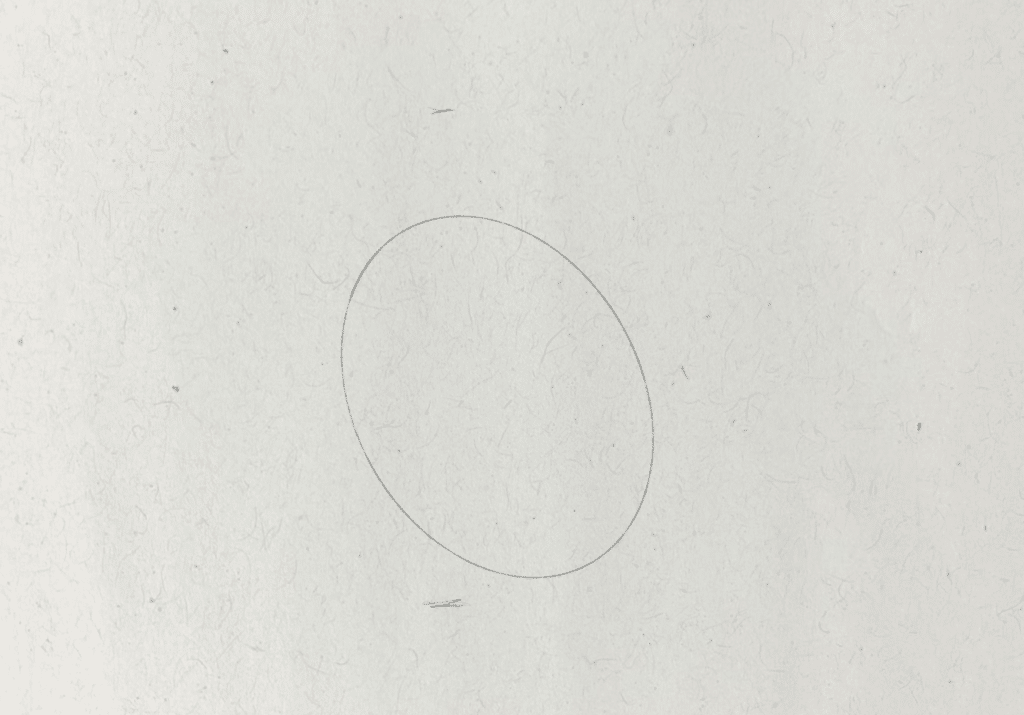
The first step of drawing an owl, which you can apply to just about any drawing you complete, is to draw two small lines to represent the top and bottom on the figure. This helps to place the figure on the paper, so you know the scale you are working at. I make sure to place the owl central to the composition and large enough to fill the page. The owl is positioned with its body turned slightly to the left from the perspective of the viewer. Its head is facing the viewer. I draw the owl’s body with a basic oval shape as a guide. The oval is fairly long and tilted slightly.
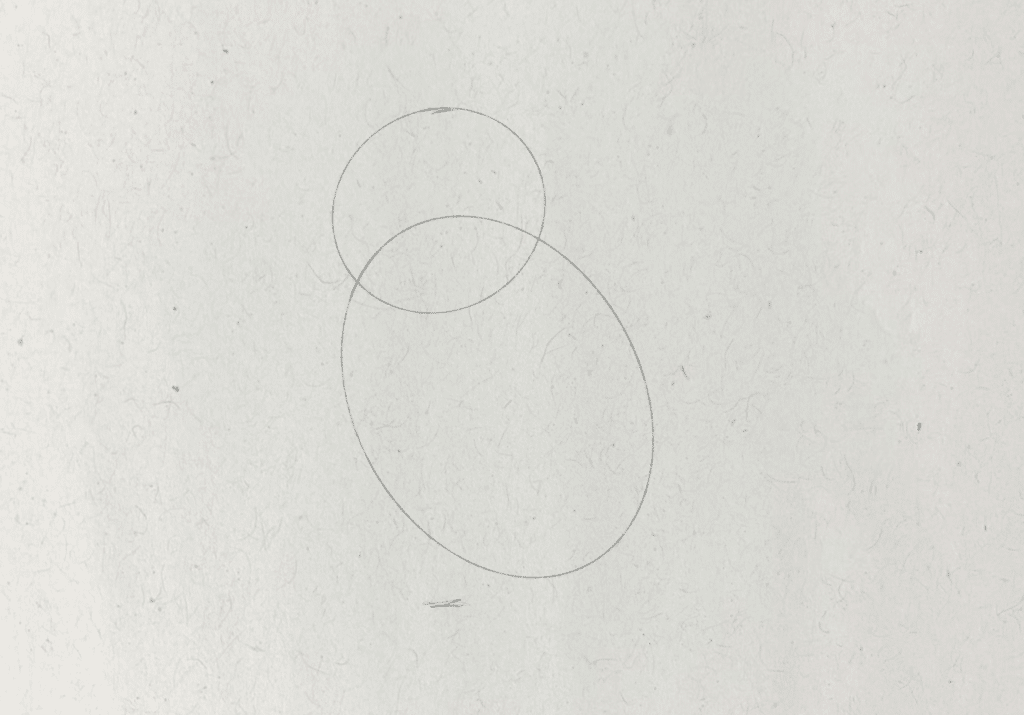
I draw the head with a large circle that is roughly half the size of the body, more circular in shape compared to the oval shape of the body and overlaps the body to just below the halfway point of the head. These guides will help me to place features and create a refined outline drawing, but I will erase them later so I make sure to sketch lightly.
Step 2: Block in the basic shape of the owl’s wing

For the wing of the owl, I establish the form by first drawing a geometric shape with straight lines. Drawing straight lines to represent curves first of all simplifies the process of drawing complex curves and it also helps me to find the angle of the curves and the point at which they change direction. This is one of the techniques I teach in the Drawing Fundamentals course, to help beginners learn to draw, step by step.
I started drawing the wing, by drawing points to show where it extends. The tip of the wing appears as a tapered triangular shape and extends beyond the body. It’s in line with the bottom of the oval, around the same width as the oval. Other points of note that make it easier to find the proportions of the wing, is that it roughly splits the oval in half and joins to the back of the head.
Step 3: Draw the contour of the body and wing
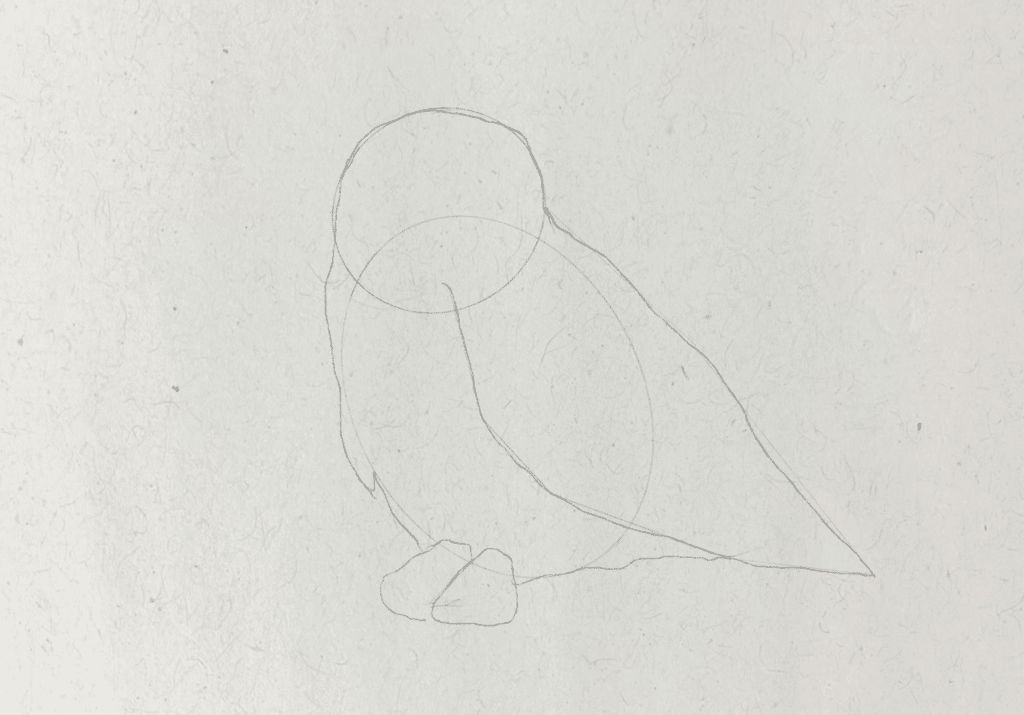
Now I’ve established the proportions of the owl with basic geometric shapes, I can refine the contour outline, to make it appear more realistic. So I follow the broad shapes that I’ve drawn to create the realistic outline, which is more organic in its curves.
I also outline the feet, with two curved trapezium looking shapes that are pointing slightly to the left. Then I draw a small rounded triangular shape for the edge of the wing that is facing away from the viewer and blocked by the body.
Step 4: Outline the feet
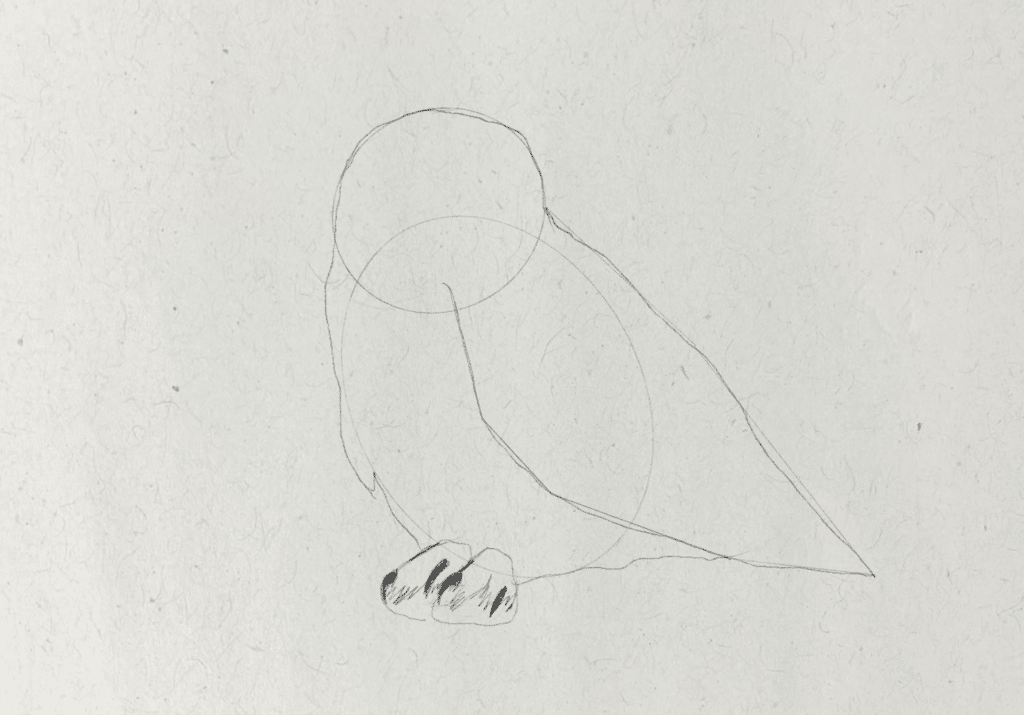
Using the trapezium shapes as a guide, I sketch the feet with jagged lines to represent the fur covering them. I also shade the dark talons which curve downwards. From the perspective of the viewer, we can only see two talons on each foot, due to the way that the owl is turned.
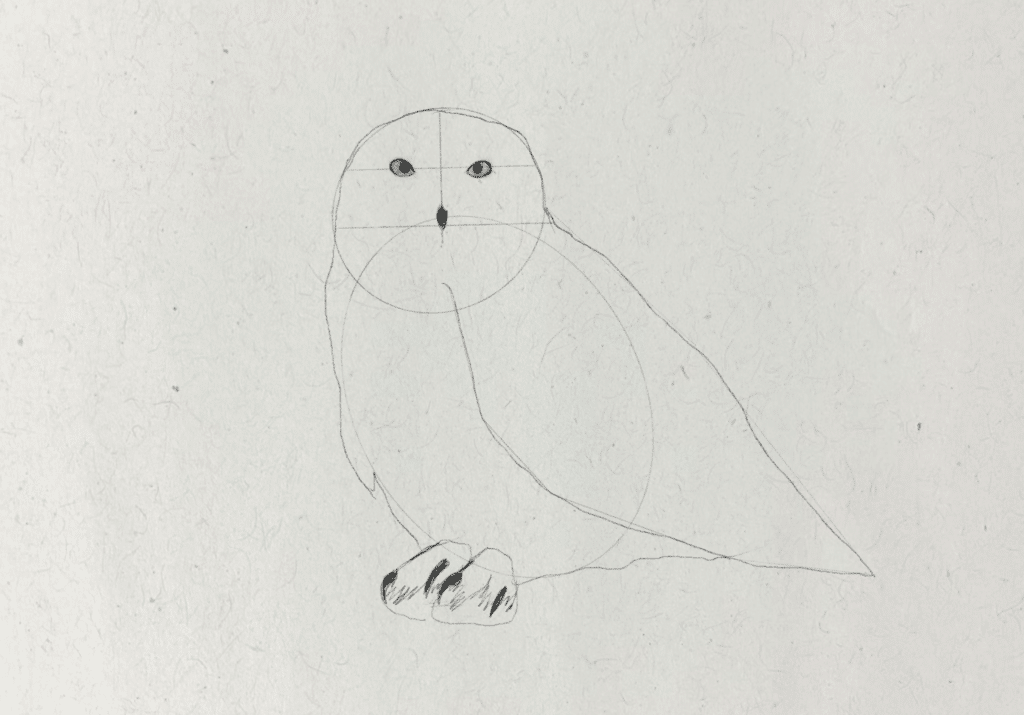
Step 5: Draw guides for the owl’s facial features
To place the features on the face, I draw a series of horizontal and vertical lines. From this I can draw the placement of the beak and eyes. I draw a vertical line to split the owl’s face in half, so I can place features symmetrically.
Owl’s eyes are placed relatively high on the head, compared to other animals. Looking at the height of the circle I drew, including the overlapped sections, the eyes sit just below a quarter down from the top of the head. So I draw a horizontal line to represent this, to ensure that the eyes are placed on the same level as each other. Then I draw a horizontal line to show where the beak will be placed, which is in line where where the head meets the body, or where the circle overlaps the oval.
Step 6: Draw the eye outline

I draw small vertical lines that I will erase later to show the width of each eye. The owl’s eyes are quite small compared to the size of the head. The head is roughly eight eye widths wide and there are roughly two eye widths between the eyes. Use this to find the size of each eye.

The bottom of each eye is rounded and the top of each eye curves down and inwards, creating a sharp inner corner. I draw the pupils as small circles, cut off by the top of the eye, in the middle. It can be tricky drawing eyes as symmetrical, but if you first outline their placement and proportions, it’s easier to then draw their shape afterwards. You could also use light sketchy searching lines to find the broad shape, then refine these lines to make them more accurate.
Step 7: Outline the beak

The beak is a small, pointed shape that sits in the middle of the face. It curves downwards to meet the horizontal guide line I drew.
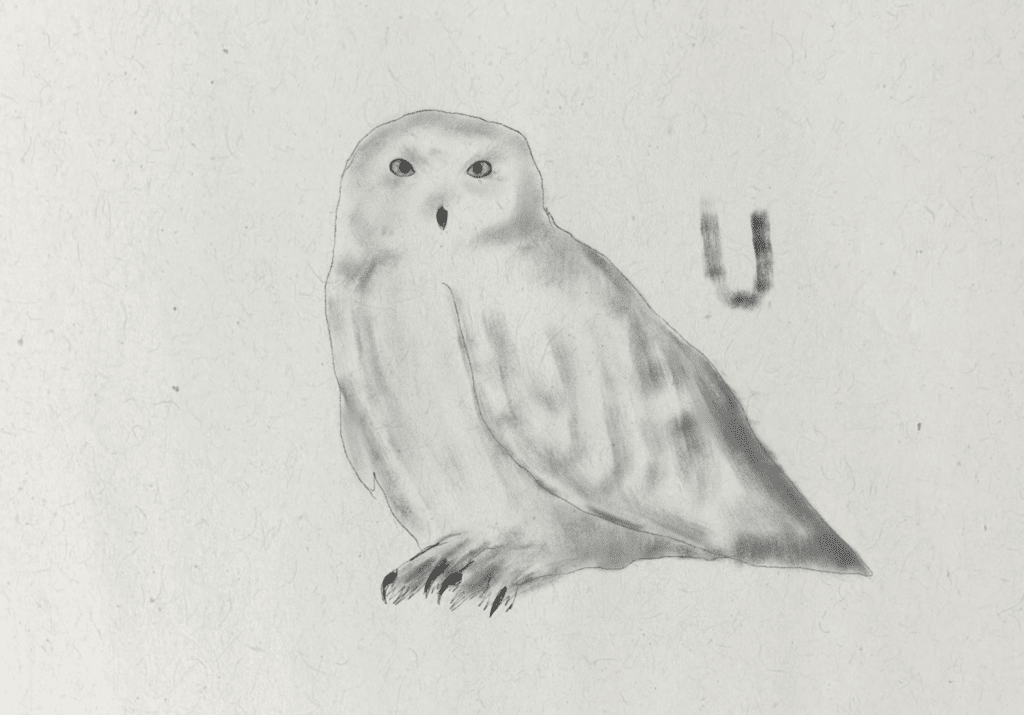
Step 8: Shade the facial features of the owl
The outline of the eyes, pupils and beak are all the darkest areas of the composition. I use a soft pencil and fill in the dark value by applying pressure. The irises of snowy owls are orange in tone in life, so I represent this with graphite by shading them a mid tone grey.
Step 9: Shade the owl

Before I start shading, I erase the guides I drew. Then I start with light pressure and the side of my pencil to establish the shadow areas. The light source is coming from above, in front and slightly to the left of the owl. I shade where different features are casting shadows. I keep the shadows soft and light at this stage so I can alter them later if I choose. The shadows are being cast under the wing and where the face meets the body. Then there are soft form shadows around the body and wing. The reflected light on the form makes the shadows appear softer and lighter.
I continue to refine, build up the shadow and details, by next establishing the shadow shapes of the feathers on the wing.
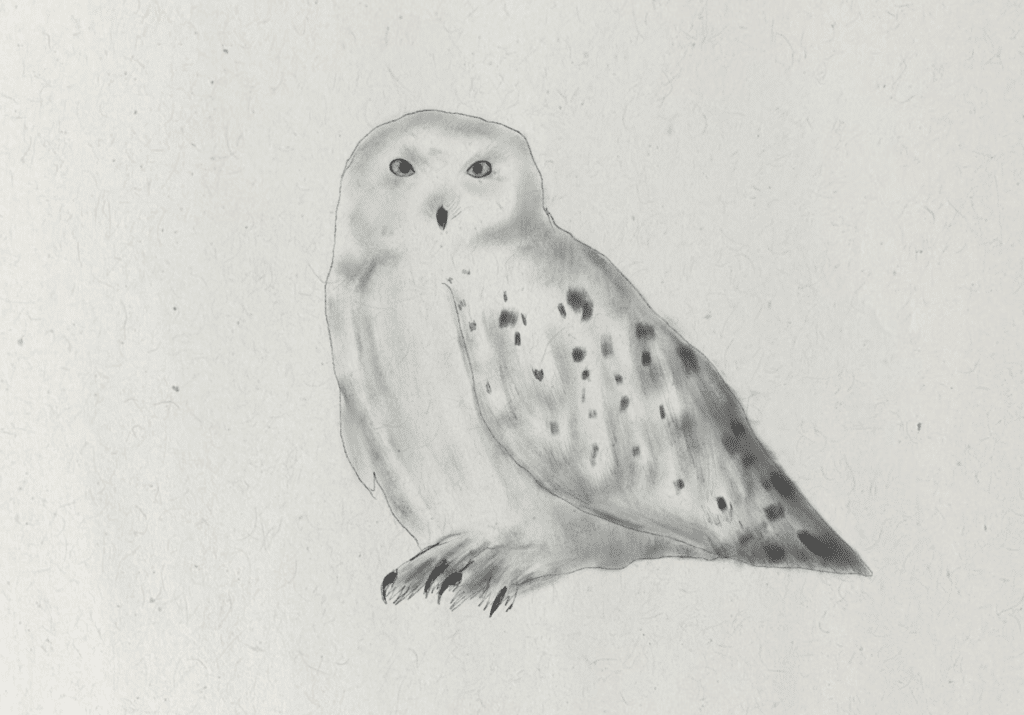
Then I outline the marks and details on the feathers, which appear as small, dark spots.
Finally, I increase the contrast in the shading, by applying more pressure with the side of the pencil. I want the shadows to appear soft and diffused, as the light curves around the form of the soft feathers, without any hard shadow edges. I also hatch in some small feather details, using the tip of the pencil to create fine lines around the edges of each feather. You don’t need to add too many details, when you have focal points in the shadow areas.
Step 10: Create highlight details

This is an optional final step, but I sketch some highlight tones on the body and head of the owl, where the feathers are reflecting the most light. This is a great technique to use if you’re drawing on toned or slightly neutral coloured paper. Sketch with a white pencil to make those highlights pop.
If you want to learn how to draw realistically in depth, with practical instruction, try the Fine Art Tutorials Drawing Fundamentals course. Through 55 online lessons, master fundamentals like shading, line work, proportions, shape, form and perspective.
If you’re looking for more wildlife drawing prompts, check out our tutorials on how to draw a robin, stag and polar bear.