Robins are relatively simple to draw, and I started this tutorial by drawing a few simple shapes, refining the details then shading feather texture. Follow along with the steps as I break down how to draw a robin from scratch.
Step 1: Draw an oval

I start the drawing by sketching an oval shape, making sure to place it in the middle of the paper. The oval acts as a guide which represents the body of the robin, so make sure to enlarge it enough to the size you want your drawing to be on the paper. The oval is slightly taller than it is wide, so take this into account while sketching. I make sure to sketch lightly, so that I can erase the guides later.
Step 2: Draw a trapezium guide for the head
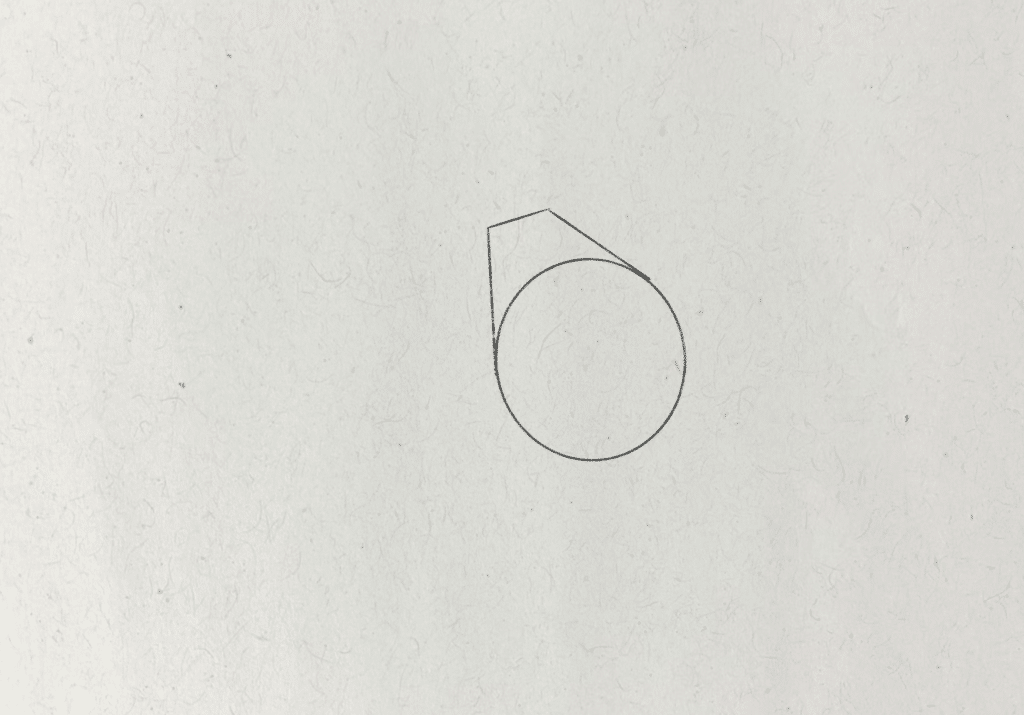
We can find the form of the robin by sketching more basic shapes as guides and understanding the proportions of the body. The head is around half the size of the body and the front of the face sits higher than the back of the head. So, adjoining the oval shape that I drew for the body, I sketch an asymmetrical trapezium shape, slanting at an angle.
Step 3: Draw a triangle guide for the tail
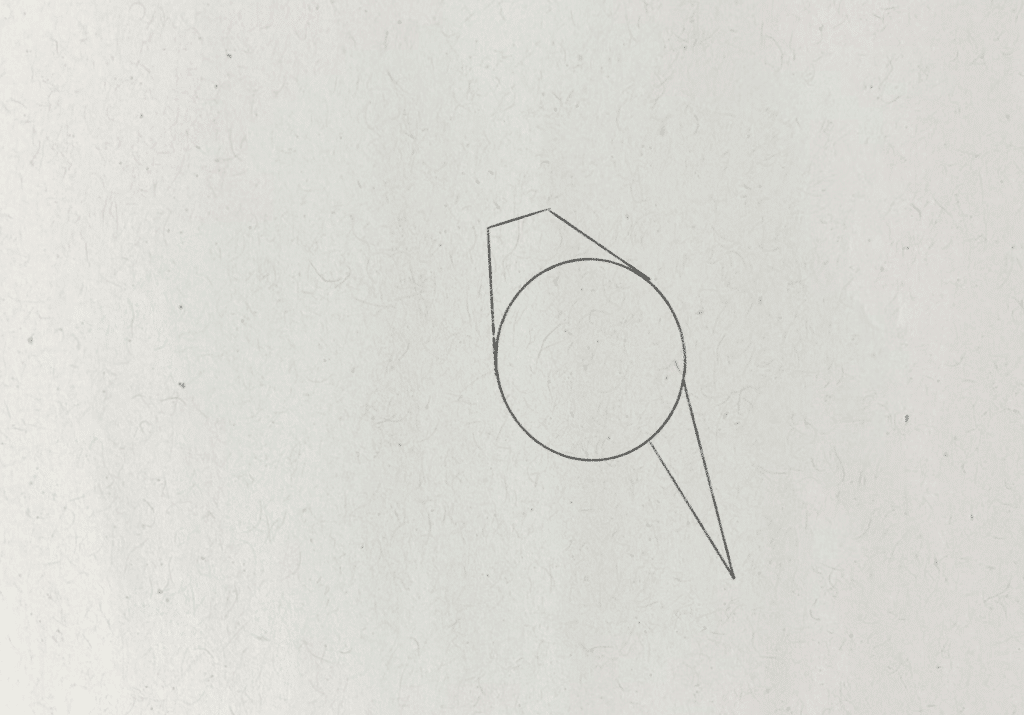
The robin’s tail is long, slightly longer in length than the body, so I drew an irregular triangle shape extending from the back of the oval I drew for the body, tapering off at the tip for the end of the tail.
Step 4: Sketch guides for the feet
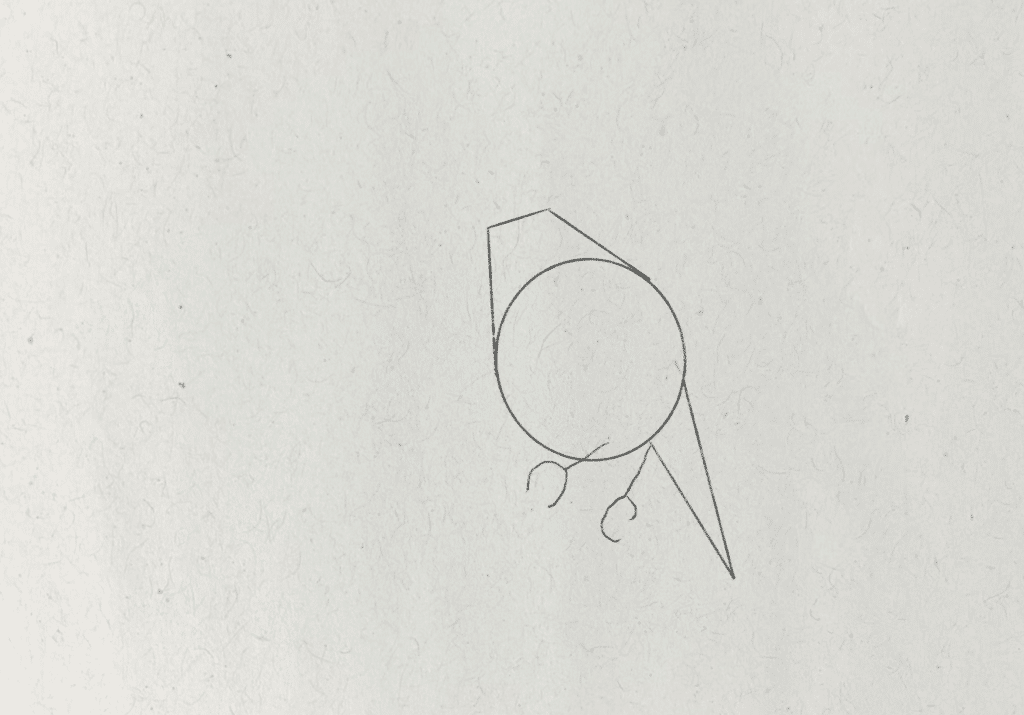
I represent the feet by drawing two simple curve shapes at the end of a straight line. I’m imagining where a branch will go that the robin is perched on top of. The talons will wrap around the branch, which I will draw lacing through the two claws, so I make sure to position them with this in mind.
Step 5: Draw a simple shape for the branch
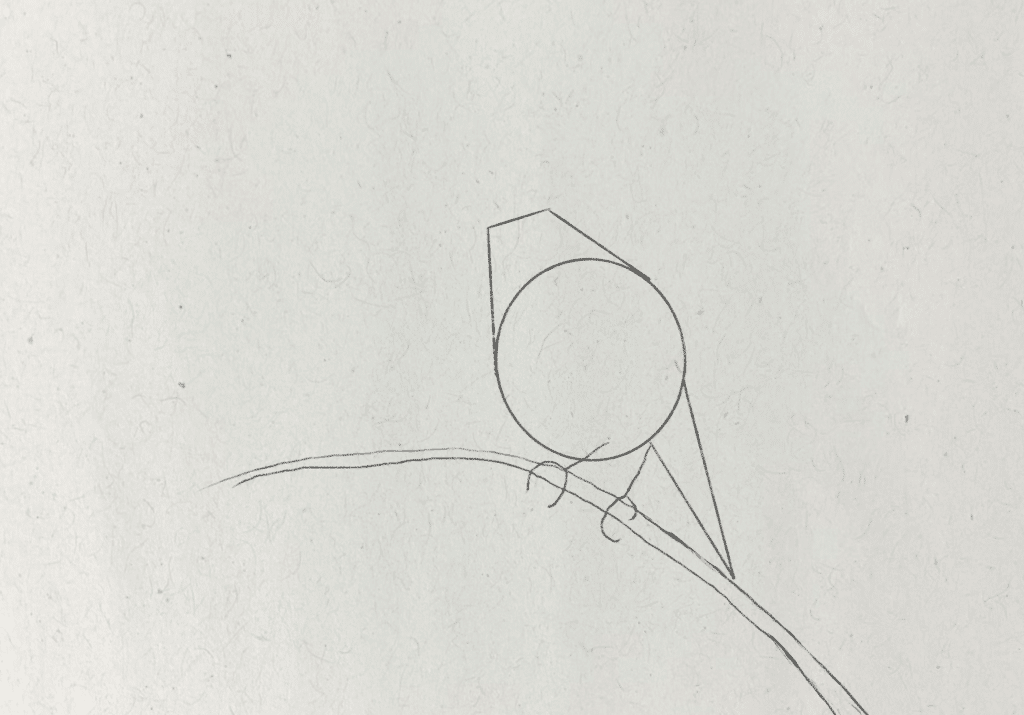
To make the robin drawing look more finished, I also want to include a branch curving across the page. For this, I draw a long arch shape. The lines of the branch look fairly organic to resemble the twisting shape of the wood.
Step 6: Establish the wing guide
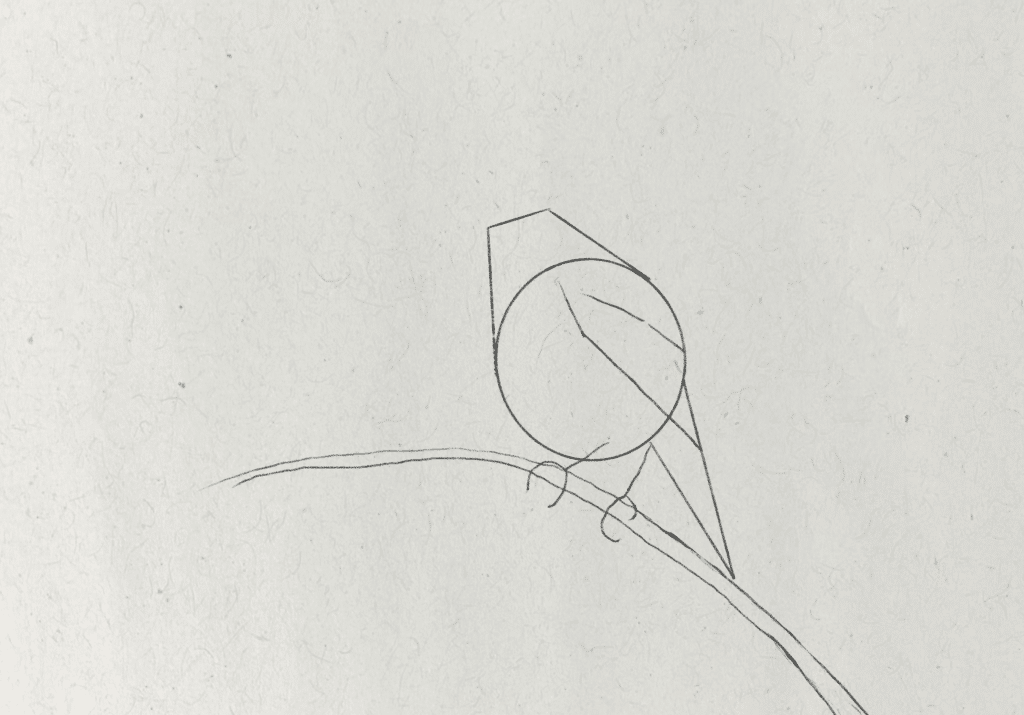
The final guide I’m going to draw is for the wing, which is simply two slanting lines to represent the outer edges of the feathers, then two more lines to show where the shorter feathers at the top of the wing will be. Drawing these guides means that I can focus on the particular points of the curves of the form, instead of drawing these outright. The guides act to establish the broad shapes and proportions, upon which I can build details.
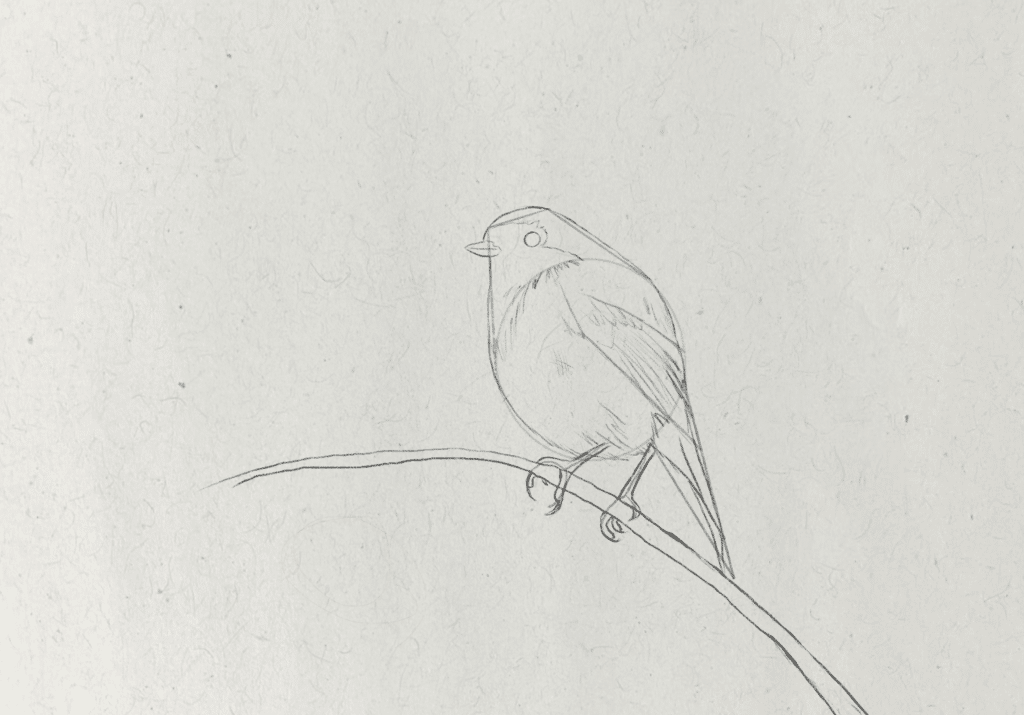
Step 7: Draw the head outline

I created a contour drawing of the head shape next, creating a gentle curve for the top, which slopes down to the back of the neck. The neck at the front dips in a little, then I leave a space for the beak.
Step 8: Draw the body

The body broadly follows the oval shape, dipping inwards a little towards the tail. I also lightly hatch some feather texture to show the direction of the feather shapes.
Step 9: Sketch the wing
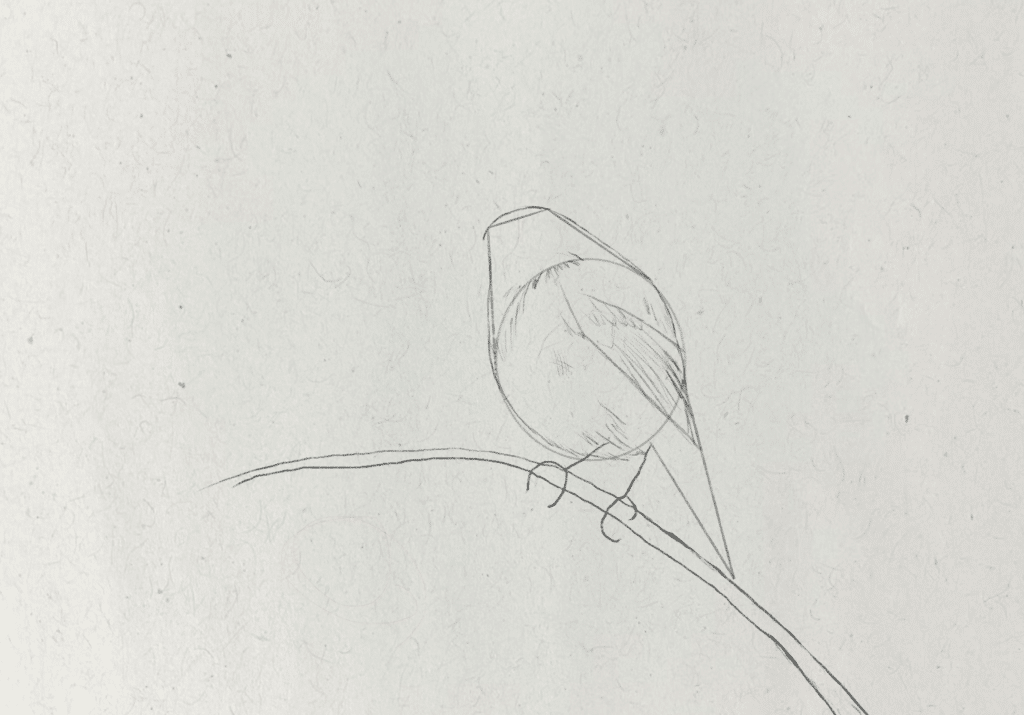
I lightly start to sketch some of the feather details on the wing. Below the top line I drew to separate the longer and shorter feathers, I draw long slightly curving lines for the feathers that make up the mid to the tip of the wing. Then I layer shorter feathers on top. I sketch these lines lightly, so I can shade over them later.
Step 10: Contour the tail feathers
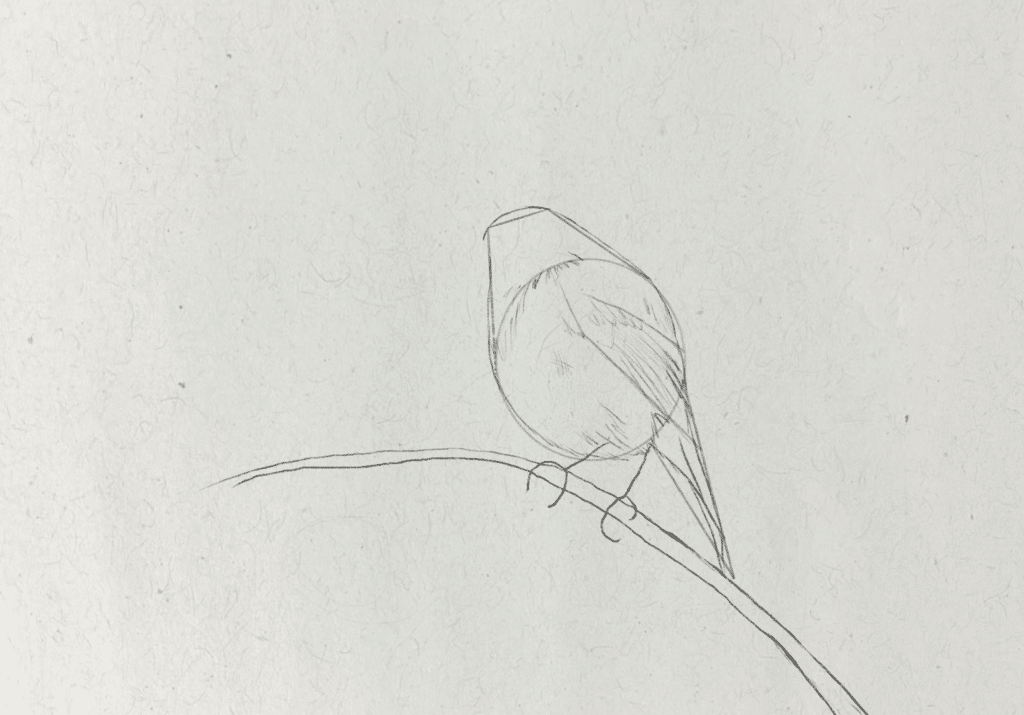
Because of the position and perspective of the robin, you can see the underside of some of the tail feathers. The tail feathers are also long in shape, so I draw isosceles triangles that stretch downwards towards the end.
Step 11: Outline the facial features of the robin
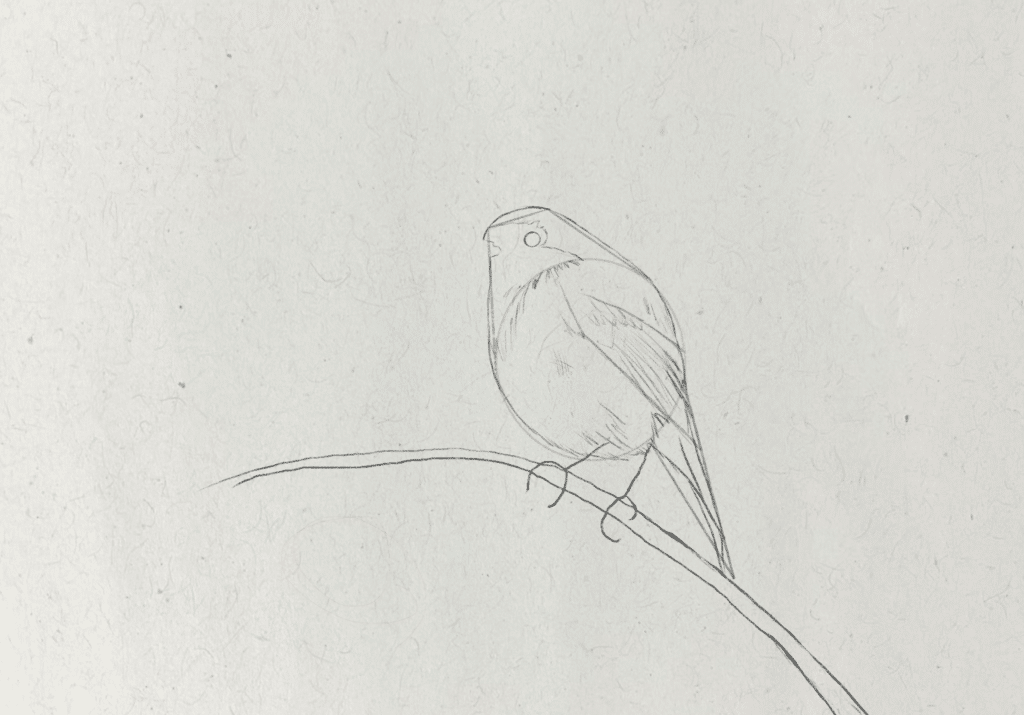
I start by drawing the eye, as a circle, which roughly sits in the middle of the head. Then stretching from the forehead and surrounding the eye are the darker feathers on the back of the head.
Step 12: Sketch the beak
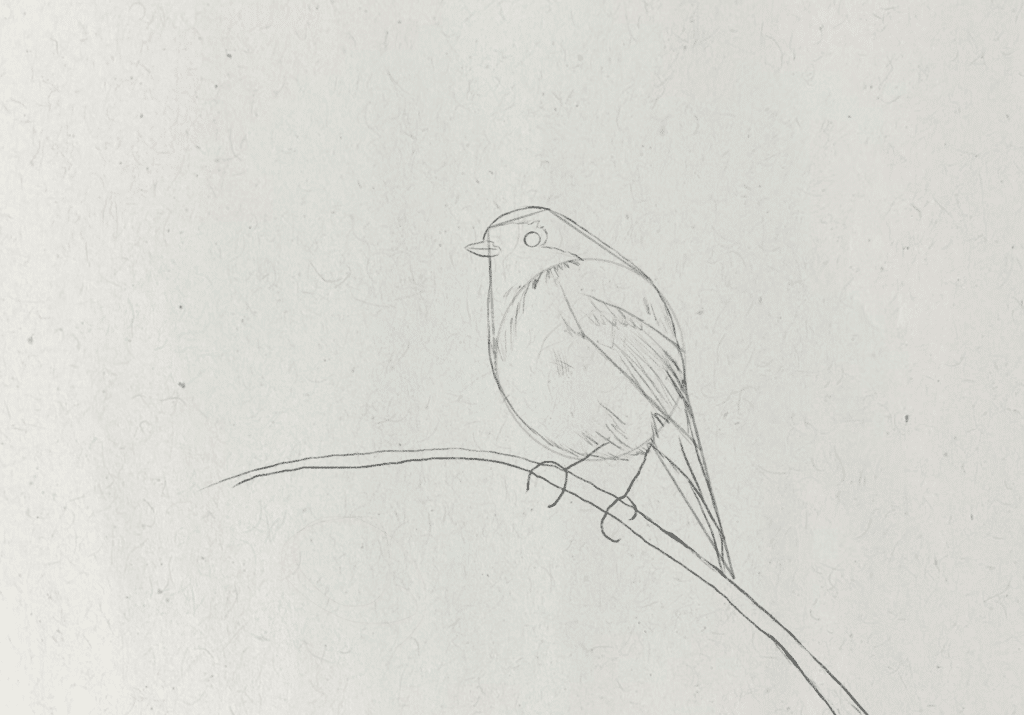
The robin’s beak juts out and curves upwards slightly, as the head is tilted upwards. Robin’s beaks are short and the bottom curves upwards, while the top of the beak is more straight in shape, tapering to a point in the middle.
Step 13: Create the talon outline
The talons are a little trickier to outline than the other parts of the drawing, but since I already established the shape, I can draw around this to thicken the claws and legs. Notice where the talons are clutching the branch, and draw them wrapping around it.
Step 14: Shade the drawing
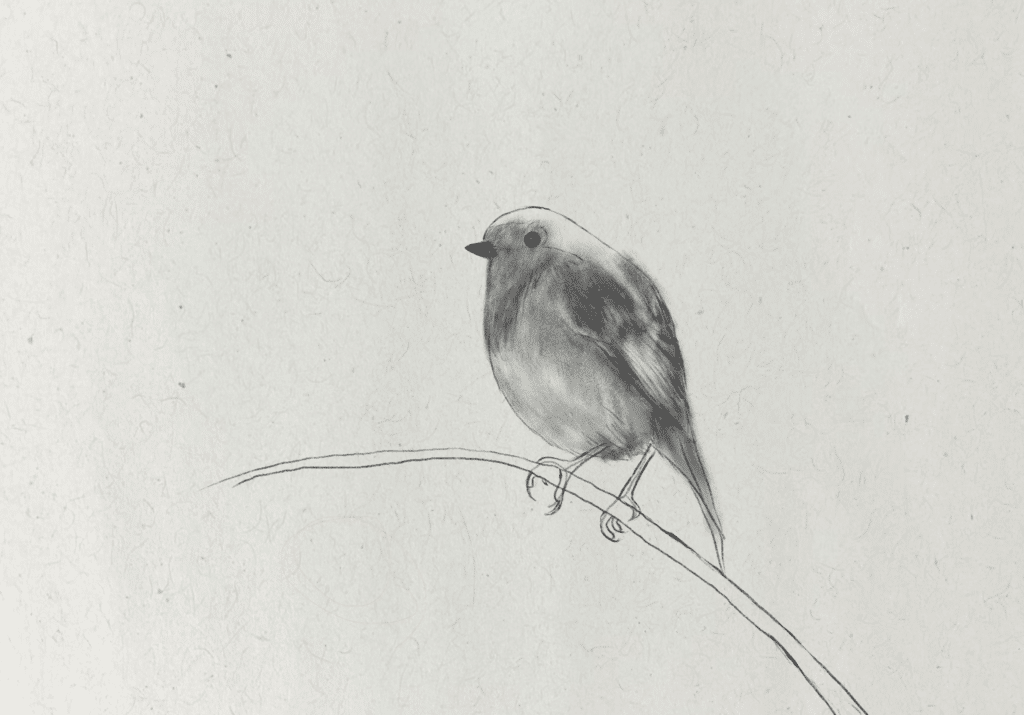
There are a couple of options when it comes to shading, you could create a colourful robin with coloured pencil, or add a splash of orange watercolour to the red feathers and hatch some ink lines for the details. The other option is to sketch in graphite. I erased all the guides before I started shading.
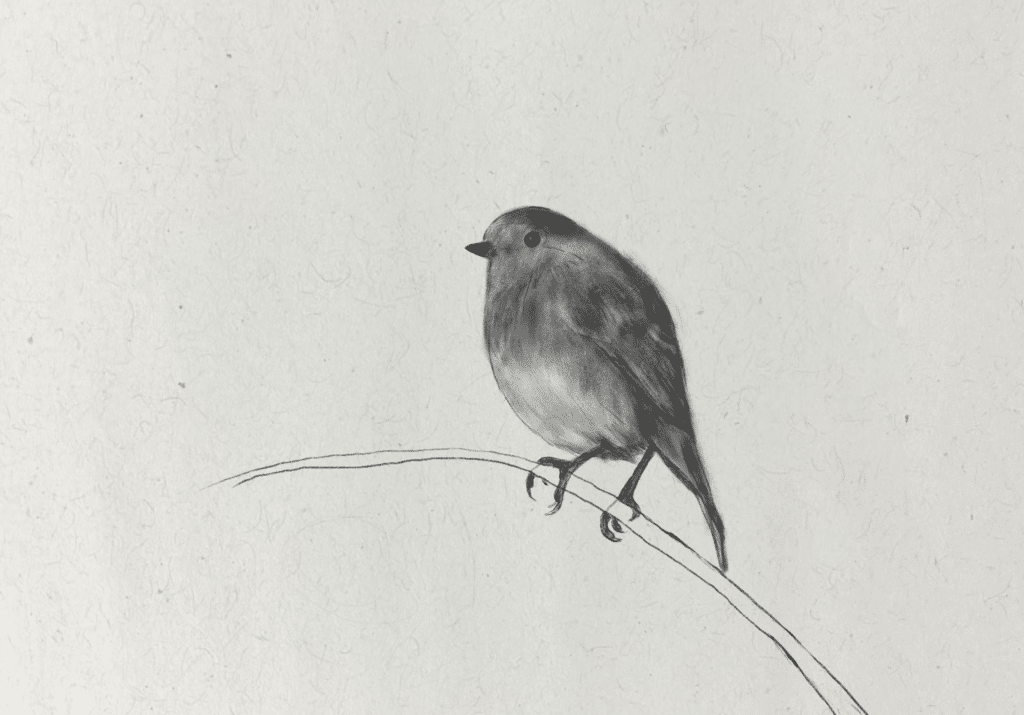
I chose to create a graphite pencil sketch, so I first established the light source, which was coming from above and in front of the robin, then I concentrated the darker areas around the feathers that were casting shadows, around the tail and the chest of the bird to create volume. Using the side of the pencil helped me lay down the shading more quickly and I used a tortillion and a kneaded eraser to blend and create subtle highlights on the feathers.

If you want to learn more about how to shade drawings, and create drawings self-sufficiently from scratch, with accurate proportions and quality line work, check out the Fine Art Tutorials Drawing Fundamentals course. It’s 55 lessons which will take you from complete beginner to drawing confidently and masterfully.