Learn nine of the most essential coloured pencil techniques that form the foundation of every pencil artist’s practice.
Coloured pencils are an attractive medium for a number of reasons. They’re mess free, easy to control and artists don’t need lots of different supplies to get started.
Even though they are a medium in their own right, if you have any experience with drawing in charcoal or graphite, coloured pencil will feel intuitive to get to grips with quickly as there are many overlapping techniques.
Because artist grade oil pencils are made from soft wax or oil binders, it gives artists the ability to blend and layer colours. By using techniques such as blending, artists can achieve sophisticated and realistic results in their drawings. Some coloured pencil artworks can even appear similar to oil or pastel paintings.
Before we take a look at the nine coloured pencil techniques that you can learn to accelerate your skills, I’ll first list some of the essential coloured pencil materials that make it possible to accomplish these techniques.
Disclaimer: Fine Art Tutorials is a reader supported site. When you make purchases through links on this site, we may earn a small commission at no extra cost to you.
Coloured pencil supplies
High quality pencils with a high pigment content and paper specially designed for fine art coloured pencil drawing will elevate your work, giving it a more professional appearance.
Pencils that contain wax and oil give the best results, as they are soft and release the binder smoothly onto paper. A variety of techniques can be achieved by using artist grade colouring pencils. For a more thorough look at different brands of pencil, check out our best coloured pencils review.
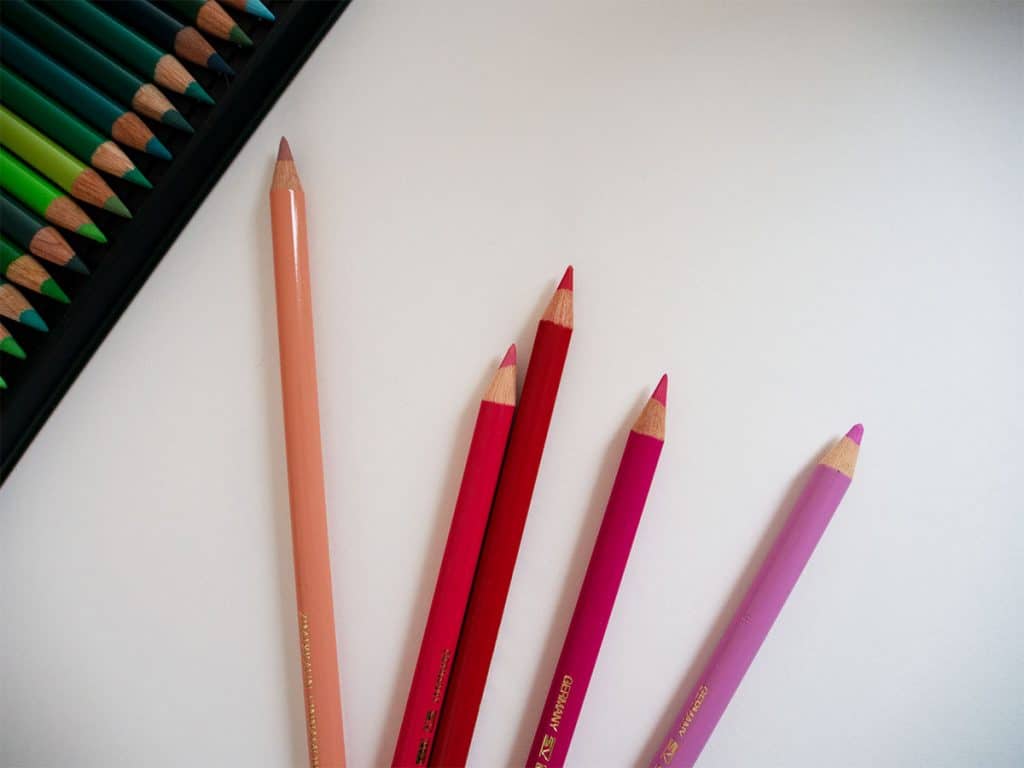
Faber-Castell Polychromos are a brilliant range of coloured pencil, they’re popular amongst professional artists for their high pigmentation, medium softness and large range of colours.
Paper suitable for coloured pencil drawing should be thick and rigid, so that it can take multiple layers of pencil work. Coloured pencil paper should also have ‘tooth’ (a slight surface texture) to encourage adhesion of pencil layers.
Pastelmat is perfect for pencil work. It’s thick like card, with a paper weight of 360gsm. The paper is velvety soft, but has a grainy tooth which helps pencil layers to adhere.
There are other exciting materials you can add to your coloured pencil supplies list, check out our supplies guide for a review of different pencils, papers and mediums.
Experiment with how you hold the pencil
The way you hold a pencil actually has a huge impact on how successful trying the techniques on this list will be.
For better control, hold the pencil near the tip. This is great for detail and precision work. Other techniques that require more pressure, or small sharp motions (like scumbling) work better when you hold the pencil closer to the tip.
To achieve, looser sweeping actions, hold the pencil with the overhand grip. This type of grip is useful for creating loose sketches, for the initial starting lines. Hold the pencil with your middle finger and thumb near the middle of the casing, then curl your ring finger and little finger around the casing and rest your index finger on top. With this grip, try and use your elbow or shoulder to move the pencil across the paper instead of your wrist. This will give you more control and will help in creating long, more accurate straight lines (if you’re not using a ruler).
Hold the pencil so the tip is at an angle on the paper. By using the side of the pencil tip, it’ll take longer to become blunt, meaning that you’ll have to sharpen it less often.
Layering
To achieve smooth blends and realistic effects with coloured pencil, it’s pretty much essential to layer colours.
The general rule of thumb is to start with lighter colours, then gradually build up the darks. To emphasise the brightest highlights, go over with a white or light coloured pencil at the very end. However, in this butterfly drawing, I layered light yellow over mid orange for the lighter tones in the inner corner of the hindwing, to lift the tones.
Another important tip is to start colouring by applying very light pressure with the pencil. Slowly build up the amount of pressure you apply with each consecutive layer. It may take a few layers of pencil to cover the paper’s texture. However, this depends on the type of texture of the paper and the softness of the pencil. For the final layers of pencil application, you’ll find yourself applying quite a bit of pressure to the surface, this enables the pencils to release the binder and pigment, yielding bright and smooth results.
Oil pencil points are more resistant to breakage, which makes them great for techniques like burnishing. As wax pencils are softer, less pressure is required to achieve thicker pencil application.
Coloured pencil techniques
Regular pencil stroke: back and forth
This is the most common of all the coloured pencil techniques used for shading. To achieve even coverage, hold the pencil at a slight angle and run it back and forth across the page so that pencil marks meet and none of the white of the paper shows through.
Blending coloured pencil technique
Blending is a technique that most beginners are keen to learn how to do. There are in fact several ways to blend colour, each method yields a different effect. For a more in depth look at blending, check out our tutorial on how to blend coloured pencils.
Layering blend method
The first blending method is to simply layer colours on top of one another.
Start with the lightest colour and fill in the space you want the colours blended together with light pressure.
With your next colour, lightly go over areas you want the colours to transition into each other.
Take your first colour again and apply another layer, this time applying more pressure.
Then take your darker colour and apply more pressure to areas where you previously coloured and overlap the sections with the lighter colour. It may take a few layers of repeating this action before colours look smooth.
In the final layers of blending, you should apply quite a bit of pressure to the paper, this is a separate technique called burnishing.
Solvent blending method
To get the smoothest blend, brush a little pencil blend medium over the top of the colours.
You can use solvent like odourless mineral spirits with oil pencils. Not much solvent is needed to blend colour, soak a tiny amount on a tortillion, q-tip or soft brush.
For wax or oil pencils, you can use a blending medium like this one by Zest-It. At the moment the Zest-It medium only seems to be available in the UK, however.
Turpentine will dissolve wax pencil medium better than odourless mineral spirits. If you choose to use turpentine, use sparingly as it is strong. As with using any kind of solvent, make sure to ventilate your space properly, as the fumes are toxic.
Solvent thins the binder in coloured pencils, so the colours will run into one another and appear transparent. Use a fixative to prevent pencil layers bleeding into one another.
Burnishing technique
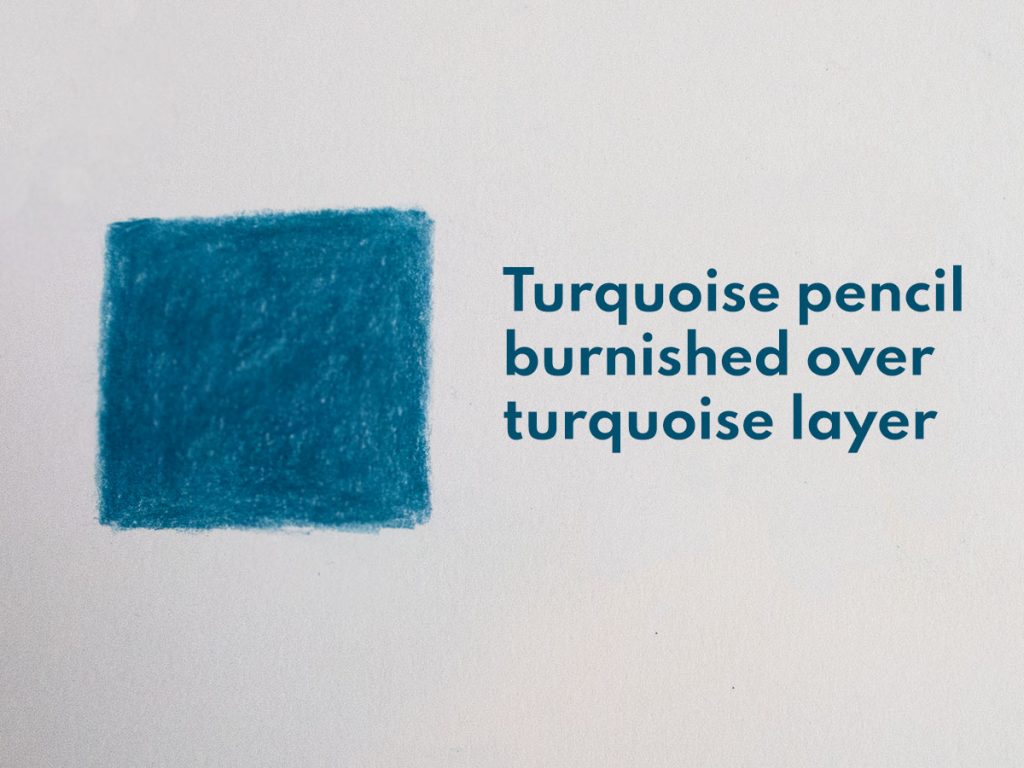
Create seamless blends and gradients with the burnishing technique. To carry out this technique yourself, apply heavy pressure.
This works best on paper that has a tooth to it, like Pastelmat. By applying heavy pressure, more of the colour and binder is released onto the paper and crushed into the tooth of the surface, creating a thick layer that looks a bit like pastel.
With a thicker layer of pencil on the paper, it’s easier to achieve smoother, more blended effects. You can burnish with the coloured pencil itself, or with a layer of colourless blender on top.
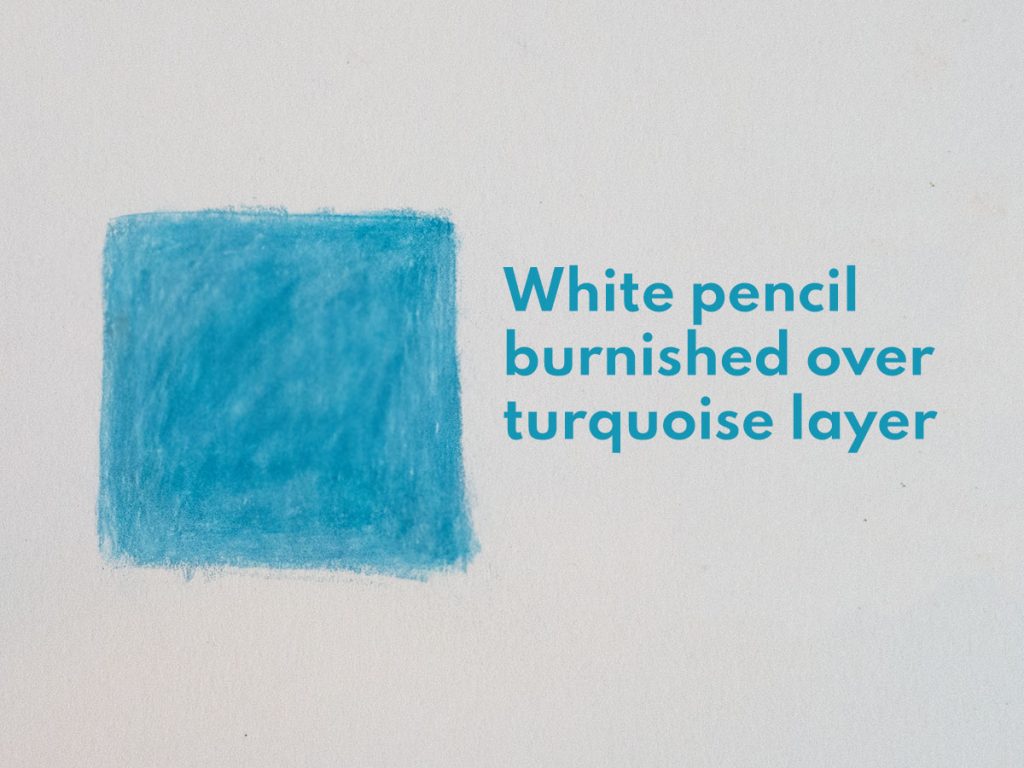
Experiment with burnishing different colours and tones on top of one another. For example, burnishing a light colour on top of a dark colour will make it appear brighter.
Change the hue of the drawing by burnishing a different colour on top. For example, if you want to create a cool tone to the drawing, add a layer of blue on top. Choose a warm colour like yellow orange or red to make the drawing feel warmer. Of course, you can choose to burnish select areas of the drawing instead of the whole thing.
This type of burnishing, also called saturation burnishing works well when using similar colours with a different undertone. Change the warmth of an area of the drawing by burnishing a warmer colour on top. For example, the
To decrease the saturation of an area of a drawing, burnish the area with a grey toned colour of a similar darkness.
I’d recommend trying colour combinations on a piece of scrap paper or on a sketchbook before committing to burnishing over layers of a drawing you’ve already spent time on.
Hatching technique
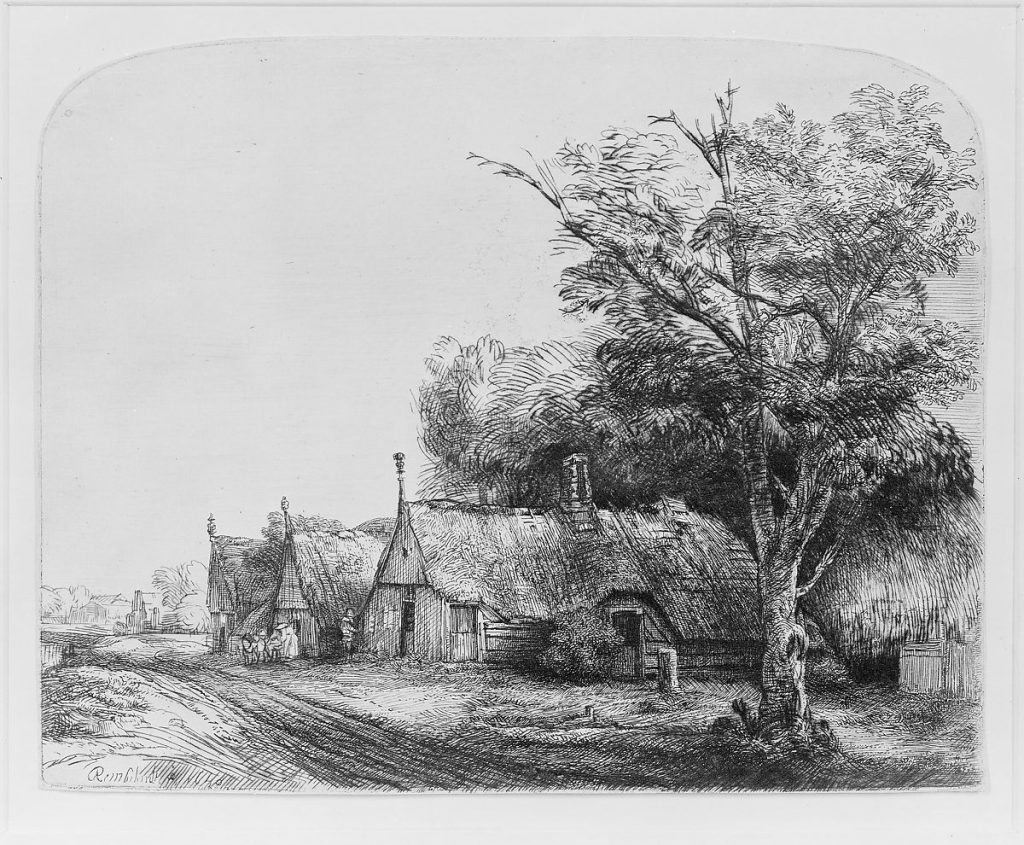
Hatching and cross hatching are both shading techniques that are used in pencil, coloured pencil drawings and etchings. Parallel lines are drawn, more heavily concentrated in darker, shadowed areas and less concentrated in lighter areas. With cross hatching, perpendicular lines are drawn over the hatched parallel lines. The closer the lines are together the more intense the effect.
In this etching by Rembrandt, you can see how he used hatched lines to create areas of light and the illusion of depth.
Scumbling technique
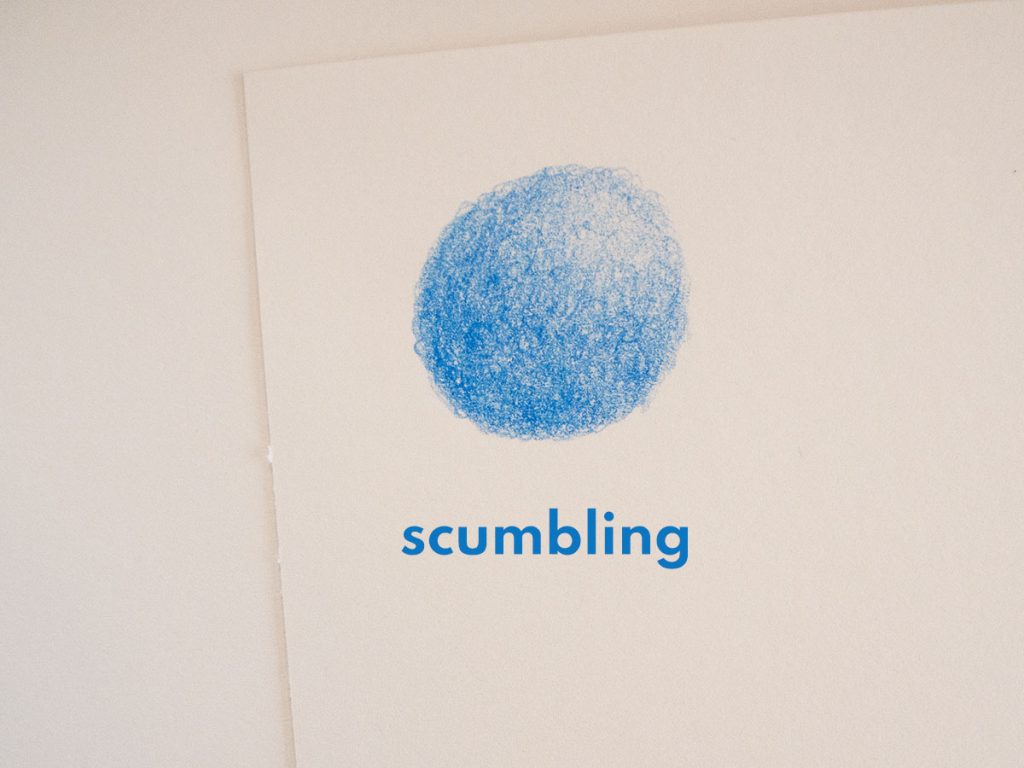
Scumbling is a shading technique involving layering tiny circular marks on top of one another. To do this, make a small circular motion with your pencil. Use this technique to create texture and show the colours of layers beneath.
Sgraffito technique
The sgraffito technique is carried out by applying colour, then scratching it off to reveal the white paper below. Thin lines can be achieved by scratching off colour. Make sure to apply a few layers of pencil first, then apply fairly light pressure with the knife, so as to not damage the surface. Use a craft knife, or similar with this technique.
Frottage coloured pencil technique
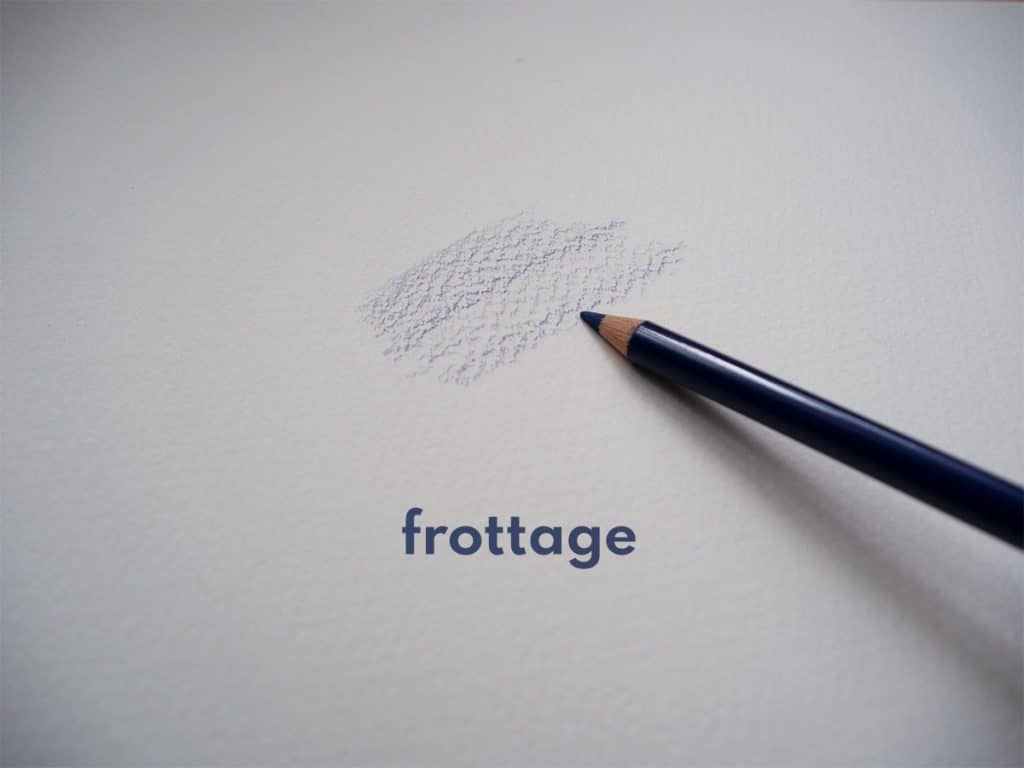
The frottage coloured pencil technique involves applying pressure to the side of the pencil tip on the paper to pick up the surface texture. The pencil marks will reveal patterns in the grain of the surface. Alternatively, place a textured object beneath the paper, then rub over the paper to reveal the underlying texture of the object.
Indenting technique
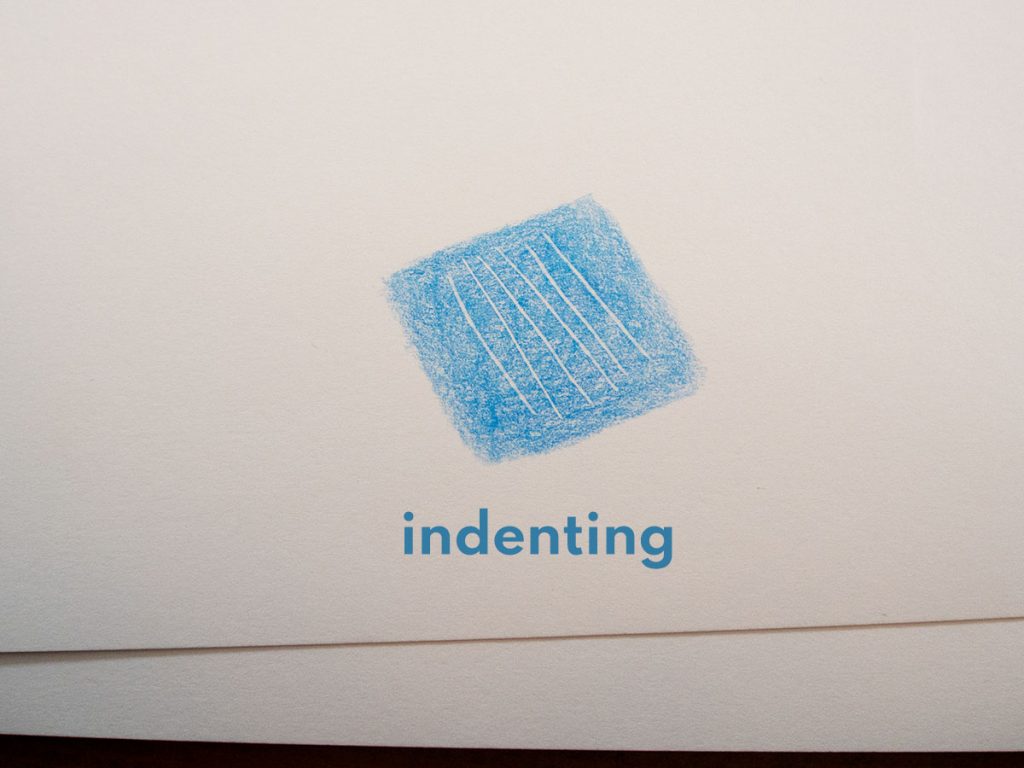
This technique involves creating a fine dent in the paper. When you come to draw over the indent, the pencil avoids the mark, leaving a thin white line, or valley in the paper.
Before starting your coloured drawing, put a sheet of tracing paper over your paper and draw lines where you want white of the paper or the layers beneath to appear. Remove the tracing paper and start shading.
An easier way to create an indent would be drawing straight on the paper with a stylus. Just make sure the object you use to create the indent isn’t sharp enough to tear the paper.
When you draw over the indented mark, shade with your pencil at an angle, as a sharp pencil point may make marks in the valley.
This technique is great for strands of hair, whiskers and other areas you may want to create thin, bright highlights.
Stippling technique
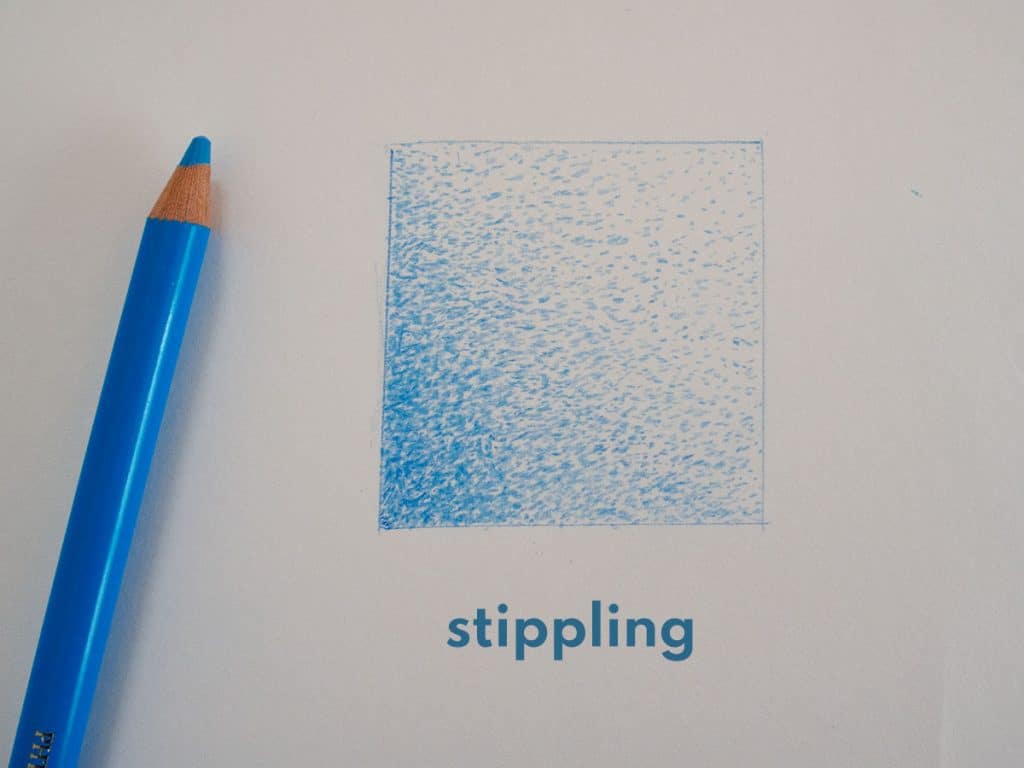
Stippling is the technique of creating light and dark areas in a drawing with dots. Create shadowed areas by drawing a large number of dots close together. Lighter areas will have fewer dots further apart.
If you apply too much pressure with a wax pencil when using this technique, the tip may break. This technique is more suited to working with oil pencils for this reason.
Bear in mind that you can create different sized dots depending on how sharp the pencil is. An unsharpened pencil will yield thicker dots with a softer appearance.
Hold your pencil vertical to the paper and drop your hand to create the dots, as your hand bounces it will create another dot, so this repetitive action of stippling can be quite fast. However, it can take practice to keep it neat.
Coloured pencil techniques
If you’ve found anything on this site especially useful, you can make a donation to me through PayPal. I take a lot of time to research and write each topic, making sure each tutorial is as detailed as possible and I make all my content freely available. Any small donation (even the price of a cup of coffee!) can help me to cover the running costs of the site. Any help from my readers is much appreciated :).
Follow the link in the button below to support this site.
Thank you for this wonderful and very helpful Tutorial! You have helped me greatly and I appreciate that you have shared this with others. I suggest that folks read it completely through and through before they pick up the colored pencils and papers you have described. Easy to read and easy to understand… I am saving this so I can refer to it as I experiment with my colored pencils. Really great content! Thank you very much, again!
HI from Boechout a small village near Antwerp, Belgium. Love your tutorials !!!
Thanks (I left a small donation)