
In this tutorial, I’ll walk you through how I drew this realistic sketch of Mount Cook in New Zealand, step by step. When drawing mountains, it’s not the shape or form that is difficult to capture, it’s the shading of the rock texture. Light is diffused and scattered around the jagged edges of rocks and wraps softly around the snow. Capturing the reflected light accurately will set your mountain drawing apart. Therefore, I will explain some of the fundamental techniques that will help you to shade your own mountain drawing.
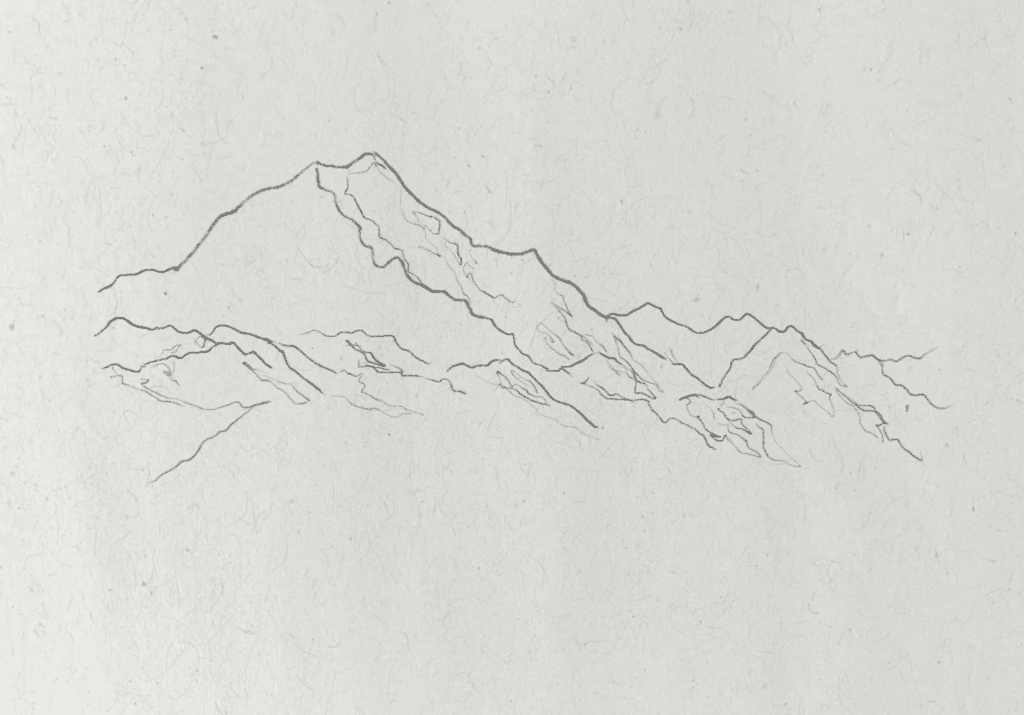
Step 1: Outline the basic shape of the mountain

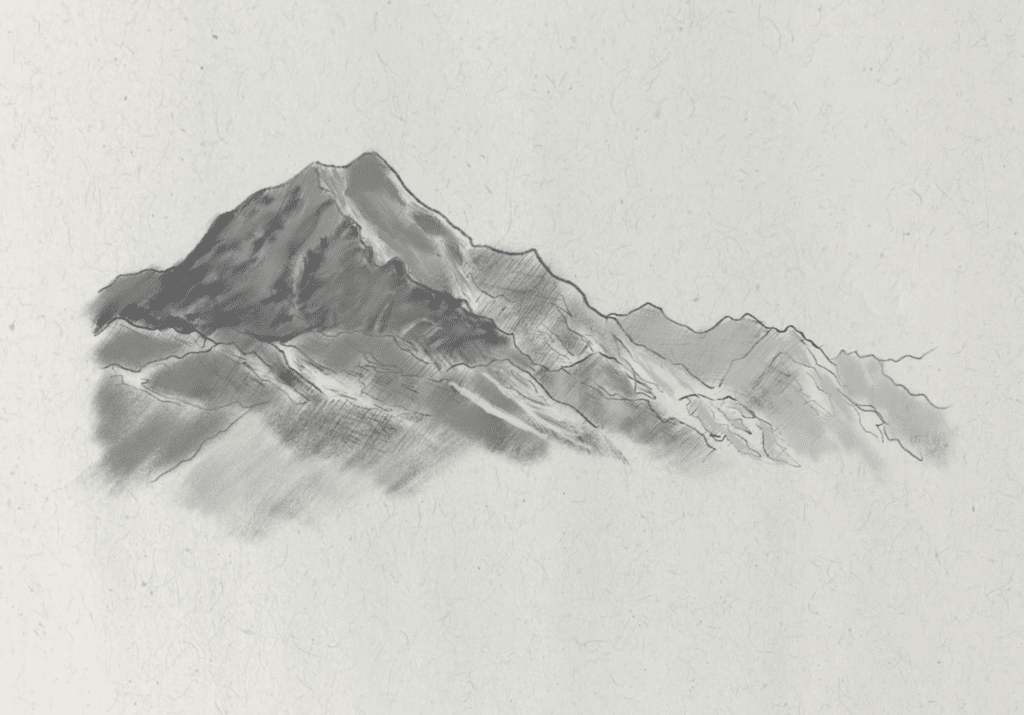
The mountain is an organic triangle shape that is asymmetrical, with multiple smaller peaks surrounding it. It has jagged edges to represent the tips of the rock formations. The peak of the mountain sits around the one third point in the composition. I use a sharp pencil to broadly outline the jagged triangle shape, and the other peaks, moving the pencil in slightly organic motions to represent the rocky outcrops.
Step 2: Draw the three dimensional form
To create the appearance of three dimensionality in the mountain drawing, I draw some more contour lines to represent the form. Drawing these extra contour lines brings a sense of perspective to the drawing. I use lighter pressure with the pencil to outline these rocky contours, that will also show the distinction between light and shadow areas in the drawing. The light source is coming from above and to the right of the mountain, leaving the rock facing the viewer partially in shadow.
Step 3: Begin shading and establish the light source
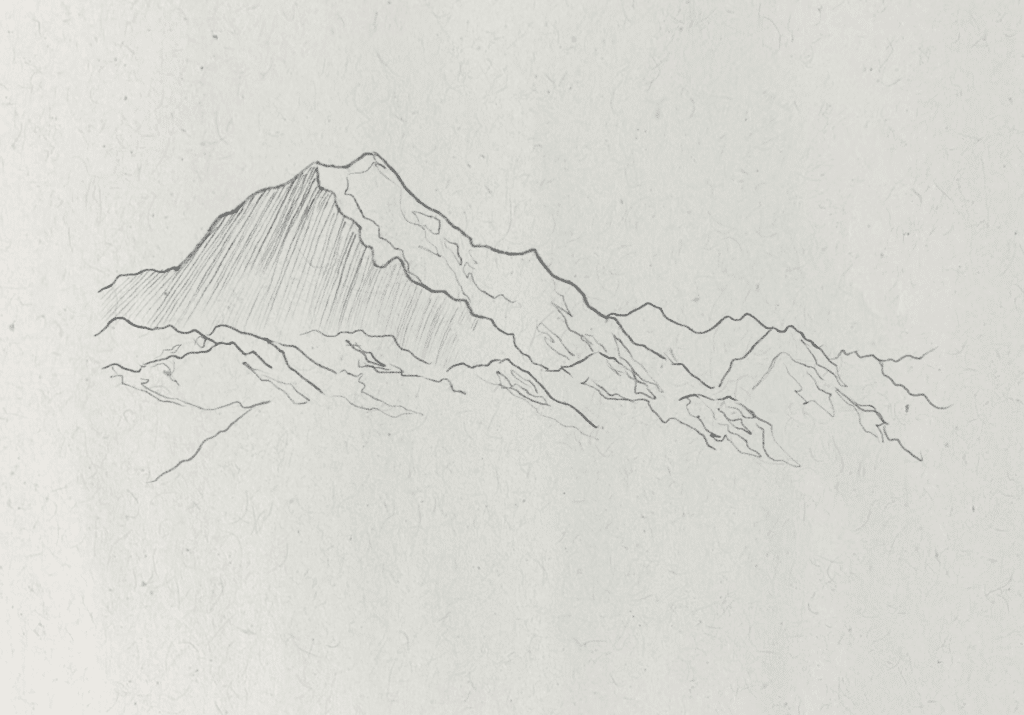
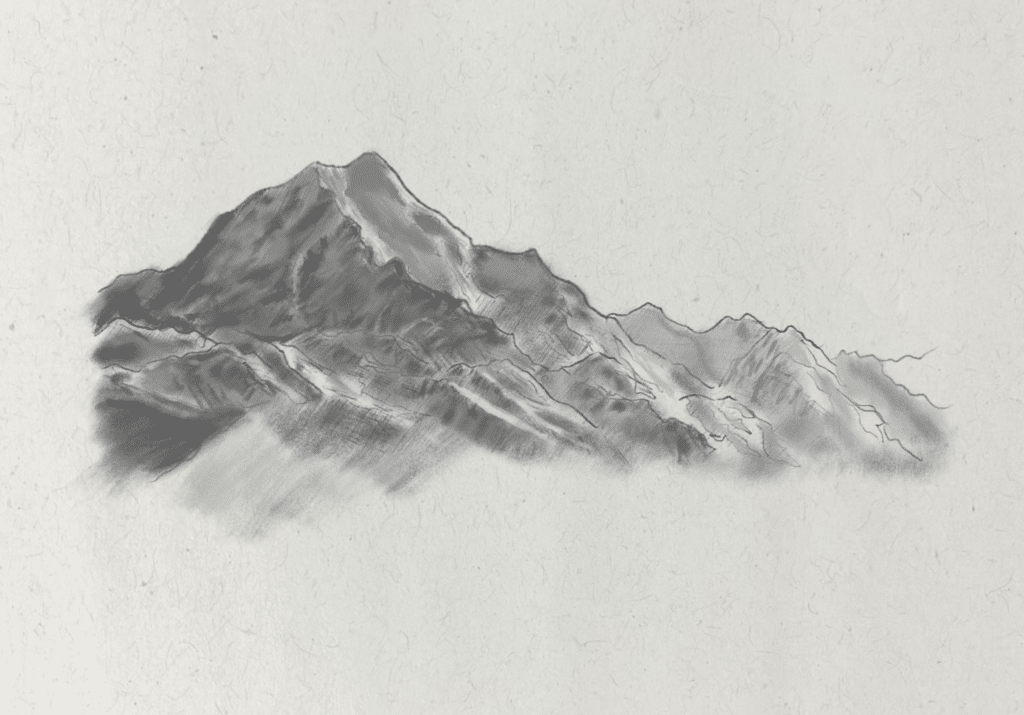
The sun is casting shadows downwards and to the left on individual rocks and slopes. The top of the mountain is covered in snow, so light appears to diffuse more softly in these areas.
For the first layer of shading, I simplify the different tones by using the hatching technique to show where the mid tones and shadows will be, where the rocks are positioned away from the sun and where the light is wrapping around the form, but not hitting it directly. I leave the top right rock faces white to show where the sun is hitting more directly.
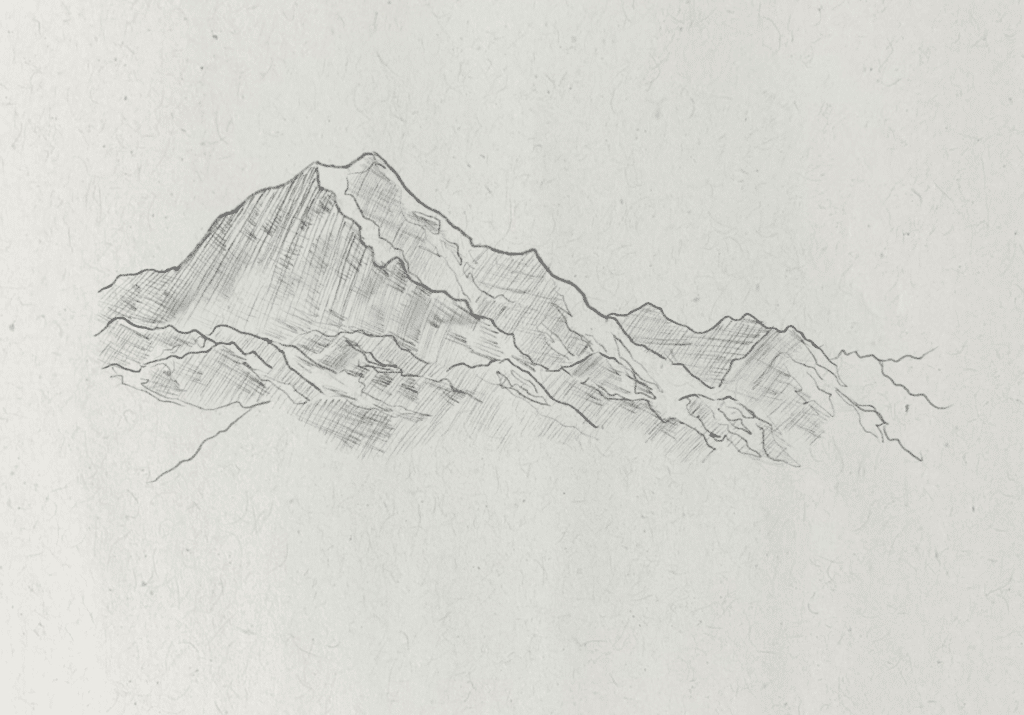
Then I create cross hatched lines over the initial hatched lines to represent the darker areas. To do this technique, I create a mixture of short and longer tapered strokes across the page, parallel to one another. The shorter hatched lines represent the dark rocky outcrops emerging from the snow.
In the Drawing Fundamentals course, I teach students how to accurately describe and portray light and shadow in this way, so they have the skills to construct forms with realistic shading going forward in their own creative practice.
Step 3: Add soft shadows to the lighter rock face
On the top of the snowy peak, on the right hand face of the mountain, the outcrops of snow covered rock are casting soft shadows. The texture of snow appears smooth from a distance and the snow rounds the otherwise sharp edges of the rock features. Light diffuses gradually around these forms, creating smooth edges between different values.
Due to the effect of atmospheric perspective, the faraway mountain appears lighter in tone. So the shadows appear as mid tone values. To demonstrate this, I use the side of my pencil to shade the mid tone shadow areas, then use the blending technique to blend the pencil into the lighter pencil tones. This shading technique is called the tonal shading technique.
The key to creating the appearance of realistic shadows is in focussing on the relationship between the different values (the relative darkness or lightness of a colour) and in concentrating on the edges of the shadow, whether they are hard, soft, or lost. This is a key focus in the Drawing Fundamentals course, where students learn to master realistic shading techniques.
Step 4: Start to shade rocky areas
The rocks beneath the snowy caps of the mountain are much darker in value than the snow. So I use the side of the pencil to start to establish where these rocky sections will be. The rock formations spread diagonally upwards to the right, so I shade where the undulations of the rocks are casting shadows.
Step 5: Shade rock details
I focus on creating some more rock details on the mountain, creating short, sharp, dark block textures with the side of the pencil to represent the rock peaks showing through the snow.
I start gradually with the shading, so I can build up the contrast as I go, across the entirety of the composition, instead of focussing on one section at a time. This leads to creating more harmonious artworks.
To create a realistic rock texture, shade hard edges to represent the depth of the outcrops. This means creating a sharp distinction between different values. I use an organic scribbling and dotting technique to create the small details up to the peak of the mountain.
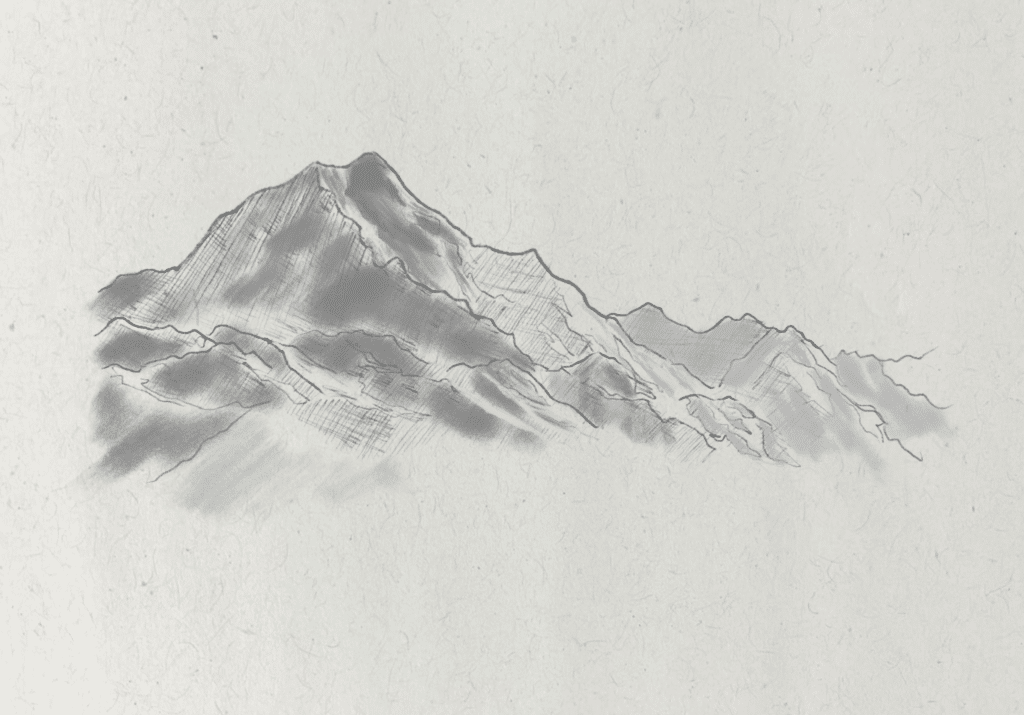
Step 6: Lift highlight details
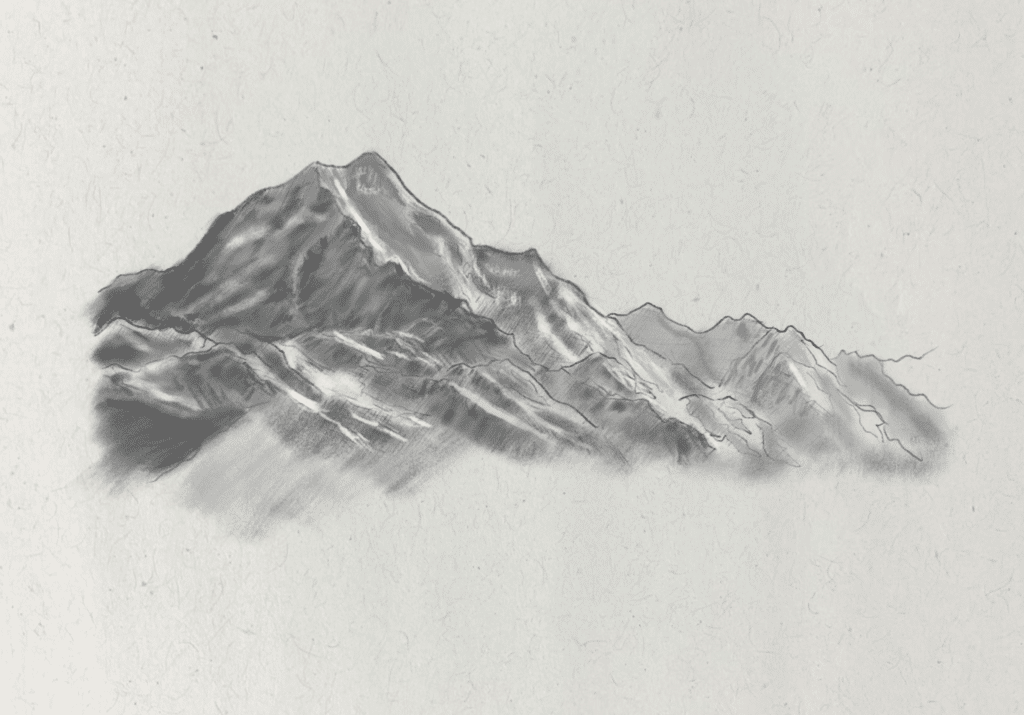
The highlight details are what makes the mountain drawing come to life and appear to pop off the page. I use a precision eraser to lift details along the top and right hand faces that are facing towards the sun and reflecting the sunlight. The reflected light on the snow on the peaks of the mountain appears startlingly bright.
Step 7: Increase contrast and sketch rock details

The lower part of the mountain consists of the darker mid tone value, with a slightly darker shade layered on top, in streaking lines that represent the edges of the rocks diagonally jutting out along the face of the rock towards the base.
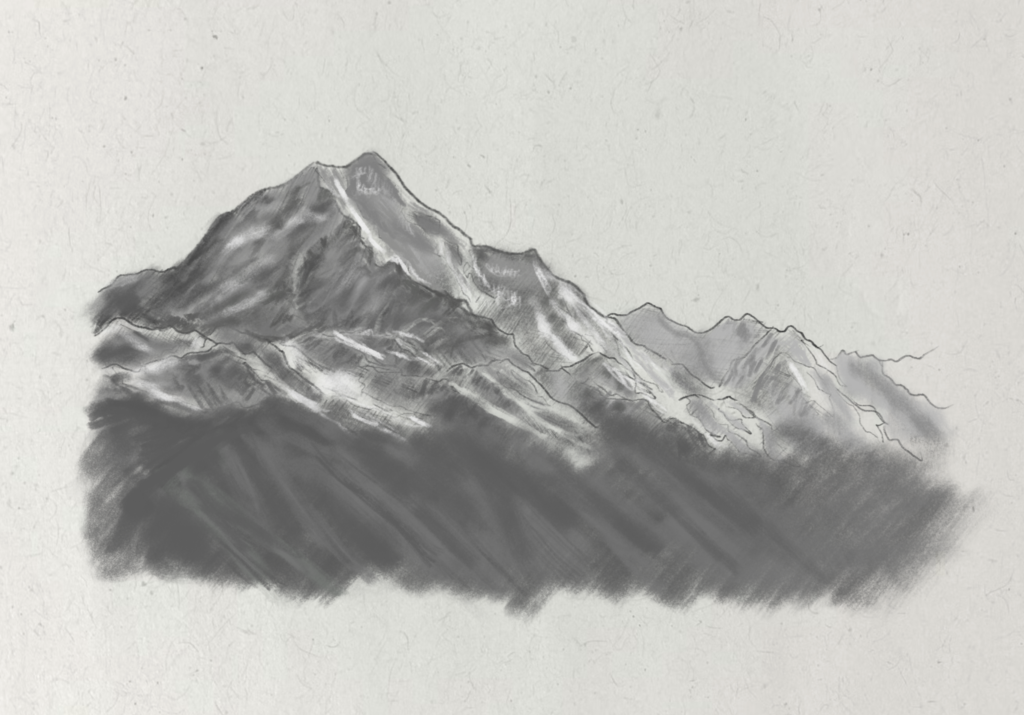
The rock texture appears fairly loose and expressionistic here. I use a blending stump to smooth out some of the hard transitions between the darker shadows and lighter mid tones.
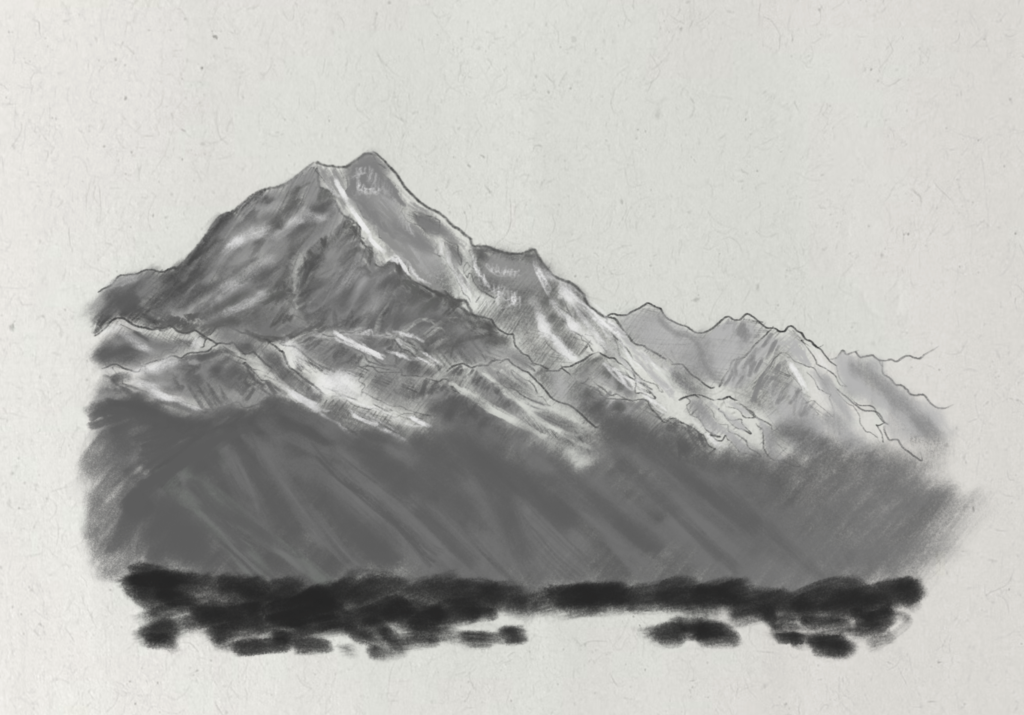
The base itself is the darkest area of the drawing. I loosely sketch the trees and bushes along the base with an 8B pencil, using its side and applying pressure to achieve these dark, broken marks. Sketching the mountain base gives the drawing a sense of perspective, as it gives the impression of the mountain’s distance and scale.
Finally
If you want more drawing ideas that relates to the alpine scenery theme, try the fir tree drawing tutorial.
If you want to learn how to shade realistically in depth, with practical instruction, try the Fine Art Tutorials Drawing Fundamentals course. Through 55 lessons, that you can take online, in your own time to master fundamentals like shading, line work, proportions, shape, form and perspective.