I created a simple method for drawing a sprig from a holly bush, with the spiky leaves, berries and realistic shading. In this tutorial, I’ll walk you through the steps, so you can create your own.
Step 1: Outline the stem

I draw a simple thin, long curved shape to represent the stem, I sketch fairly lightly as I will go over the lines with shading to make it appear three dimensional. The lines don’t have to be perfectly straight, as the organic looking lines mirror the shape of the stem.
Step 2: Draw the holly berries
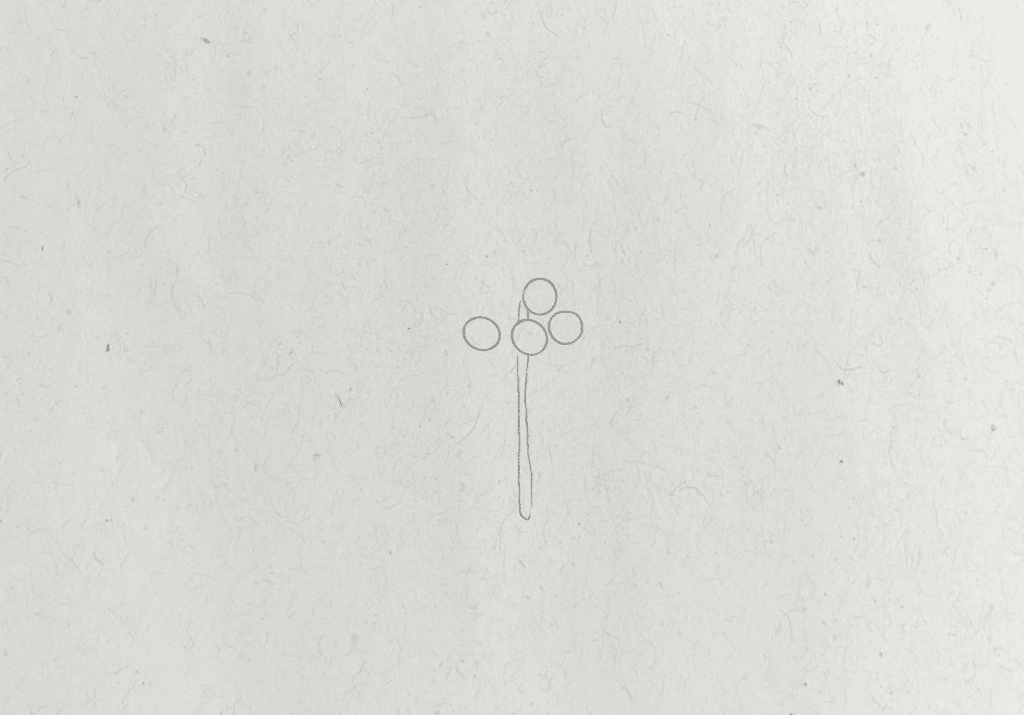
I then draw four berries, closely clustered together at the top of the stem. These berries appear as simple circles. I also erased the small section of stem that is overlapping the berry.
Step 3: Outline the broad shapes of the holly leaves

To simplify the shape of the holly leaves, I start by drawing broader outlines, so I can follow the size and basic shape of each leaf. Each leaf tapers to a point at the end and curves outwards in the middle.
Step 4: Draw the curves and spikes of the leaves

I start by following the broad shape of the leaf that I drew as a guide, and drawing this curve pattern with spikes along the leaf.

The spike shape doesn’t have to be perfectly symmetrical or precise, but they do follow the basic guide shape and taper at the end.
Step 5: Sketch the details on the leaves, berries and twigs

Before I start shading, I erase the holly leaf guides, then sketch some light details on the leaves, berries, and fill in where the berries adjoin the stem of the plant.
The central vein of the leaf, called the midrib, lightly tapers almost to the tip of the leaf. I draw the calyx of the berry, which is the small circular crown area as a small dot in the middle of each.
Step 6: Shade the holly drawing

You can spend as much or little time on the shading process as you like, I chose to develop the shading so that the drawing looks more realistic.
I start by mapping out the shadow shapes, outlining where they will be placed with lighter hatched lines.
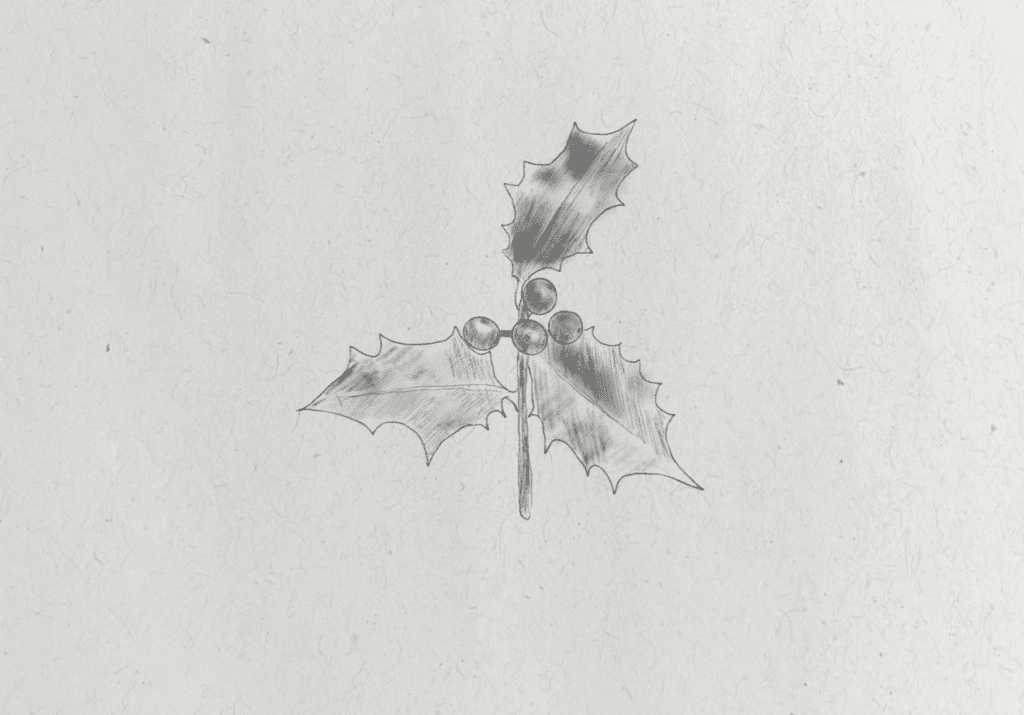
The light source is coming from above and in front of the holly leaves, and shadows appear where the leaf curls and blocks the light. The shadows being cast by the curves and spikes on the leaves, have soft edges, where the light is diffused around the curved form.
Step 7: Darken and blend the shading
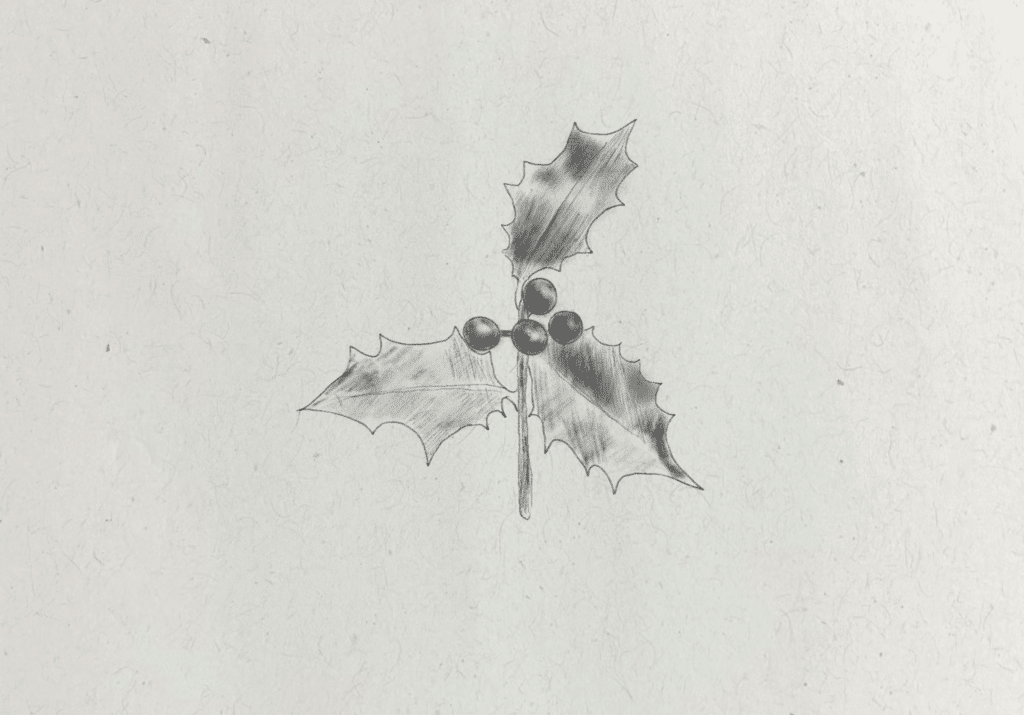
I gradually build up the shading in the darkest areas, using the side of my pencil to create soft, darker marks. Then I use a paper stump to blend around the edges of the shadows to soften them.
I focus on shading the berries first, to make them look more three dimensional. The key to shading spherical objects is in establishing where the darkest area of shadow is, which in this case is around the bottom of the berry, then softening the shadow by blending it out, with lighter marks and a paper stump.

Then I use this same technique, of building depth with darker shadows and blending with a paper stump on the leaves. The reason I do this gradually, is because I don’t want to create any dark marks on the paper that I then need to erase because they were placed wrongly. For the lightest highlights, I go in with a kneaded eraser and use a stamping technique to subtly lift the graphite.
If you liked this tutorial and you want to learn more about how to construct drawings from scratch, check out the Fine Art Tutorials Drawing Fundamentals course. In it, you’ll have access to 55 lessons that progressively build your skills from beginner to a more advanced level, with practical portrait drawing classes, where you can learn the fundamentals in depth.