
Use these acrylic painting techniques to improve your art and elevate the appearance of your acrylic paintings.
For many of these techniques, you’ll only need your tube paint and brushes. But for some of the more advanced techniques, you may need extra mediums and slightly different tools such as softer brushes.
Learn how to make your acrylic paintings look more professional and achieve specific effects using these techniques.
Disclaimer: Fine Art Tutorials is a reader supported site. When you make purchases through links on this site, we may earn a small commission at no extra cost to you.
Acrylic painting techniques
For each technique, I’ll run through the supplies you need and how to try the technique yourself.
Create texture with the impasto acrylic painting technique

Impasto is an incredibly fun technique that artists use to create vibrant works with depth and texture.
What supplies do you need for the impasto technique using acrylic paint?
To create texture with acrylic paint, you don’t need too many extra supplies. All you really need is heavy body paint and stiff brushes. You won’t need to add any water to the paint mix.
Golden’s Heavy Body paint is high quality, highly pigmented, has a thick texture and retains brush strokes on the canvas.
When choosing a brush for the impasto technique, choose one that is stiff but springy. These Princeton Catalyst brushes emulate the stiff properties of hog hair, making it feel easy to move thick paint.
To add to the body of paint, or make it more thick and three dimensional in appearance, look at the Liquitex Modelling Paste. Apply thick paint with a palette knife, stiff brush or a silicone catalyst wedge.
How to paint with the impasto technique
To paint with the impasto technique, first think of how you will approach the painting.
One approach is layering texture, waiting for paint applications to dry in between. This way you can create depth and variety by using different colours layered on top of one another. By layering broken brush strokes on top of previous dried layers, the colours from the previous layers of the painting can shine through.
Think about the brush strokes and marks you’re making. Will you use short sharp strokes like Monet and Van Gogh, or pile the paint on creating almost sculptural pieces?
If you want to create vibrant colour combinations, you could even think about mixing the colour on the canvas, as opposed to mixing it on the palette first. Monet was famed for using colours straight from the tube and mixing them on the canvas. When looking at your reference, look for underlying colours and tones that you could incorporate into the painting.
For a more in depth look at this technique, with tips on choosing a subject and planning composition, refer to our impasto tutorial.
Blending
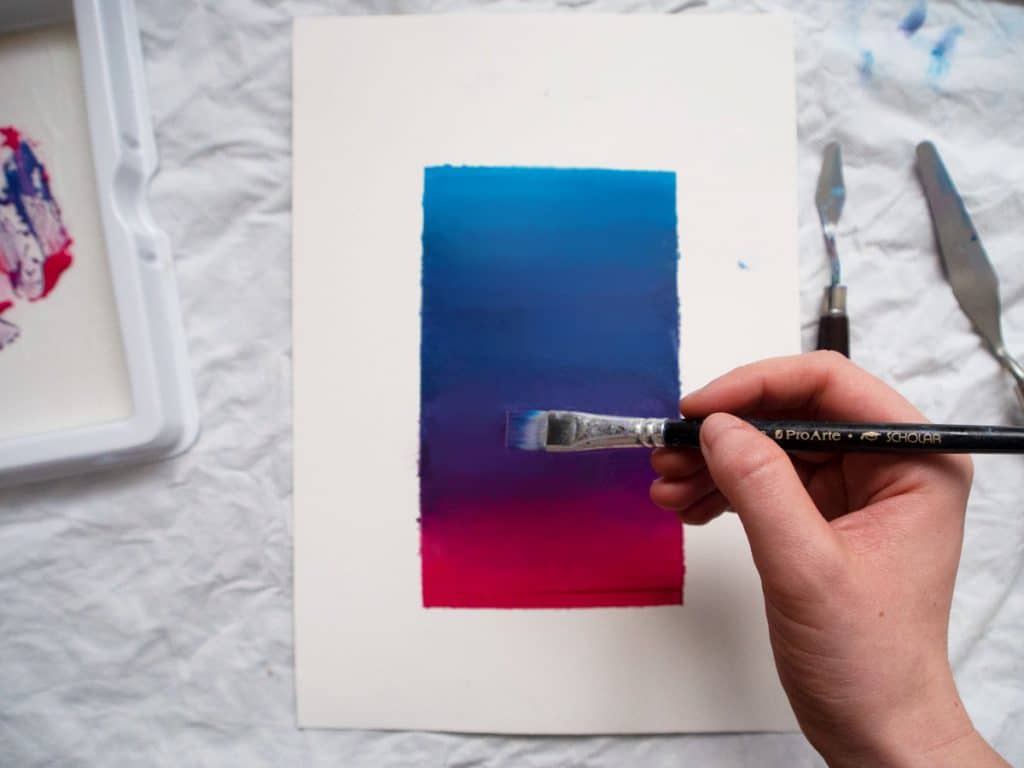
Artists who want to seamlessly blend colours onto their canvas usually gravitate towards oil paint due to its slow drying nature. However, it’s possible to increase the open working time of acrylic paint.
Use Golden Open Acrylic paints, as these dry at the same rate as oil paints (around 1-2 days). If you already have a set of acrylic paints, then you could extend their open working time with a medium. Any of the Golden Open Mediums will make paint dry slower.
Softer brushes are best for blending paint. If you use soft body acrylic paint, get an extra soft brush to blend colours together. The Da Vinci Casaneo in the square shape would work perfectly for this. A large slightly springier brush like the Isacryl brush in the flat or filbert shape would blend slightly thicker paint better.
For a more in depth look at how to blend acrylics and step by step guides using two different blending methods, take a look at our blending acrylic paint tutorial.
Alla Prima (wet on wet) with acrylic paint

Alla prima is the technique of applying layers of paint on top of wet layers. The painting, or section of the painting should be finished before the first application of paint dries.
It’s a fast, fun and spontaneous way of painting, that can yield gestural and textural results. Colours swirl together, appearing loose and painterly.
A drawback of acrylic paint that makes it difficult to use the alla prima technique is its fast drying nature. If you want to try painting wet on wet, you will need a slow drying medium, or to use Golden Open Acrylics. The slower the paint dries, the better. As it will give you longer to complete the painting. I also recommend using stiff brushes, especially in later stages of the painting as you will have to increase the thickness of paint in consecutive layers.
Start by blocking in colours, or by creating an underdrawing. Then layer paint onto the canvas in the colours that you see in your reference. Gradually increase the thickness of the paint as you apply more layers. The thickest and lightest highlights should be applied last.
If you make a mistake, scrape the paint away with a palette knife. Paint can be applied to your surface with a stiff brush, a palette knife or catalyst wedge.
Check out our alla prima painting guide to learn this technique in more detail.
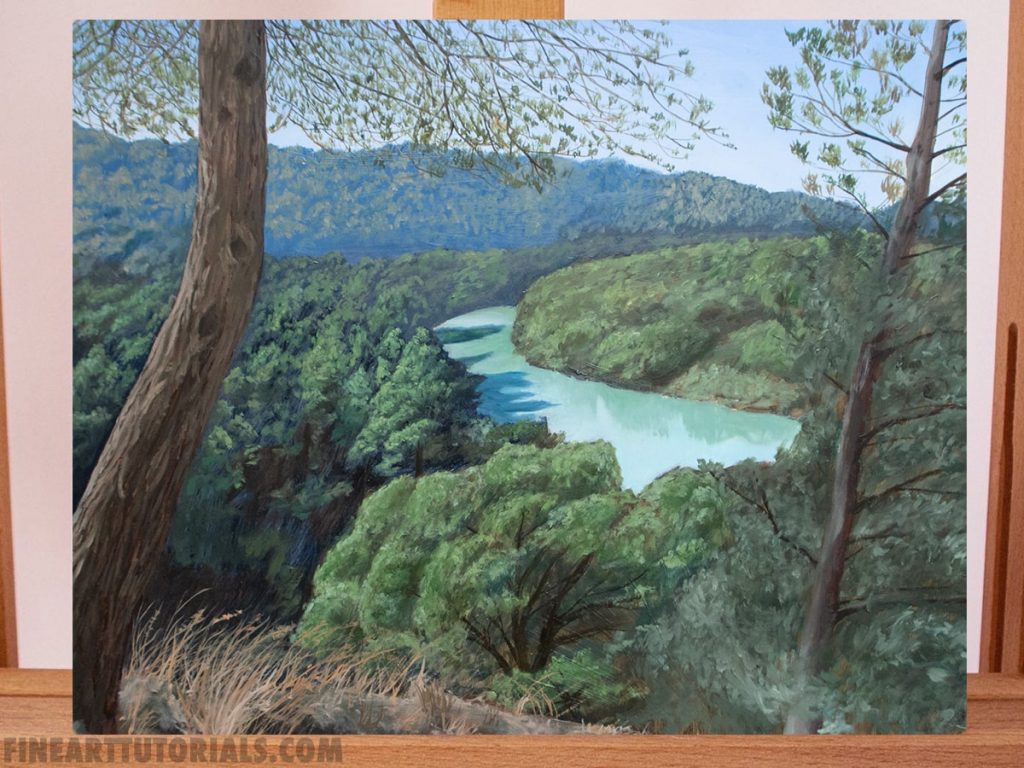
Acrylic painting in layers
This is an approach to acrylic painting that goes hand in hand with blocking in, underpainting and glazing.
Acrylic paint dries fast, so it’s possible to create works with hard edges with relative speed. Increase the open working time of paint to create blended layers with a fluid retarder. By combining these techniques, creating layered pieces with a variety of hard and blended edges, you can create realistic looking artworks.
Blocking in acrylic painting technique

The only supplies you need for this technique are tube paint and a medium stiff brush. You can optionally thin your tube acrylic paint with water to make it runny in texture.
Blocking in an acrylic painting forms the first stage of the painting process. The purpose of this technique is to cover the canvas, so the white of the gesso ground isn’t visible. Block in basic shapes of colours you see in your reference.
For example, if you’re painting a mountain scene, a distant mountain may appear broadly blue-grey in tone with light grey highlights where snow is reflecting light. For the blocking in stage, you would paint the blue-grey colours. Then wait for it to dry and layer the lighter highlights on tops.
To be successful at using this technique, you’ll have to think of your painting in layers. You’ll have to see these layers in your painting reference.
For a more detailed tutorial, check out our blocking in technique guide.
Underpainting

The underpainting technique can be used with oil and acrylic paint.
The purpose of this technique is to create a monochromatic layer. Spread a layer of paint thinned with water evenly over the surface. This type of underpainting method is called a toned ground or imprimatura. It works well with transparent earth colours like burnt umber or burnt sienna. It functions to create a mid toned ground, which helps artists establish value relationships between colours more easily.
Another underpainting method is using a colour like burnt umber and titanium white to create a tonal underpainting. Establish the values, form and composition of a piece. Colour layers are then applied on top in glazes or opaque layers.
To learn more about this technique, read our underpainting tutorial. It’s aimed at oil painters but all the techniques can be applied to acrylic painting.
Glazing acrylic paint
Glazing is the technique of applying transparent colours on top of one another to alter the colour profile of previous layers. This is a slightly more advanced technique than the previous two and can take some practice to master. It’s a famous technique in oil painting, used by old masters such as Rembrandt. This technique enabled artists to create detailed and realistic paintings.
There are many ways of using this technique. For example, change the colour temperature of a section of your painting to warm or cool. Apply a glaze over the entire painting to create a more unified appearance (almost like adding a filter to your painting). Use a glaze to deepen shadows or increase colour contrasts.
This technique is also useful for painting subtle shifts in skin tone. Burnt umber works wonderfully in shadows in portraits.
You could also use this technique to render details in a portrait. For example, use the transparency of the glaze to paint almost imperceptible pores on the skin, or fine wisps of hair.
As you can imagine, to paint such fine layers, you’ll need a medium to make paint runny and transparent. This glazing medium by Winsor & Newton increases the transparency and fluidity of the paint layer. It also strengthens the paint film. You’ll also need soft body acrylic paint, from a professional brand, like Golden’s Fluid Acrylic paints. Look out for colours that are transparent or semi transparent. Information about pigment transparency will be on the paint tube, or on the website. Another tool you will need to paint glazes is a soft brush. Isabey Isacryl brushes are soft, but are also springy.
Dry brush
Apply colour to the surface without wetting the brush first. Wipe excess paint on a paper towel and create marks on your canvas. This technique can emulate the effects of charcoal and create dry, broken texture that lends itself to portrait painting.
Wash
Paint can be thinned with water to create washes that look similar to ink. Wet your brush, dip into the acrylic paint colour and spread evenly across the surface. This technique works well with slightly softer brushes like Isabey Isacryl.
Pouring acrylic paint
Pouring acrylic paint onto a surface is an incredibly satisfying technique to try, that can yield beautifully organic yet intricate looking results.
To create pour paintings, you’ll need a few different pour painting supplies. This includes Fluid Acrylic Paints and a pouring medium. Get cups, gloves, mixers and pouring strainers in this set. To achieve cells, you’ll need to mix a few drops of silicone oil in each colour cup. Then use a heat gun once poured onto the canvas to get rid of air bubbles. There are a multitude of different acrylic pouring techniques you can use, like dirty pour, flip cup, swiping and more!
Mix one colour per cup with the pour medium. You should read up on the ratio of medium to paint to use, find it on the pouring medium product page. For example, Schmincke specify to use their medium at any ratio up to 45% acrylic colour. Mix the medium with the paint in each cup using a stir stick. Then layer paint by pouring the individual cups one by one into a clean cup. Tip the cup with all the paint upside down onto the canvas. Then use the heat gun to get rid of bubbles.
For a more in depth tutorial, check out this beginner’s guide to acrylic pouring. If you want to find the best pouring mediums and paints for fluid art, check out our guide.
Airbrush
Airbrushing is a technique that can be used with Fluid Acrylic paint. You’ll also need an airbrush tool to spray paint onto canvas or paper. Use a medium, like Golden’s Airbrush Medium to reduce the viscosity of the paint.
Airbrush is an art in itself, the thin viscosity of Fluid Acrylic paint means it won’t clog in the airbrush tool. It’s recommended to use a nozzle of .2mm or higher and paint can be sprayed through an airbrush at 25-50 p.s.i.
The technique of airbrushing gives the artist superior control over the paint and ability to create subtle colour gradations. This technique allows artists to create realistic works and render fine details.
Other mark making and brushwork techniques
Apply paint in splatters
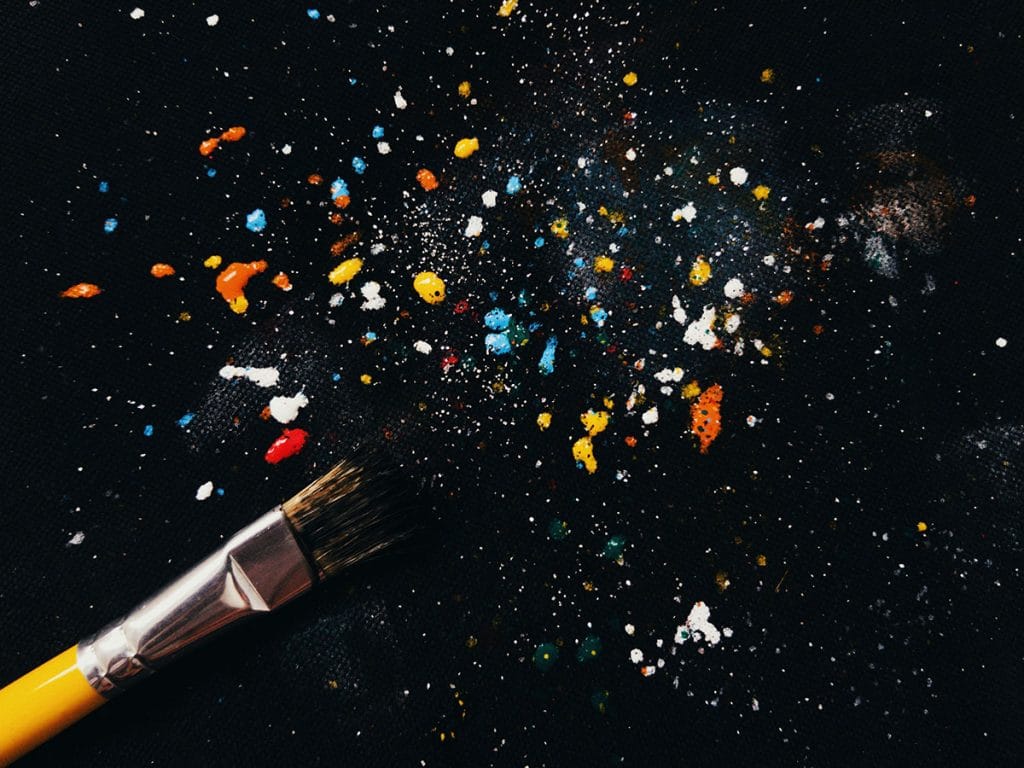
Liquitex splatter brushes are made for this technique! The long bristles enable you to create unique splatter patterns.
To create splatter effects on the canvas, you’ll need a stiff brush with long bristles (like the Liquitex brush) and soft body acrylic paint. Wear some gloves and cover your work surface, as it can get messy. Pull the bristles back with your fingers, then release onto your surface. Or you could flick the brush itself. Use this technique to create abstract pieces, stars, or ocean foam.
Jackson Pollock would use a number of different tools and mark making techniques such as paint splatter in his abstract expressionist pieces.
Sgraffito

Sgraffito is the technique of scratching into wet paint so that colours are revealed from layers beneath. Create patterns in the wet paint by scratching with the end of a brush or a palette knife.
Use this technique in portraiture by creating a toned underpainting in a transparent earth colour like burnt umber and scratch off highlights in the hair. Rembrandt used this technique to reveal highlights on strands of hair in his self portrait.
Create three dimensional works
By incorporating modelling paste in the paint mixture, you can create sculptural, three dimensional works. It improves the adhesion of paint layers, so it can also be applied on its own before acrylic paint is layered onto the canvas. One way of using the medium is to create volume and structure on the canvas, then paint on top of it.
Add texture to the paint with dry additives
Add dry mediums such as marble dust or mica flakes to acrylic paint gel medium or to the paint itself. Dry mediums all have their own individual properties. Mica flakes will provide opalescent and iridescent effects. Add mica flakes to transparent mediums like acrylic paint gel for the best effects. Equally, mica flakes can be sprinkled on top of a wet paint film to make a painting sparkle.
Dabbing with a sponge
Using a sponge to apply paint can yield some varied effects. If you want to create a texture appearance, dab a dry sponge loaded with thick paint onto your canvas. You will create peaks of paint with broken almost grainy appearing texture. If you wet the sponge and use fluid paint, you can create a soft blended appearance.
Stippling
Stippling is the art of dotting paint onto the canvas. This is a technique commonly used with pencil medium. Get a round brush with short hair, an old worn down brush works well with this technique. Use the dotting action, with dots closer together in areas you want to appear shaded.
Mix colours on the canvas
Mix colours directly on the canvas instead of on the palette. Monet was famed for doing this. This technique can create vibrant and varied areas of colour. Colours are mixed together and therefore the pigments appear purer than if they were combined. Use a palette knife on the canvas for the best mixing results.
Scrape paint
Use this technique in abstract painting. Layer on colour, then use a Catalyst Wedge tool to remove paint from the surface. You’ll be left with a thin, mixed layer of transparent paint. Play around with this technique and colours until you achieve the desired effect.
Acrylic painting techniques for beginners
The impasto technique is a perfect for beginners to experiment with. It’s fun, and feels immediate and spontaneous. Thick texture adds a new dimension to artwork. For beginners, I would recommend sketching out your painting first so you know how the different elements are going to fit together. Then mix all your colours before you start applying paint. Get a stay wet palette to keep colours wet for longer.
All other techniques on this list would be suitable for beginners to get started with, however glazing and alla prima may take some practice to master. If you’re interested in learning how to acrylic paint from scratch, check out our list of the best acrylic painting tutorials.
Acrylic painting techniques: Pin it!
If you’ve found anything on this site especially useful, you can make a donation to me through PayPal. I take a lot of time to research and write each topic, making sure each tutorial is as detailed as possible and I make all my content freely available. Any small donation (even the price of a cup of coffee!) can help me to cover the running costs of the site. Any help from my readers is much appreciated :).
Follow the link in the button below to support this site.