
Are you curious about alcohol ink painting? This beginner’s guide will teach you the basics of this fun and therapeutic art form. You’ll learn about the different types of inks and substrates and how to create your own unique paintings.
Disclaimer: Fine Art Tutorials is a reader supported site. When you make purchases through links on this site, we may earn a small commission at no extra cost to you.
What is alcohol ink painting?
Alcohol ink painting is the process of using alcohol ink, which is made from isopropyl alcohol, resin and pigment, to create beautiful, fluid looking works of art.
Alcohol inks are vibrant, can be used on many different types of surfaces and are often used to create abstract pieces. The inks are fast drying and once dry are waterproof.

Some examples of surfaces that artists can create alcohol ink paintings on include metal, glass, plastic, yupo paper, primed panels and smooth non absorbent surfaces.
The colour layers are vibrant, yet translucent and artists will apply the inks with various methods, such as dripping and layering. Artists will optionally use a tool like a brush or air blower to spread the ink across the surface.
The supplies you need to get started with alcohol ink painting

To get started with alcohol ink painting, you’ll need a few basics: inks, surfaces, tools to apply the ink and manipulate it on the surface.
Alcohol inks
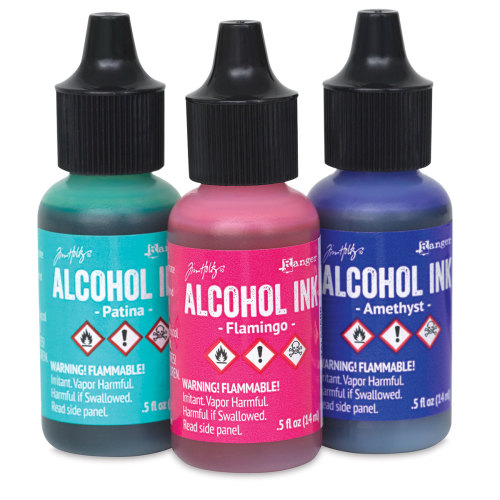
Ranger Tim Holtz alcohol inks are fast drying, dye based, permanent and come in an array of vibrant colours, including pearlescent and metallic colours. The colours are transparent, can be mixed and the bottles have precision tips, so you can squeeze them onto the paper or onto stamps with ease.
Blending solution
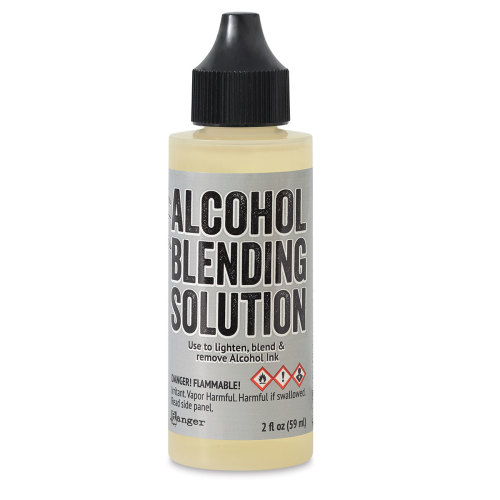
Blending solution acts like a medium that thins alcohol inks, making them fluid and adding to the body of the ink. It contains resin, just like alcohol inks, however it is clear in colour. It helps to blend, lighten or remove ink from the paper. The blending solution makes the ink workable, even after they have dried.
Isopropyl alcohol
Isopropyl alcohol is a clear, colourless liquid that’s often used as a solvent to thin the alcohol and make it flow better. Make sure to get Isopropyl alcohol that is 91% proof or higher and get a dropper bottle so you can dispense the alcohol onto the paper. Isopropyl alcohol makes colours appear lighter, and spread across the surface. This type of isopropyl alcohol is safe to spray in a mister bottle, if you want to create sprayed effects in the painting. However, the blending solution and the inks themselves are not safe to spray.
Surfaces
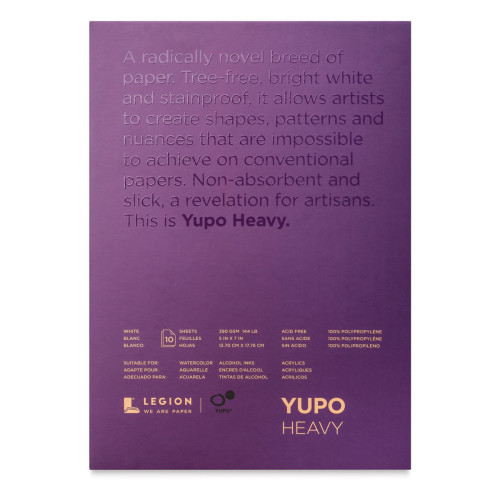
Yupo is one of the best surfaces for alcohol ink painting. This is because it’s perfectly smooth and non absorbent, so colours will sit on top of the paper, appearing bright and vibrant. The resin in the inks will help the colours to dry and stick in place on the Yupo, despite its non-absorbent nature.
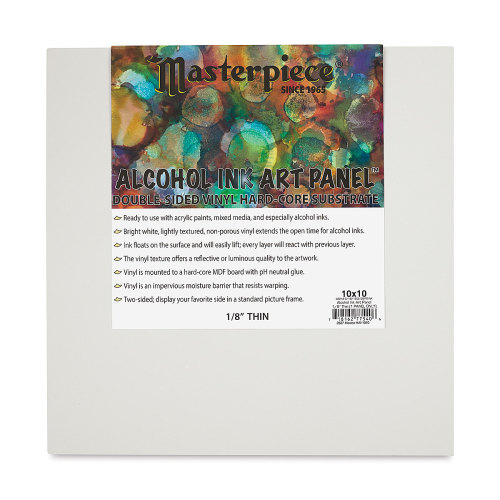
You can also use primed wooden panels, glass and ceramic tiles. A great brand that makes panels is the Masterpiece Alcohol ink art panel, they are PH-neutral, non-porous, bright white and 1/8″ thick. Just like Yupo, due to the non-porosity, the panels give ink a luminous quality
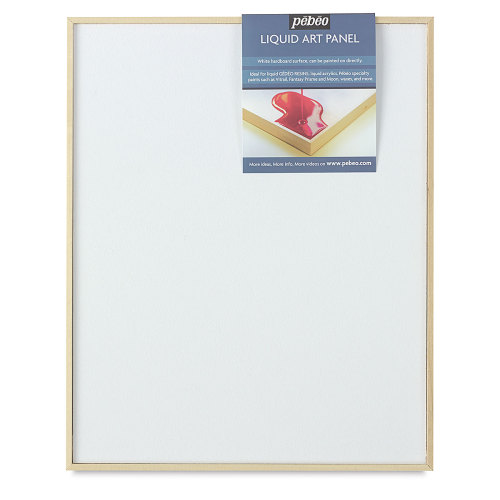
Another great brand of panels is Pebeo. Their Liquid Art Panels are artist quality, acid-free and archival. They are also made with a wooden frame with a 3mm edge, to keep liquid contained and from running off from the panel.
Air-blower
Use this air-blower to spread the alcohol inks across the surface, watch the colours swirl and blend. Squeeze the bulb to control the airflow, and blow the inks around to create interesting effects.
Brushes and blending tools
Other tools that can help you manipulate the alcohol ink include, paintbrushes, sponges, stencils and stamps. Dab a stamp with some blending solution and stamp on the paper to lift colour from particular areas. Many artists will experiment with different tools to add texture and depth. If you use brushes, make sure to use synthetic brushes with alcohol inks, as the resin in the ink can ruin natural hair bristles.
Extra tools for clean up
Paper towels, cotton swabs, cloths and isopropyl alcohol are all great tools to clean up excess ink from your work surface, as well as to clean the brushes used for blending. Make sure to also wear gloves to protect your hands when using ink.
How to prepare your workspace for alcohol ink painting
Before starting any alcohol ink painting project, it is important to properly prepare your workspace. Make sure that you have an area that is well ventilated and uncluttered, with a protective cover over your work surface. A protective cover could be a tempered glass mat, a board, or plastic covering.
You’ll also need a stack of paper towels nearby, some rubbing alcohol to rinse brushes and other tools, disposable gloves and a few soft cloths in case you need to dab away any extra paint.
Don’t forget that it is recommended to wear a mask when applying alcohol inks as they can be quite strong aromatically. It’s also advisable to keep pets and children out of the room while working.
Another safety tip is to avoid spraying alcohol inks in spray bottles, as this can be damaging to people’s lungs and eyes. Set up beforehand and make sure you are comfortable before beginning!
The basics of creating an alcohol ink painting
Creating an alcohol ink painting is quite easy and incredibly fun.
Drop the ink onto the paper using the nozzle, with whatever colour you want to use first. Then grab the air-blower tool and squeeze to spread it across the paper. The results of alcohol ink painting are beautifully unpredictable, as the inks spread across the paper organically.
You can grab your blending medium, drop a small amount on top of the colour layer you just created, then watch the colours pool and spread further.
Once these layers have dried, go in with your next colour. Use metallic or pearlescent tones to lift the painting and make it shine! To create separate colours, that appear translucent but do not blend into one another, it’s important to let previous layers dry before moving onto the next.
Experiment and have fun with your alcohol ink painting. Use brushes, stamps and other tools to move the ink around to create unique effects.
Alcohol ink techniques
Drip effects

Lift and tilt the paper and watch the ink drip down. Use gravity to create fluid movements in the ink.
Blending and mixing
Brushing, blowing and sponging techniques can be used to blend colours, create gradients and diffuse the ink. Work with wet ink on a wet layer of ink to make colours blend together.
Adding details

After building up colour, you can use a fine-tipped brush to add details or draw with alcohol markers over the top.
Blow the ink
Use an air-blower or straw to spread the ink out and create a more abstract effect. For more subtle effects, don’t squeeze the air-blower too hard.
Use blending medium

The blending medium will create lighter tones and reactivate the alcohol and resin in the ink, making it spread further across the paper. Create incredible tonal paintings using this medium. In this alcohol ink piece, you can see that blending medium was used to lift circles of colour to create a bubbling effect.
How long does alcohol ink take to dry?
Alcohol ink feels dry to the touch fairly soon after applying it. However, it can take up to 72 hours to dry and cure fully. Wait for it to dry fully before sealing it or varnishing it. Use a varnish like Kamar varnish from Krylon, which is fast-drying and can be used on all kinds of surfaces. Then you can frame your painting behind glass and hang it on the wall!