If you’ve ever wanted to draw a polar bear, I’ve deconstructed the drawing process into easy to follow steps.
Try this step by step guide on how to draw a polar and follow along to see how I created this graphite drawing. I sketched simple shapes to represent the proportions of the animal, that I refined to improve the line work, then shaded to create fur texture.
Step 1: Draw circles to represent the body and head
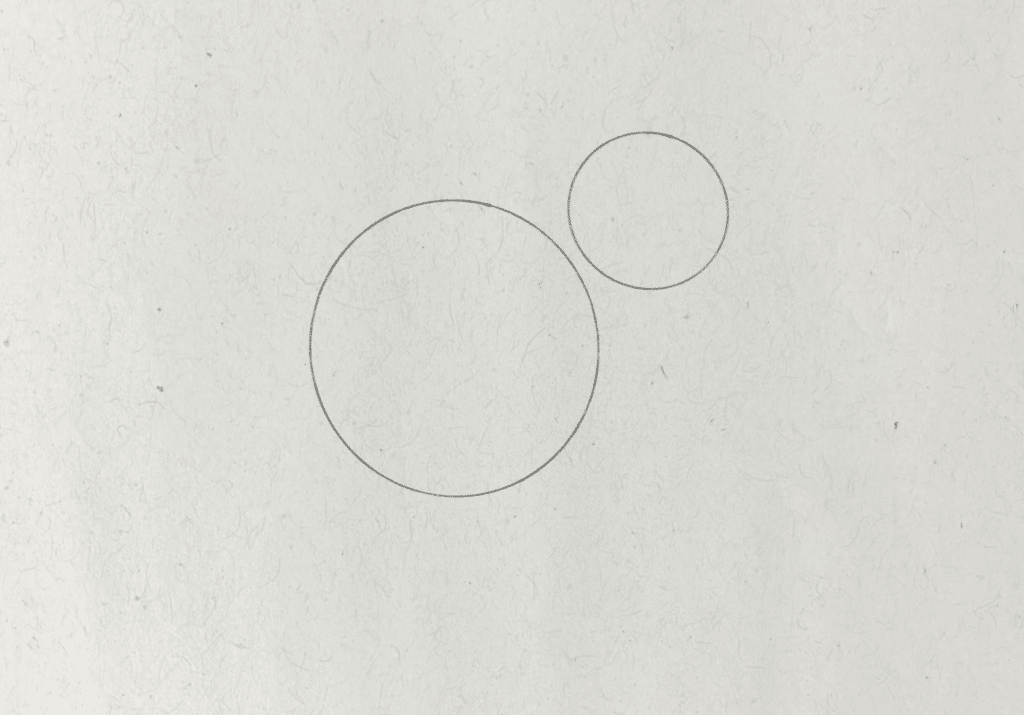
I often start more complex drawings with geometric shapes, which broadly cover the dimensions of the body and head areas. this is called the blocking in technique. I drew a large circle in the middle of the paper to cover the area of the polar bear’s body, the main part of its back around to its chest and underbelly. Then I drew a smaller circle, the width of which was around half the diameter of the first circle, diagonally above the first. I left a small gap for the neck. I keep these geometric pencil guides light, so I can erase them easily later.
Step 2: Outline the basic shape of the body
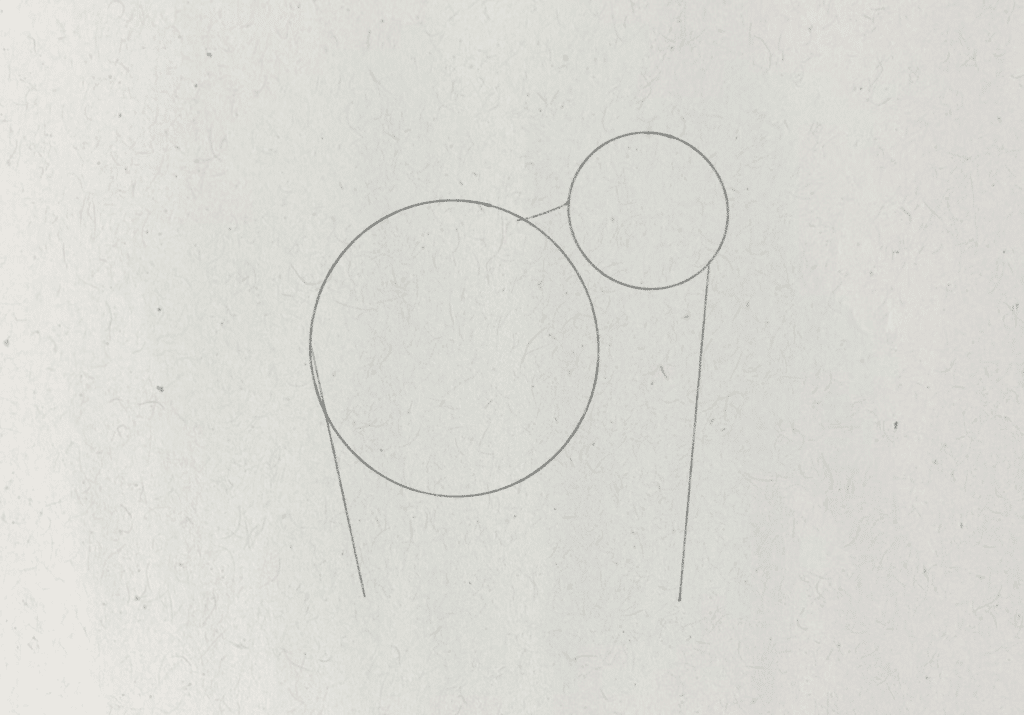
I drew a short line between the two circles to show where the back of the neck will go. Then I drew two diagonal lines pointing downwards from the furthest side of each circle to represent the front and back legs. The polar bear is positioned at an angle so the form is foreshortened, this means that the front of the body appears shorter to the viewer.
Both the front and back legs are angled inwards and the back leg is shorter and lower than the front.
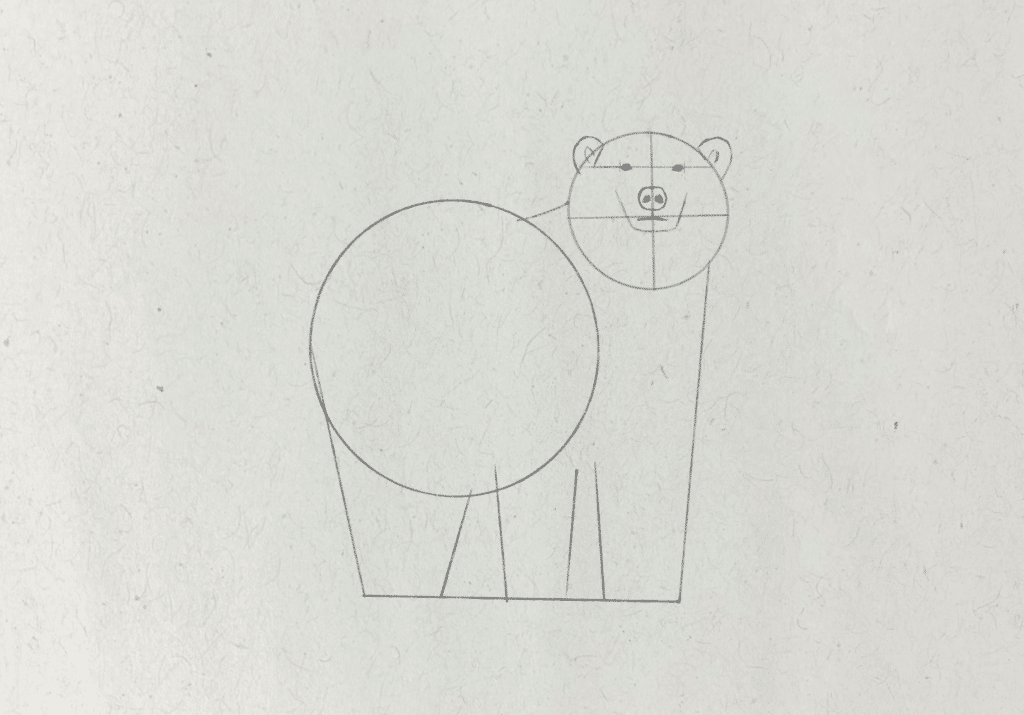
Step 3: Outline the legs with basic shapes
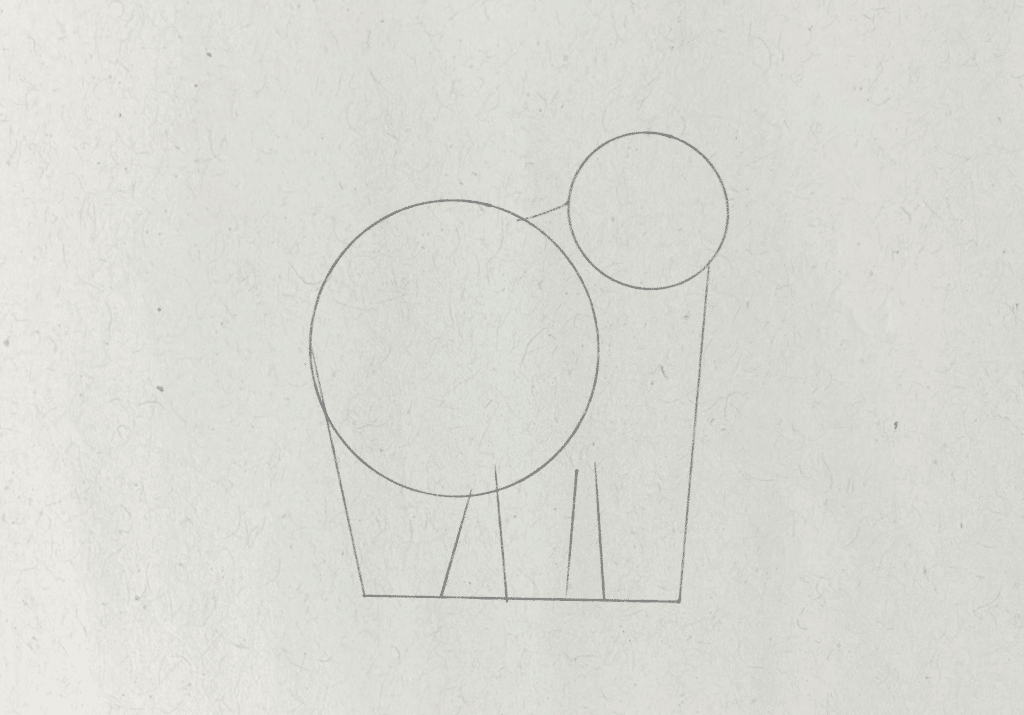
I draw a horizontal line to show where the feet will be placed on the ground, then sketch four diagonal lines to represent the outline of the legs. This forms three oblong shapes, one thicker shape that starts just over the halfway line on the circle, to the outer edge. This thicker oblong shape that tapers towards the ground acts as the guide for both of the hind legs. Then the two, thinner and longer oblong shapes represent the two front legs, that are turned towards the viewer.
Step 4: Draw a grid to establish facial proportions
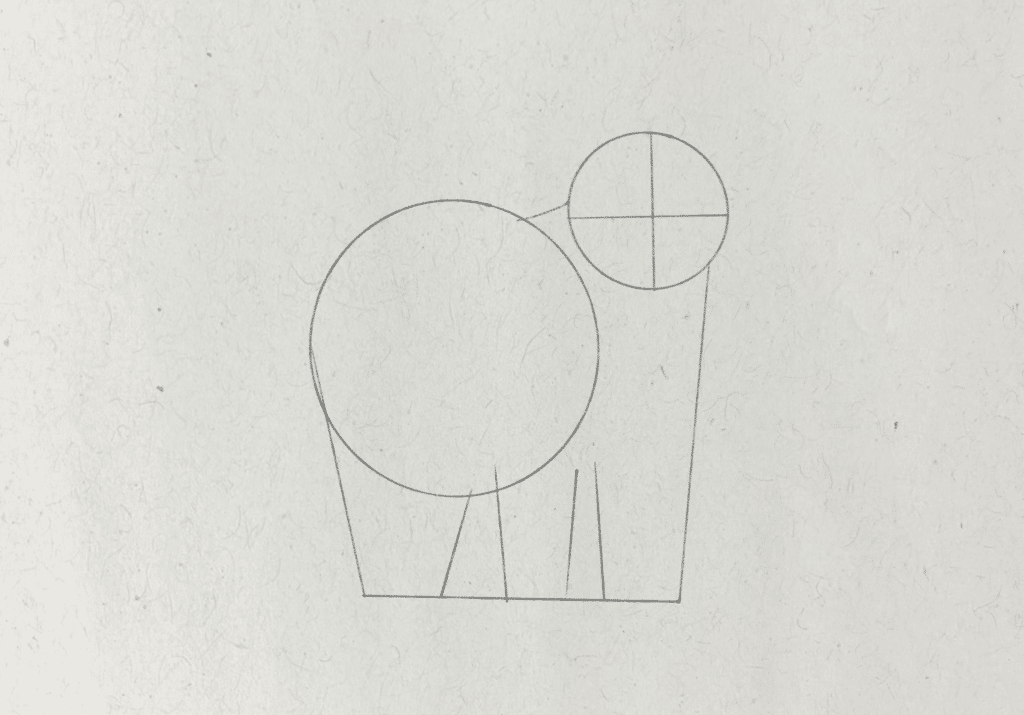
The circle I drew at the top outlines the head and neck area, but the top half of the circle encompasses the entire face. I draw a horizontal line, through the middle of the circle and a vertical line to divide the circle halfway. The horizontal line is where the mouth line of the polar bear sits and the vertical line divides the face, so I can place features symmetrically.
Step 5: Draw the muzzle area
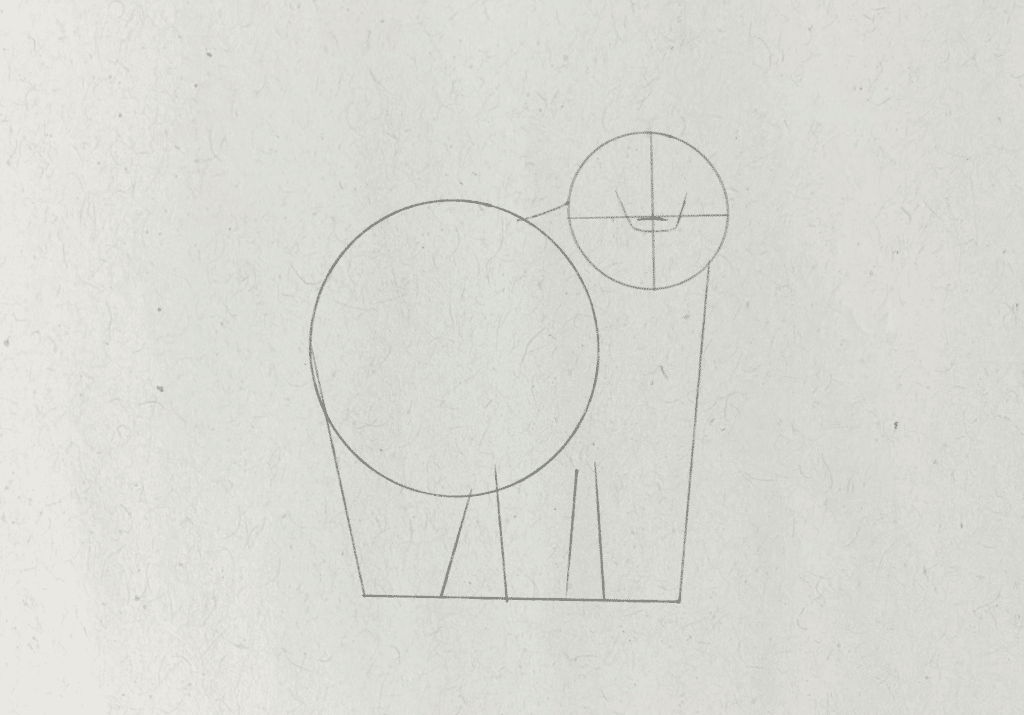
I first draw the polar bear’s mouth, which sits along the horizontal dividing line, the outer corners point downwards slightly. Next, I draw the muzzle shape surrounding this as a broad U shape that juts out slightly below the horizontal halfway line.
Step 6: Sketch the nose
I sketch the polar bear’s nose as a large round shape in the middle of the muzzle, with the nostrils that look like two upside down teardrop shapes either side of the dividing line.
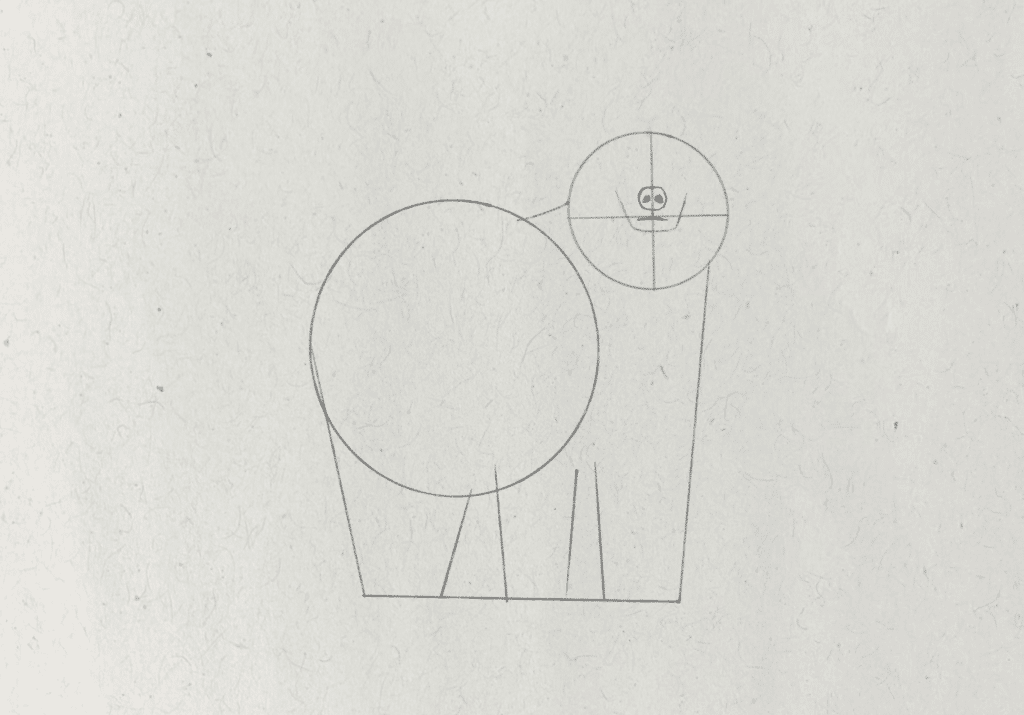
Step 7: Place the eyes
I draw another horizontal guide line to gauge the position of the eyes on the bear. The eyes are positioned near the top of the circle, around the one fifth mark. This horizontal line helps to keep the eyes straight and symmetrical. Then the outer corner of each eye sits almost inline with the outermost corner I drew for the muzzle.
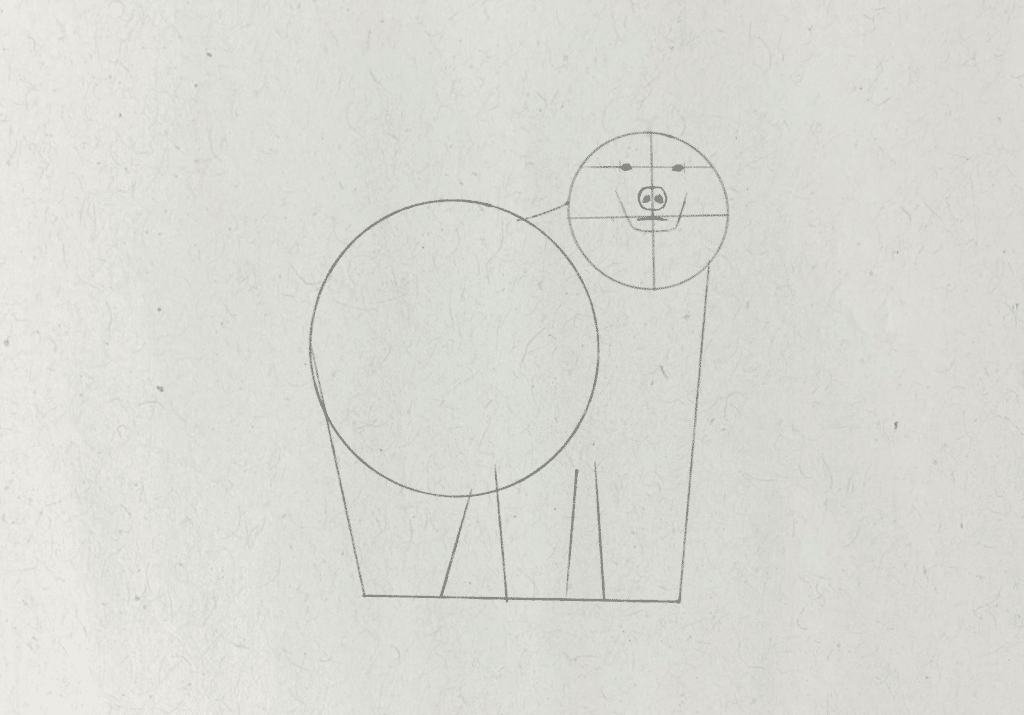
I draw the eyes as two small circles that taper inwards and down in the inner corner.
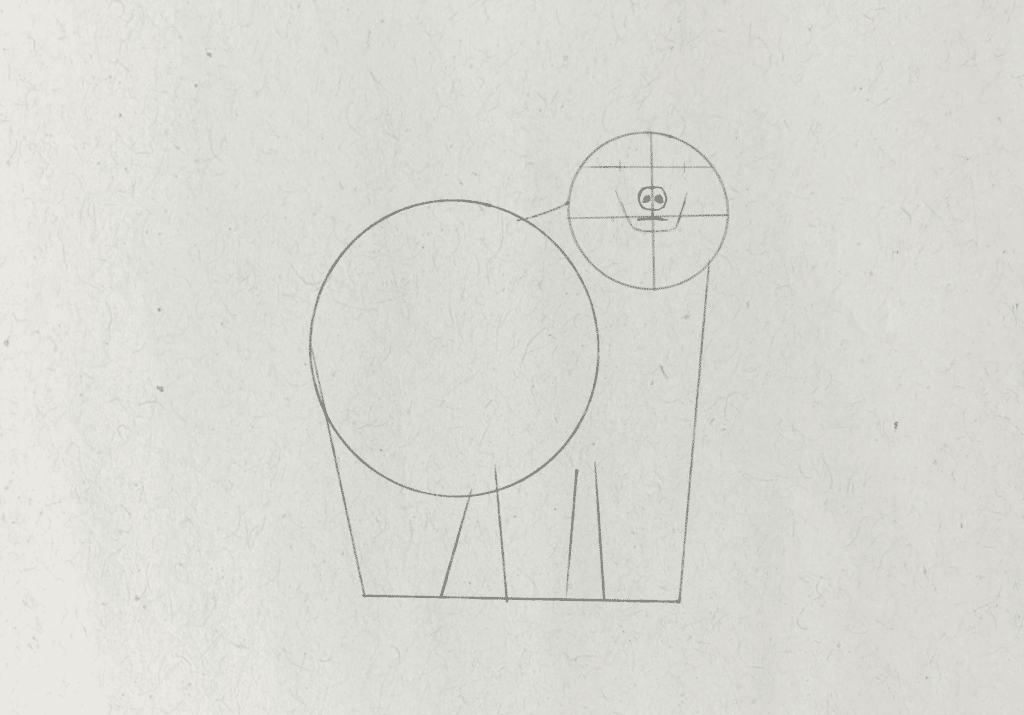
Step 8: Draw the ears
The ears appear as two semi circles on either side of the head. Polar bear ears are set quite far apart, outside of the outer edge of the muzzle line I drew earlier. When drawing realistically, it’s important to use reference points in a drawing to find the correct proportions. I teach this concept in my Drawing Fundamentals course, of using reference points, measuring and checking lines to ensure that drawings are accurate. This naturally trains the eye and student’s visuospatial skills to draw more precisely and intuitively.
Step 9: Outline the head
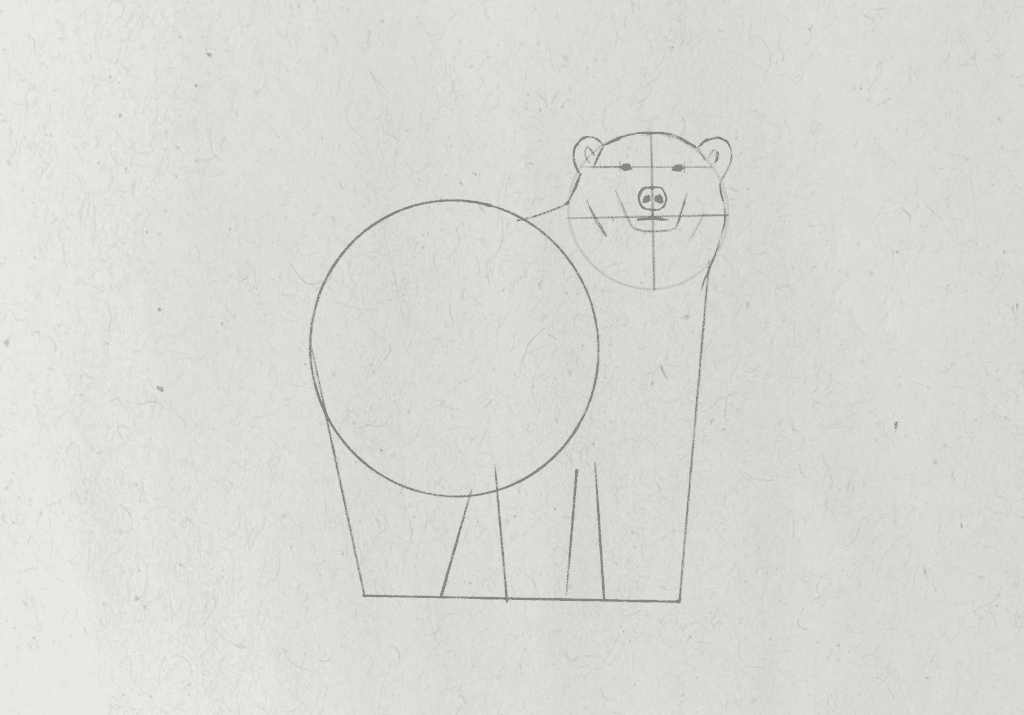
To draw the head, I first lighten the circle guide I drew with a kneaded eraser, so that I can follow the guide without it obscuring the appearance of the contour. Then I follow the broad shape of the circle, sketching the organic lines for the top, sides of the head and back of the neck that adjoins the body.
Step 10: Sketch the polar bear’s body shape
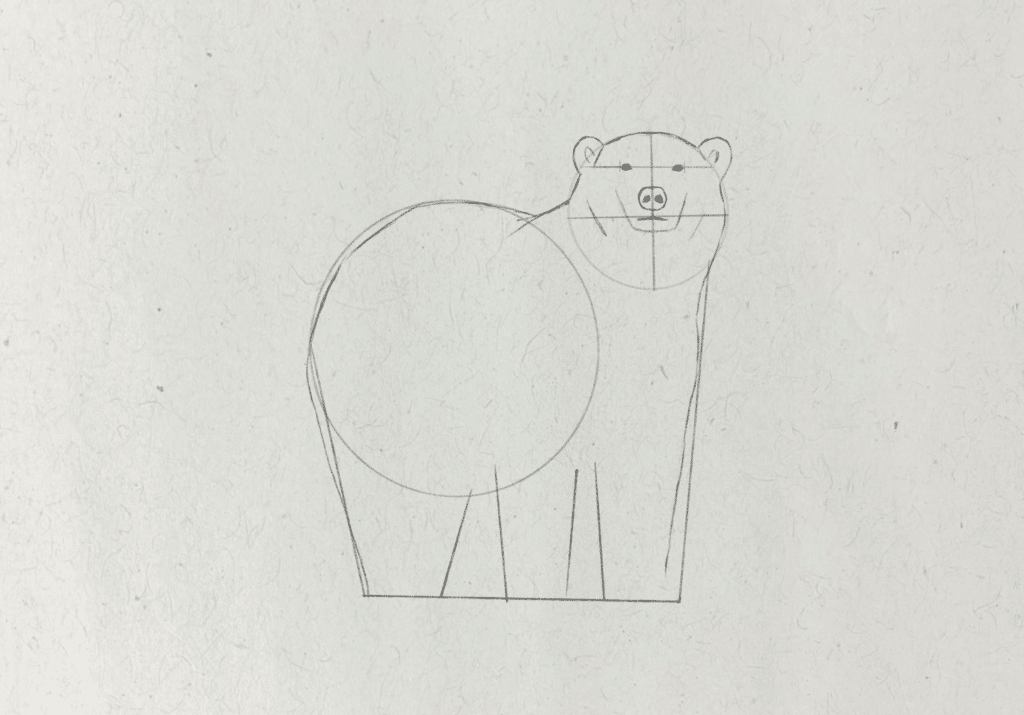
The bear is standing partially facing the viewer, so the front part of the torso appears foreshortened. This part of the back slants down and inwards, then the back of the torso follows the general shape of the circle guide, cutting the top left section off slightly, and angling downwards for the hind leg.
Step 11: Draw the legs
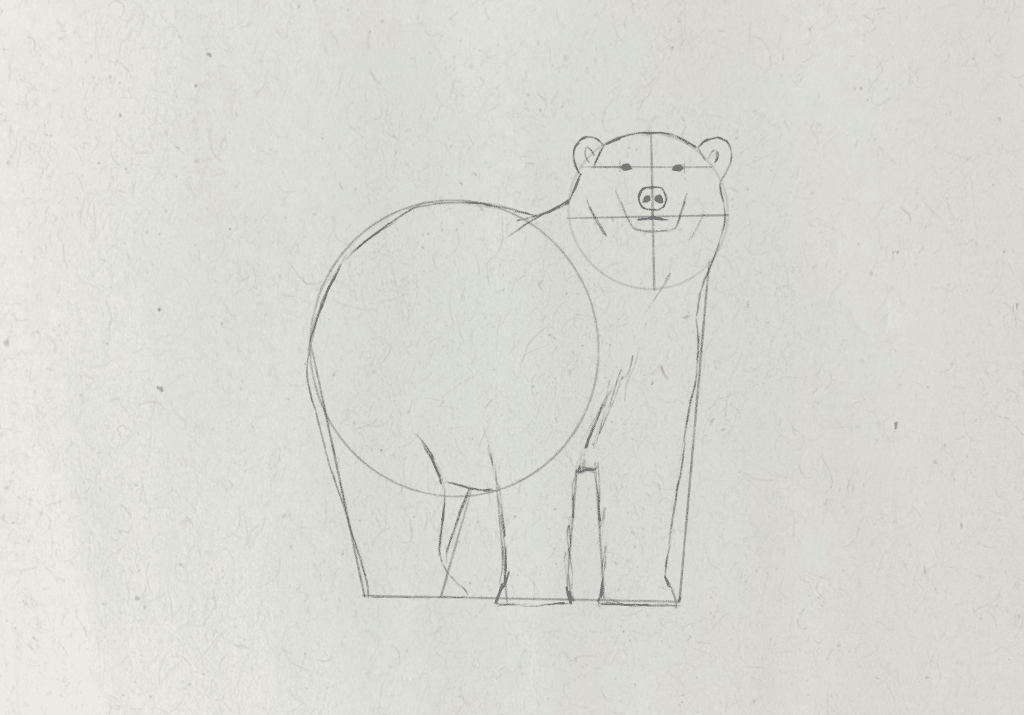
Because of the position of the polar bear’s body, the legs appear to be facing to the side and the front two legs are facing forwards. The legs are thick and follow the shape of the guides I drew earlier. I created some sketchy linework to represent the polar bear’s fur.
Step 12: Sketch the paws
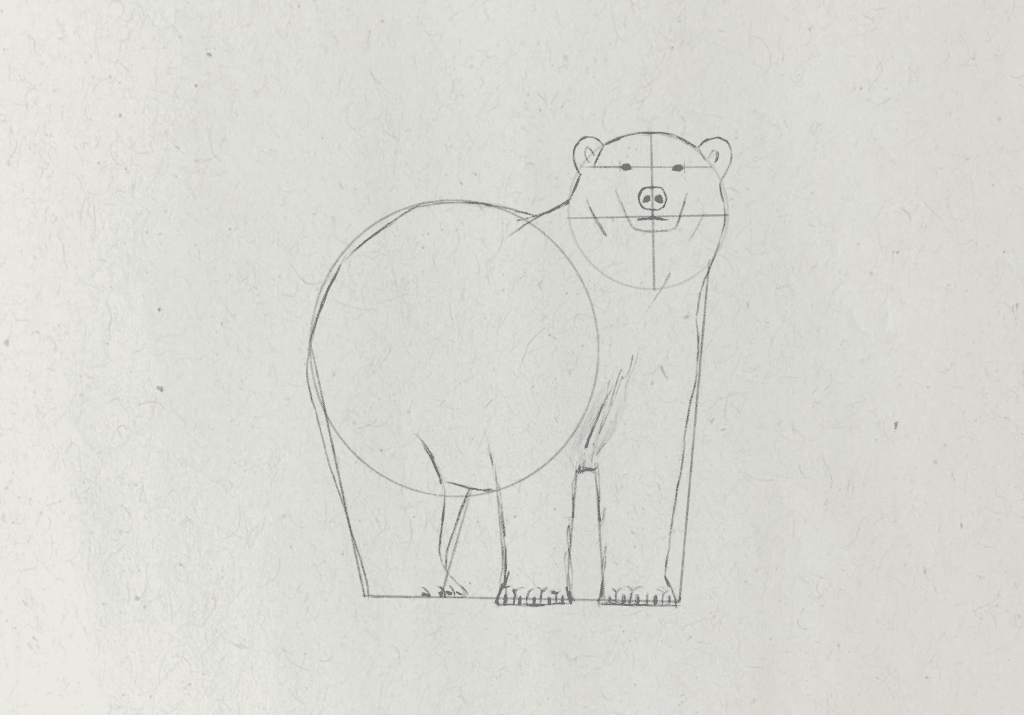
Polar bears have 5 toes on each paw, with small black claws, so I spend time sketching the volumes of each toe, making sure that they’re roughly even in size.
Step 13: Shade the drawing
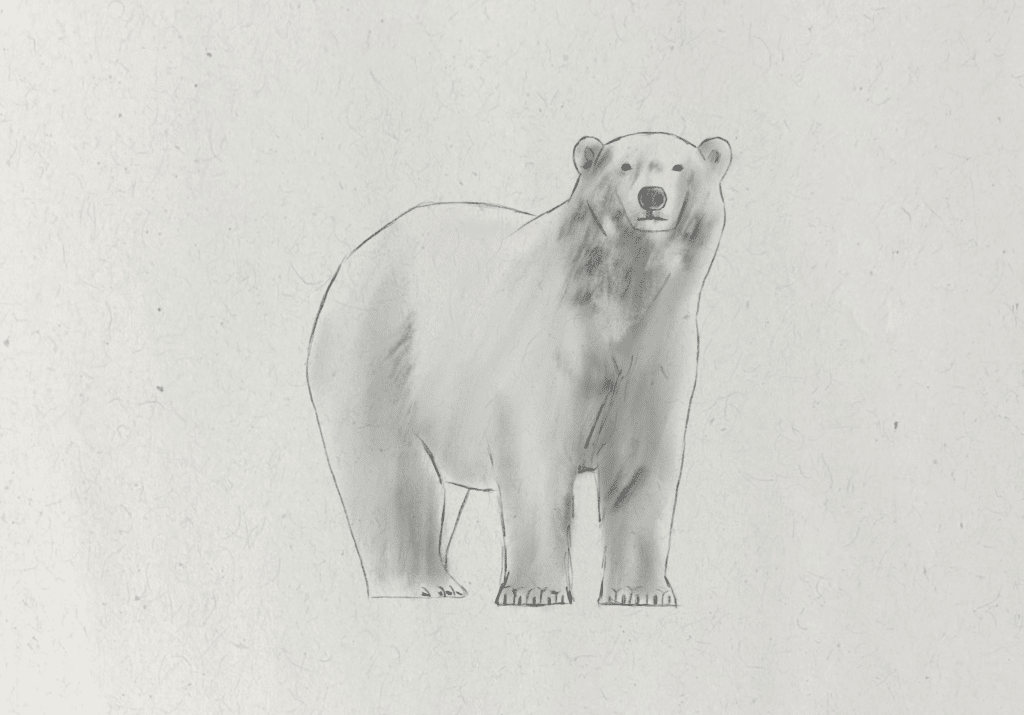
Before I start shading, I erase the guides I drew with a kneaded eraser. The fur of the polar bear is light in tone, so I don’t apply much pressure to the pencil, but I use the side of the pencil to establish shadows around the neck, muzzle, hind legs and feet. I use a blending stump to smooth the texture to make it appear more even, then I go over this initial layer with some darker shadows to create a fur texture. I apply more pressure to the darkest areas of the nose, eyes and inside the ears.

To create the fur texture, I try to emulate the clumps of fur around the neck that appear in loose triangle shapes. Then I use a precision eraser to lift highlights, using the hatching technique to create the impression of individual hairs.
If you want to improve your drawing and shading skills, so that you can construct accurate drawings from imagination and references, join the Fine Art Tutorials Drawing Fundamentals course. It’s 55 lessons that are all online, that you can take in your own time, at your own pace. It teaches you about all the fundamentals of drawing, about how to compose art, improve line quality, master proportions and shading through practical sessions.