When getting a palette for oil painting, consider buying one made from a material that’s compatible with oil paint. It should also be easy to clean and in a shape that’s going to suit your working style.
Discover the features that make a palette as good as it can be for mixing colour onto. In this guide I give a rundown of some of the best oil painting palettes used by artists.
Disclaimer: Fine Art Tutorials is a reader supported site. When you make purchases through links on this site, we may earn a small commission at no extra cost to you.
Top product picks
Choose a palette suited to your painting style, environment and budget.
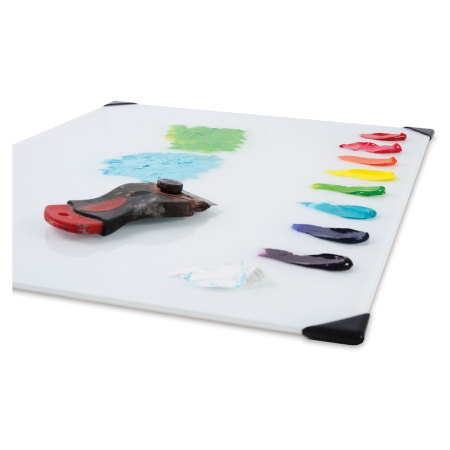
- New Wave glass palette: high end, highest quality tempered glass palette, suitable for studio work (as they are large, heavy and work best when laid down flat on a table). You can get this palette with a white or grey backing too.
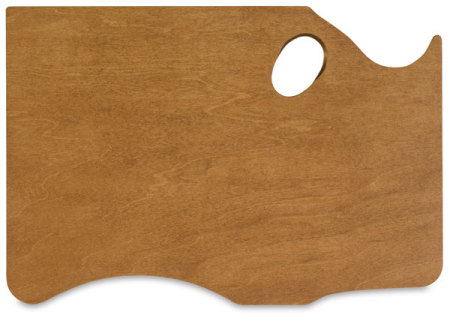
- New Wave wooden palette: This option is relatively expensive, but top of the line in terms of quality. The wood is so smooth and well treated, so that it makes cleaning up a joy. It is light, easy to hold and you can choose a left or right handed palette. It’s perfect for taking outdoors with you too, as it will fit in most landscape boxes.
- Budget wooden palette: this quality palette has a relatively large surface area for mixing, but is also very light and smooth. This palette is suited for studio or plein air painting.
- Tear off palette: This disposable paper palette pad is a convenient alternative to glass or wood and has a large surface area for mixing. It has an ergonomic hand held design and palette sheets can be thrown away once finished with.
What makes a perfect oil painting palette?
Materials
The palette should be made from a material that is non-absorbent and impenetrable by solvent. Look for a palette made from a material that’s easy to clean up so you can spend more time painting, rather than spending tens of minutes scrubbing away at oil that’s stuck to your palette.
Glass
Glass palettes are completely non-absorbent and resistant to solvent. Plus, if stored in a cold environment, the glass will prevent oil paint from drying up. If you want to store the colours you squeezed from the tube overnight, just cover your glass palette and put it in the fridge. I’ve kept oil paint wet for a fortnight by doing this. It means less paint wastage.
You can use the transparency of glass to your advantage when painting. I place my glass palette on top of a mid-tone sheet of grey card. This corresponds to my surface, as I like to start with a mid-tone imprimatura. It helps me define the tones and chromatic range of the painting I’m working on in relation to my canvas, allowing me to see the colours as they would appear when applied to the surface. If you like to work on a white surface, stick a sheet of white paper under your palette. New Wave glass palettes come in grey and white.
Glass palettes are a dream to mix on because they’re so smooth. Your palette knife will just glide over the top when mixing colour.
All glass palettes are made from tempered glass—this means they don’t break easily and are safe to use and apply pressure to (i.e. when you’re cleaning up). Picture glass is really not suitable as it can easily crack and shatter under a small amount of pressure.
Because they’re relatively heavy, tempered glass palettes are great for use in a studio where you can lay them down flat on a surface. But if you want to mix on glass when painting outdoors, the Richeson Sienna Pochade box comes with its own tempered glass palette insert.
How do you clean a glass palette?
Glass palettes are by far the most well suited to use with oil paint. This is because they are so easy to clean. To clean a glass palette, all you have to do is wipe wet paint off. If the paint has dried on the palette, scrape it off with a flat razor. If you want your palette extra clean and shiny, wipe it with some window cleaner or white vinegar.
Wood
Wood is lightweight and easy to move around. This is especially useful for artists who paint dynamically and want to hold their palette in their hand while they paint. Wooden palettes are also the cheapest palettes to buy, so they’re great for those on a budget.
Wood is naturally absorbent unless it’s been treated. Get a palette that has been treated already, or do it yourself.
To treat a wooden palette, you need to sand the wood. Then remove any dust and spread a layer of stand oil over the surface. Let the wood absorb the oil for an hour or so, then wipe off any excess with a lint-free cloth. The palette may take 2 days to dry. Once touch dry, repeat this process twice more. When the palette is fully dry after the last coat of oil, it’ll be ready for you to start painting with. Remember to wash all linseed soaked cloths straight after using, as they can be a fire hazard.
How do you clean a wooden palette?
A treated wooden palette will be resistant to solvent. Bear in mind however, that wood is more difficult to clean than glass. However you treat it, wood will absorb residual paint after cleaning, it’s preferable to get a palette made from a wood with a tight grain, as this is less absorbent.
Don’t let your mixed paint dry on the wooden palette, as scraping paint off with a flat razor will chip and ruin the wood. Wipe mixed paint off straight after use. Straight tube paint around the edges of the palette can be wrapped and kept in the fridge if you plan to paint again the next day, or a couple of days later.
Materials to avoid when choosing an oil painting palette
Ceramic palettes are exclusively used with watercolour. Harsh chemicals like paint thinners can corrode ceramics and they’re not smooth enough for use with oils. Also most of the ceramic palettes you’ll find have been purpose built for watercolour painters, meaning that the shapes of the palettes make working with oil tricky.
Plastic palettes go hand in hand with acrylic, watercolour and gouache, but again aren’t especially suited to oil. If you get a bit of dry oil stuck on the plastic, there’s no way of scraping it off. It’ll just get really messy and you’ll spend way too much time cleaning. That’s not to say you can’t use them with oil, just that wood or glass are better options.
Shapes and sizes
All palettes used for oil painting should be flat. By this I mean they shouldn’t have any of the wells you see on watercolour or acrylic palettes. Having an uneven surface makes them difficult to clean. You don’t need to worry about oil running off the sides of a flat palette—the viscosity of oil means that it will stay in one place, even if you’ve thinned it with a medium.
Palettes with a large surface area are favourable. Oil paint stays wet for days at a time, so you can keep your colours on your palette. This means you’ll need more room to mix more colours to paint with. I use a 12×16” palette and I often find myself running out of space.
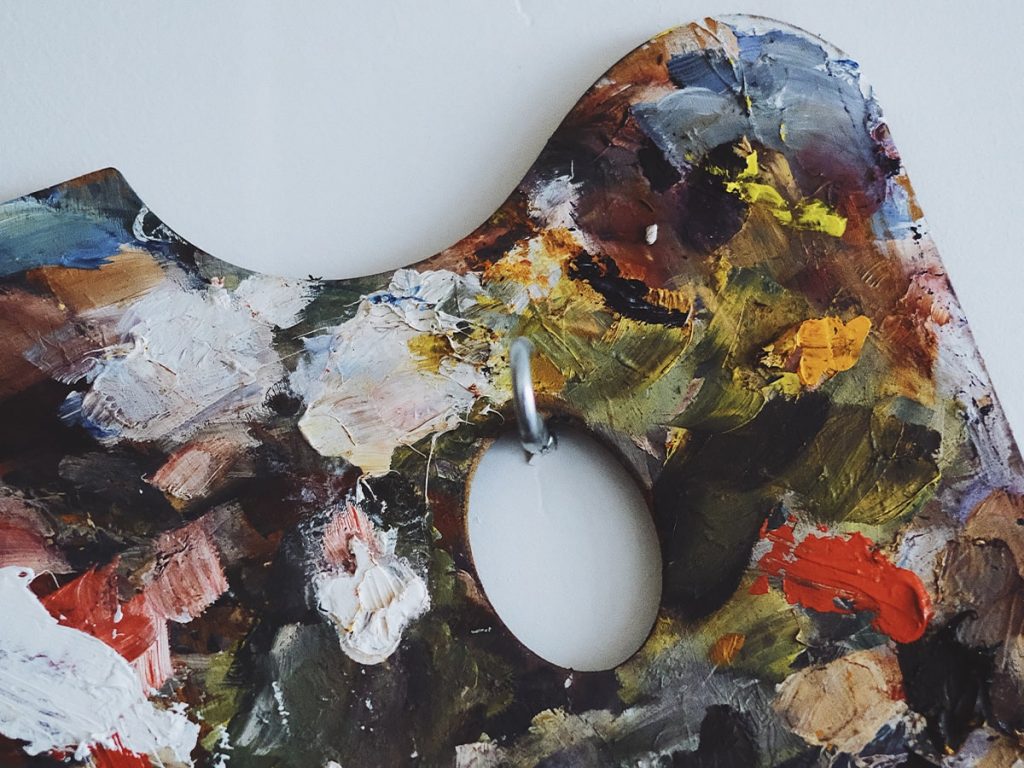
If you want a palette to hold, find one that’s kidney shaped with a hole for the thumb. These are ergonomic and your hand shouldn’t hurt after a session of holding a palette that’s moulded to fit it in this way. Most manufacturers will provide left and right handed versions of these palettes.
If you’re painting plein air and you’ve got yourself a pochade box, a palette will usually come with the easel as an insert, so you can easily carry it with you on your travels.
Finally
If you’re just beginning on your oil painting journey and you’re not quite sure what supplies to get, start with this beginner’s guide. It’ll teach you about all the tools and materials you need to start oil painting and give you valuable advice on how to use the supplies to get the best results.
If you want to stock up on art supplies, check out our shop.
Best palettes for oil painting: Pin it!
If you’ve found anything on this site especially useful, you can make a donation to me through PayPal. I take a lot of time to research and write each topic, making sure each tutorial is as detailed as possible and I make all my content freely available. Any small donation (even the price of a cup of coffee!) can help me to cover the running costs of the site. Any help from my readers is much appreciated :).
Follow the link in the button below to support this site.